


Sharpening stuff
Old stones, diamonds and a new roller for my honing guide

[ soundtrack : Prefab Sprout - ‘Steve McQueen’ [full album] 1985 ]
***
This post is too long for email — open in browser for full length.
***
In my previous post I bored you with my sticky abrasives on glass. Today I thought I’d finish the job by showing you what I used before I ‘converted’ to grits-on-glass. Then I’ll brag about my honing guides and change the bronze bushing (‘roller’) on one of them. That should send you to sleep nicely.
I wasn’t born like this, you know! I used to hone freehand. At trade school we were taught to hollow grind on the bench grinder and hone on oil stones. Not a honing guide in sight. So, when I started out I bought oil stones and an Arkansas stone for polishing the cutting edge. I keep them folded up in an oily towel and protected by an old .50-cal ammo box:
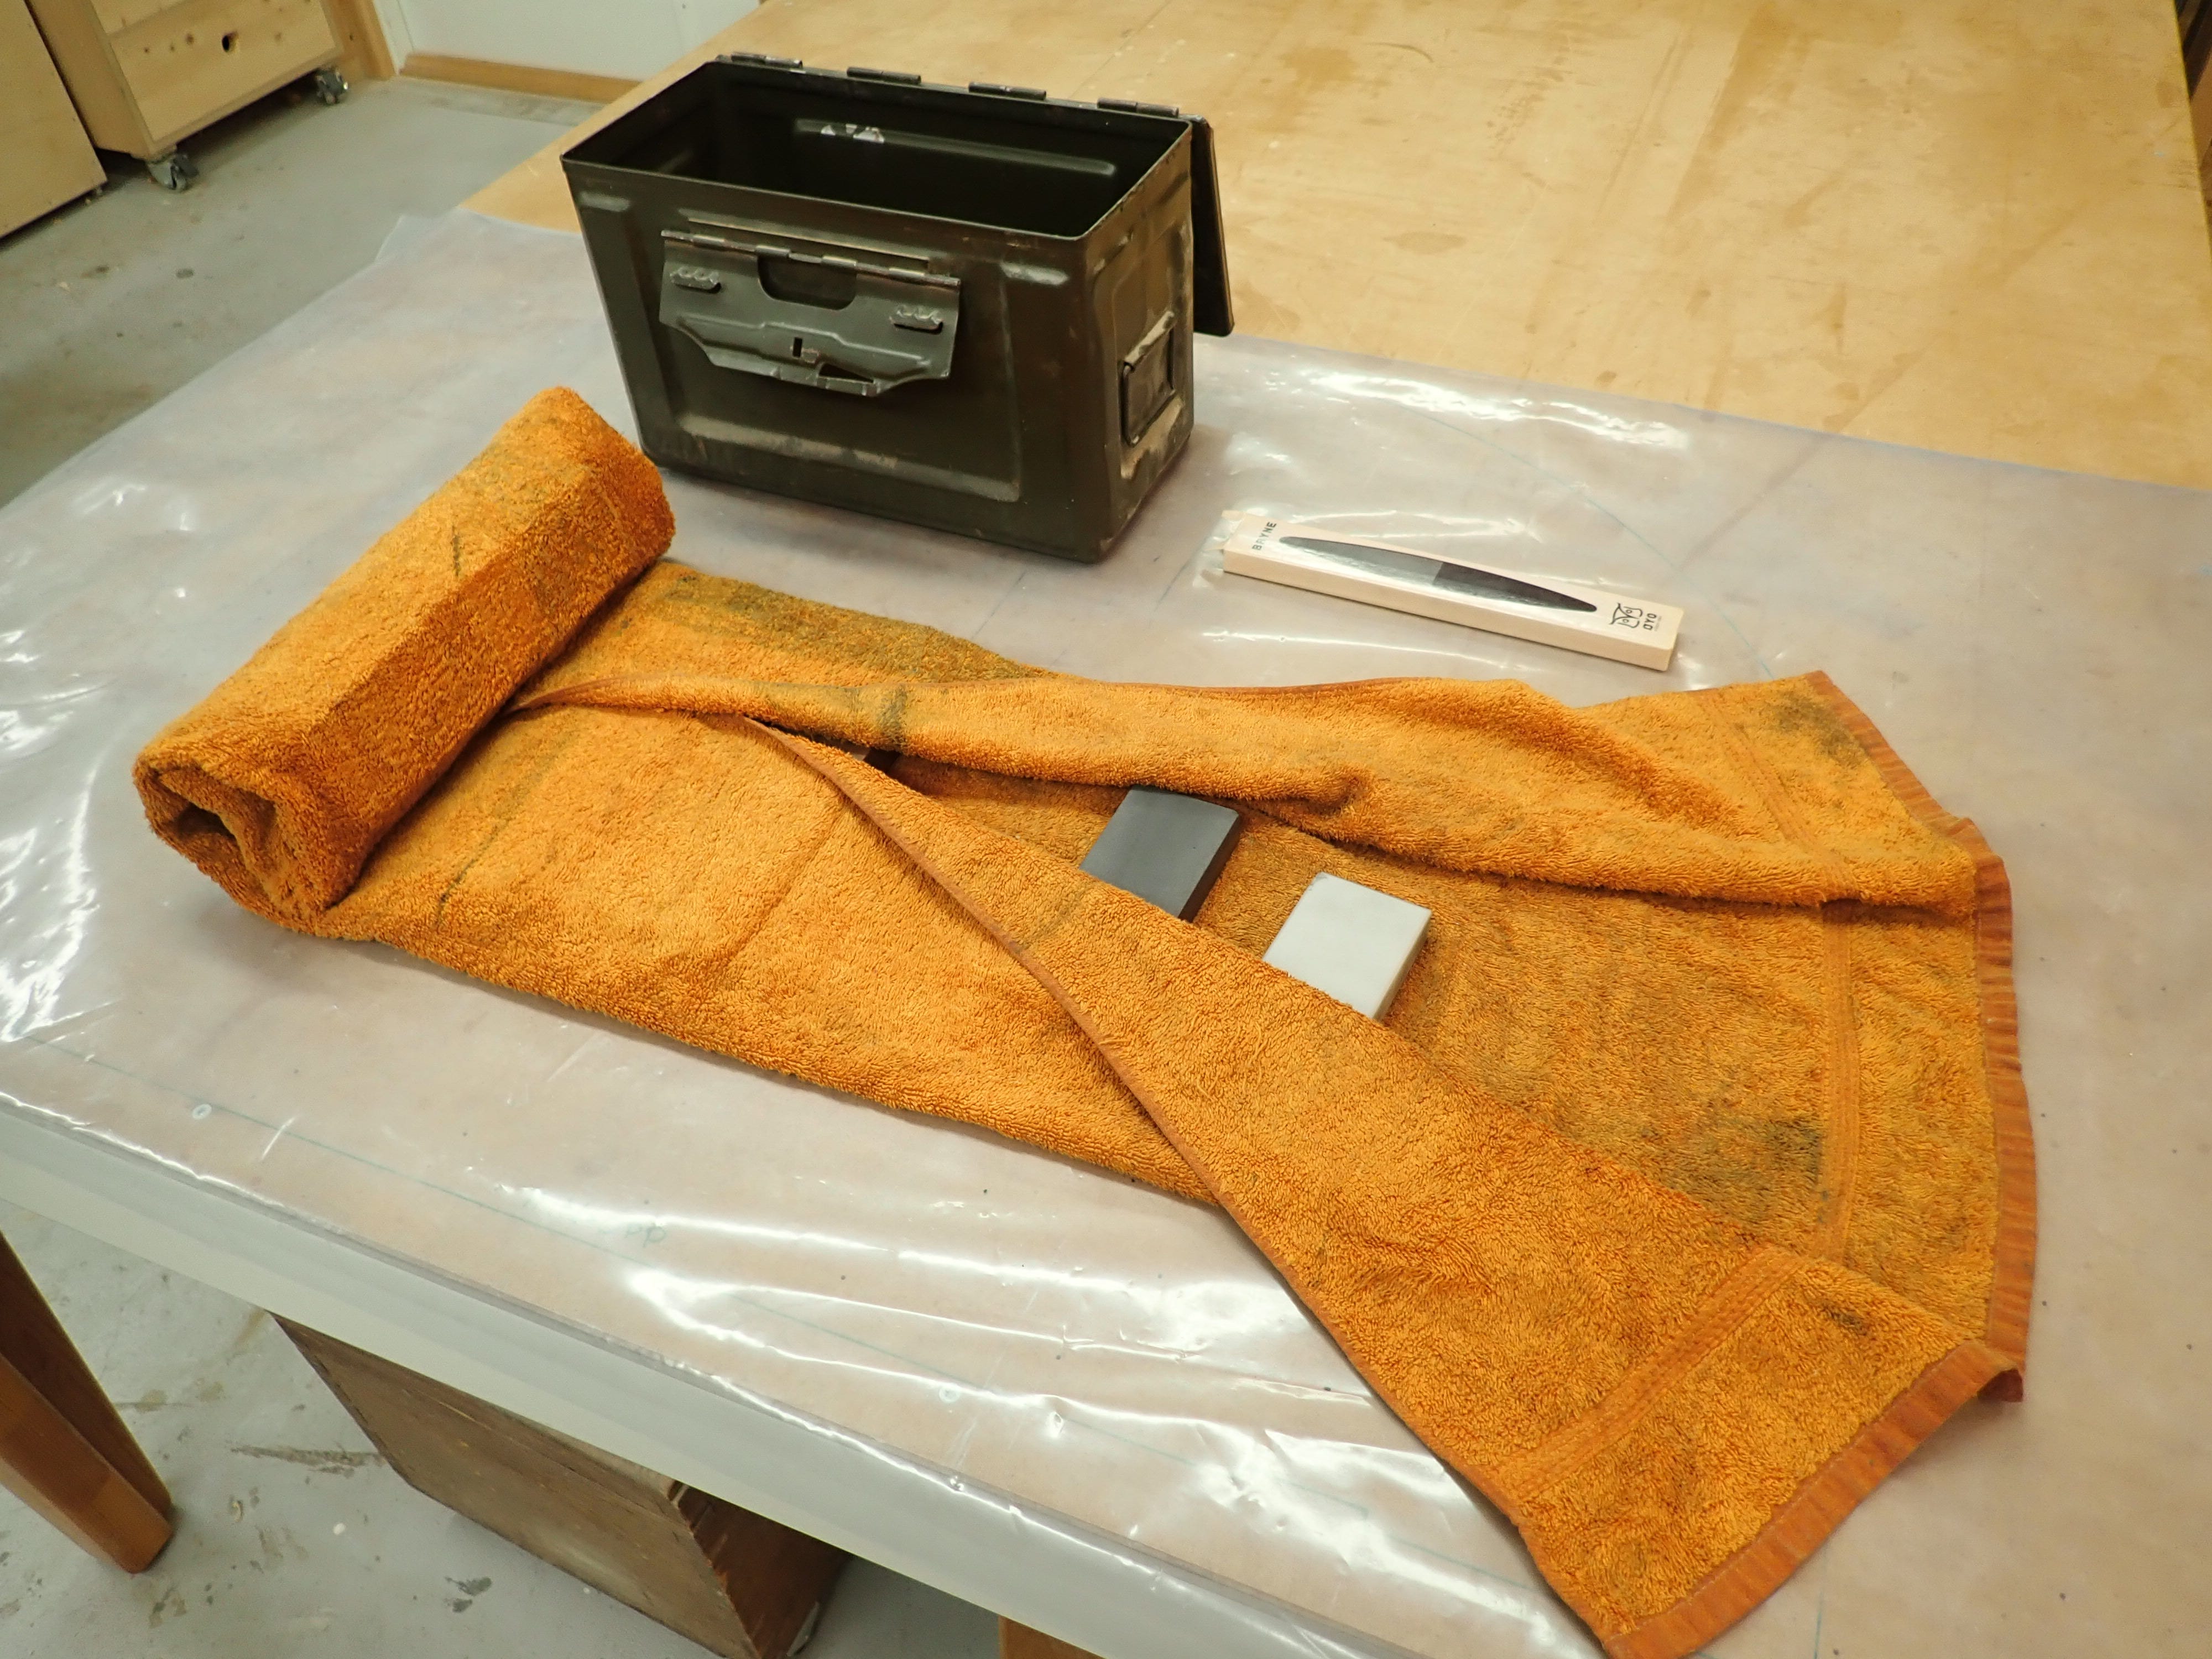
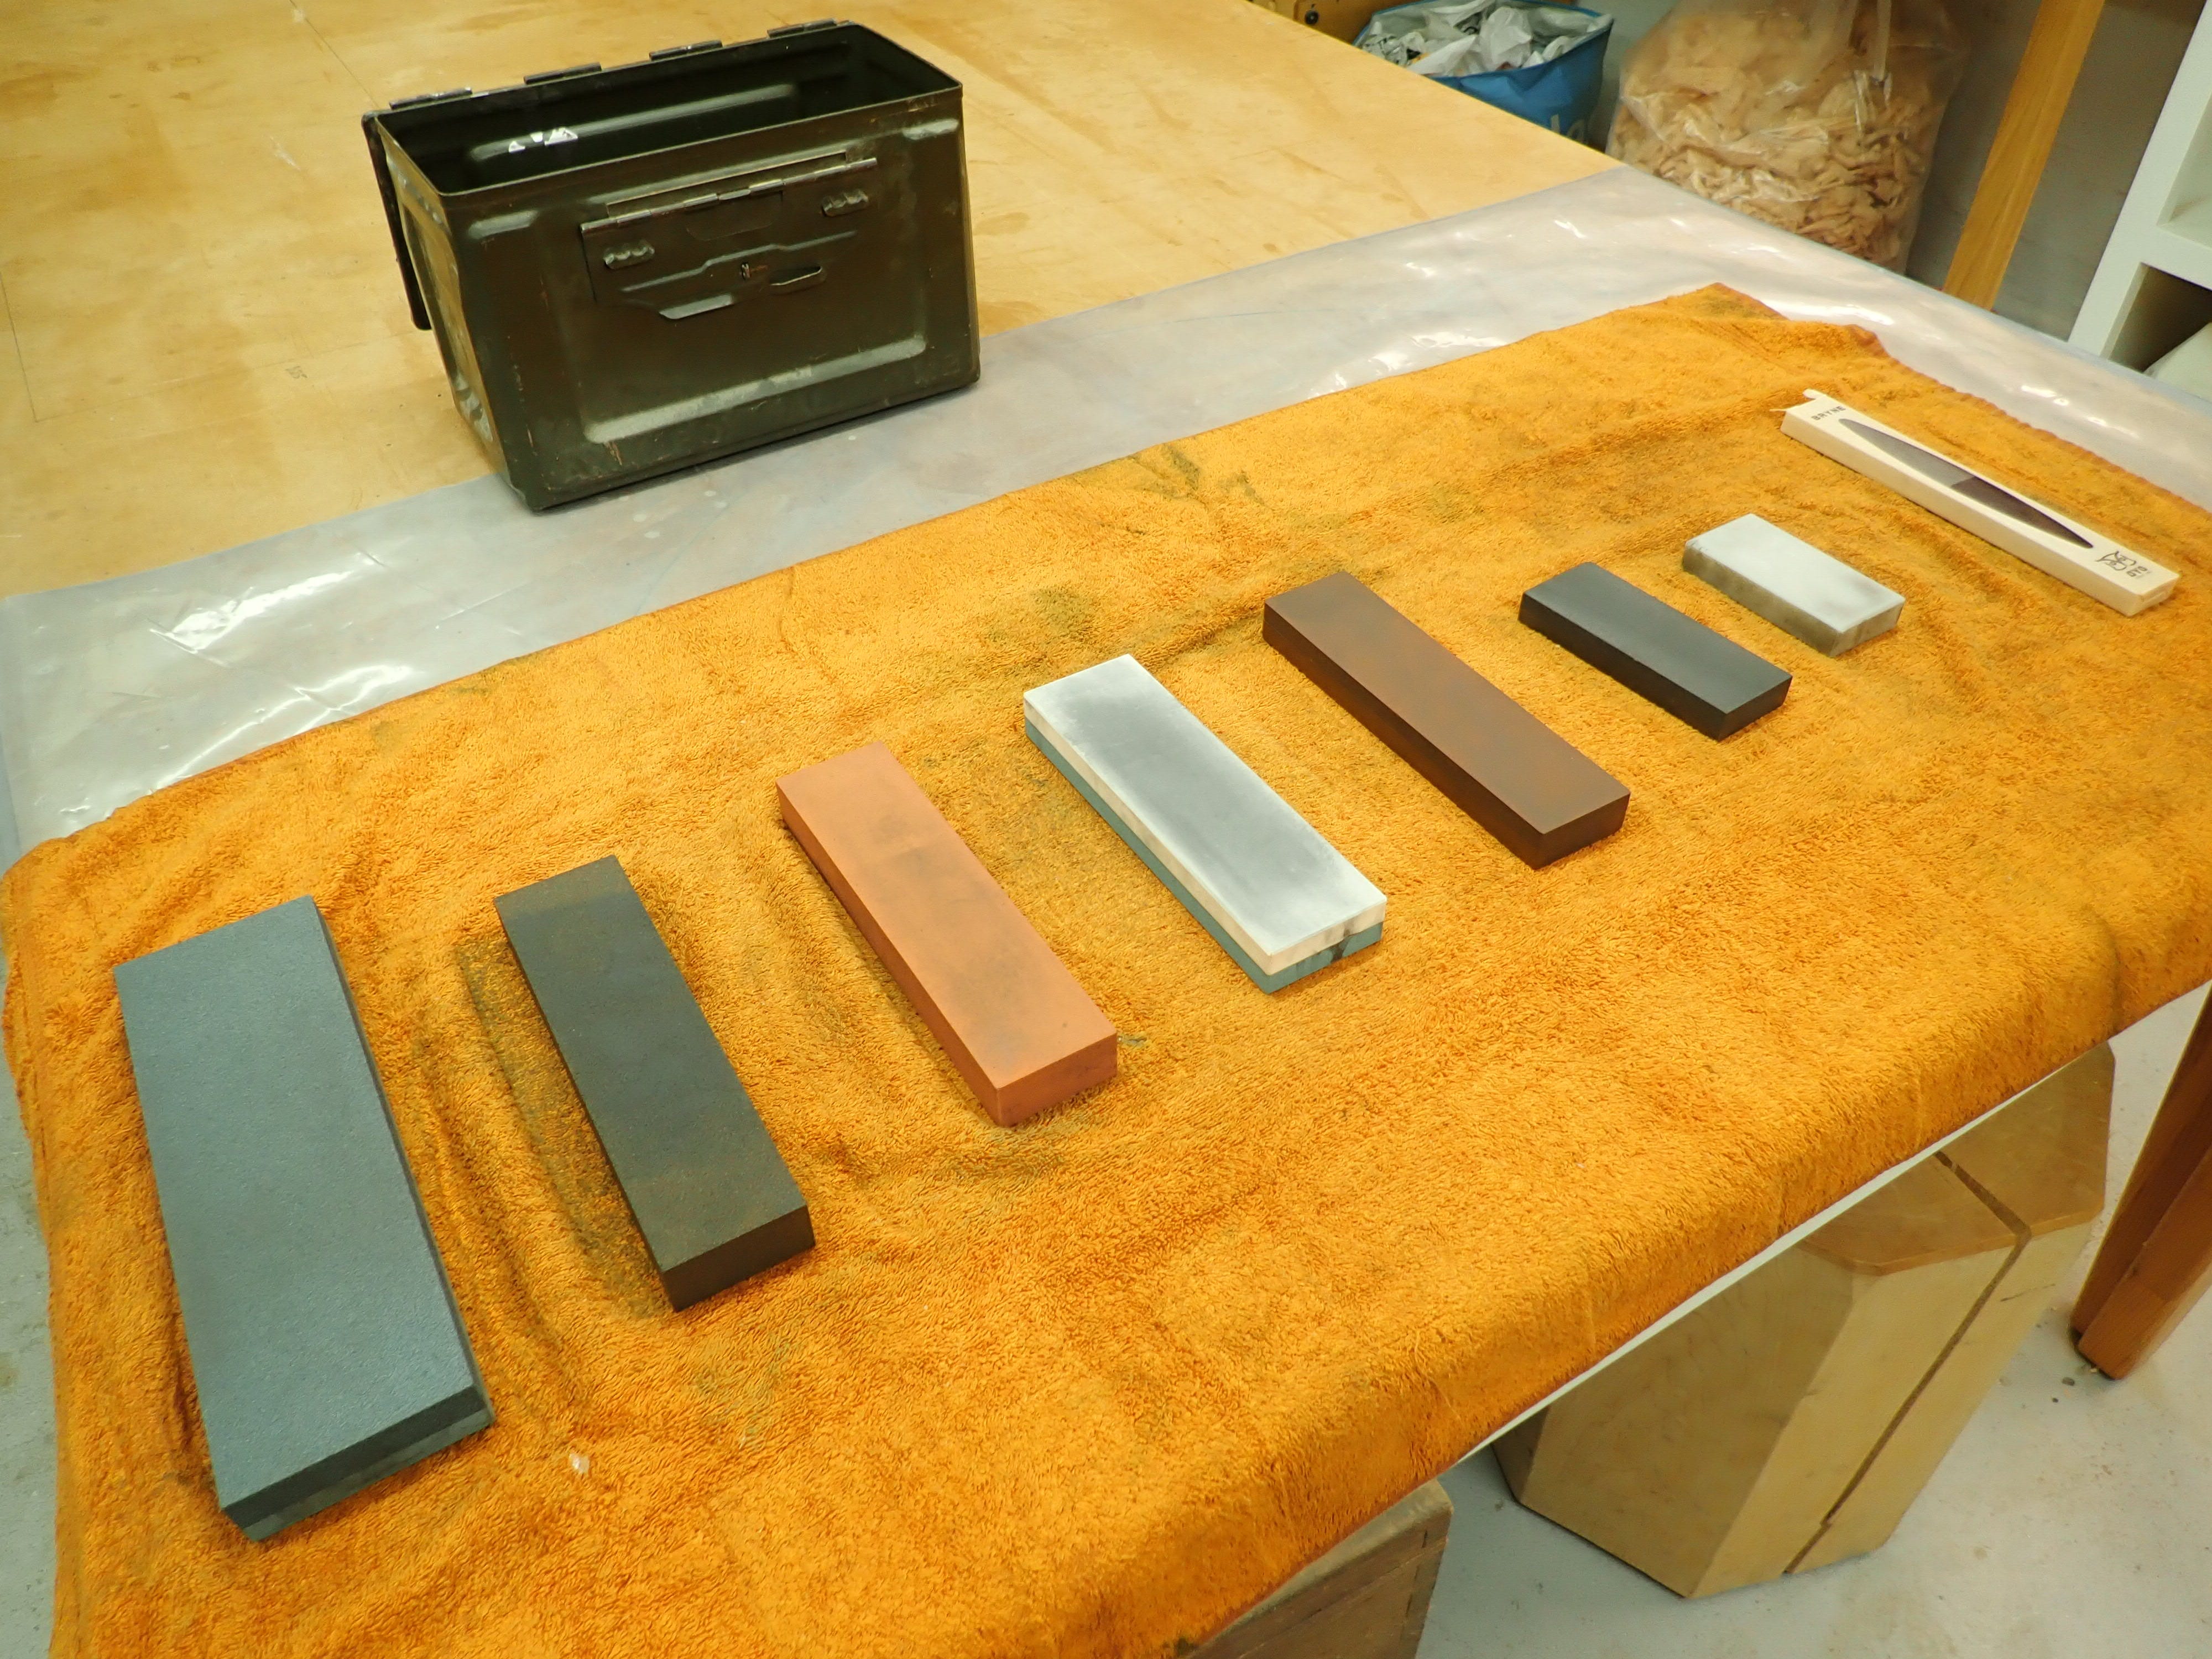
Oil stones have several advantages: they are quite cheap; they stay flat for a long time; the modern, man made ones have consistent grain sizes. I still use them for sharpening tools like axes, draw knives and my imaginary scythe for harvesting souls.
In among the oil stones is a Japanese water stone I tested out for a time. All my workshops have had access to water, but none of them have had a sink in the actual shop. Although the water stone cut well, the hassle of getting water, submerging the stone for a certain time before use, and the dirty slurry it would produce in use … too much hassle! And the fact that it hollows out so easily that you have to constantly flatten it with a larger master stone … too impractical for my taste.
It was only about 10 years ago that I bought my first diamond stones; a set of three from DMT. Curiously, I’ve always been a ‘side-winder’ — I move the edge sideways over the stones, and it seems I’m not the only one. It just seems more stable and intuitive to me. And yields nicer cambered blades!
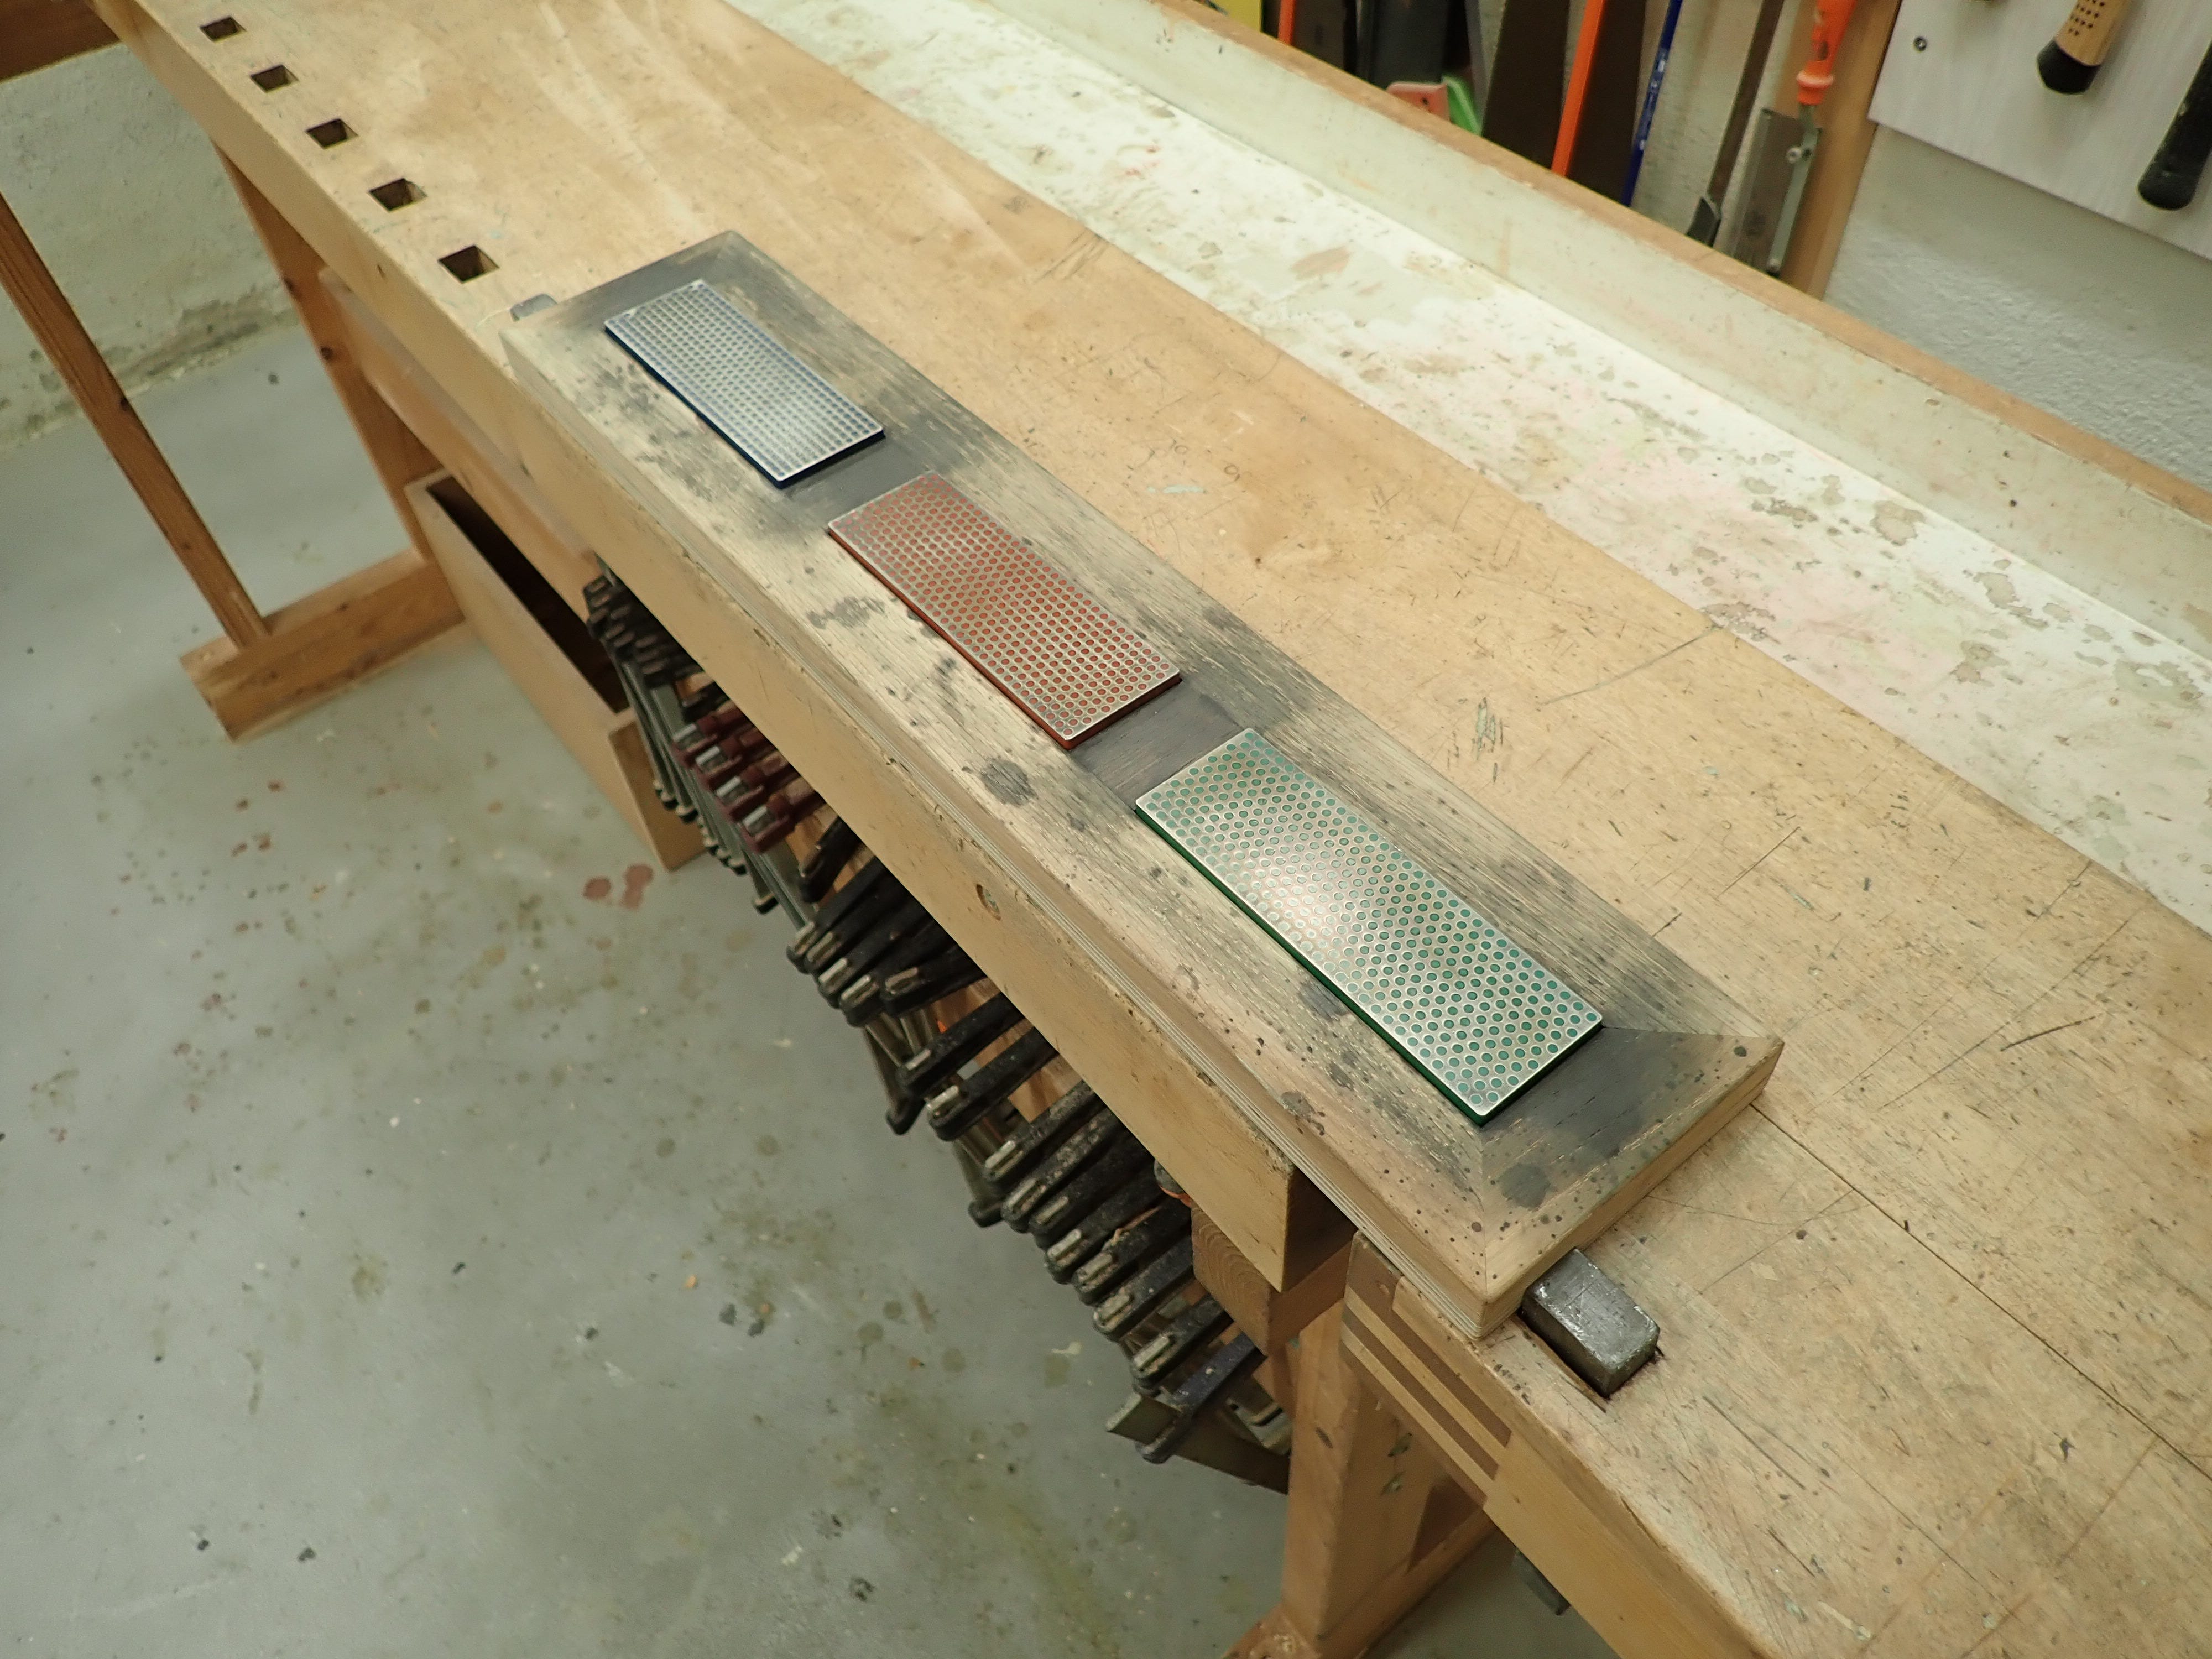
I made a holder out of plywood and oak for my new diamond stones. The water I used for lubrication would become ferrous enough to react with the tannins in the oak, giving it a blue-gray colouration. That’s why we use stainless, brass or bronze screws in oak if it is to look nice :-)
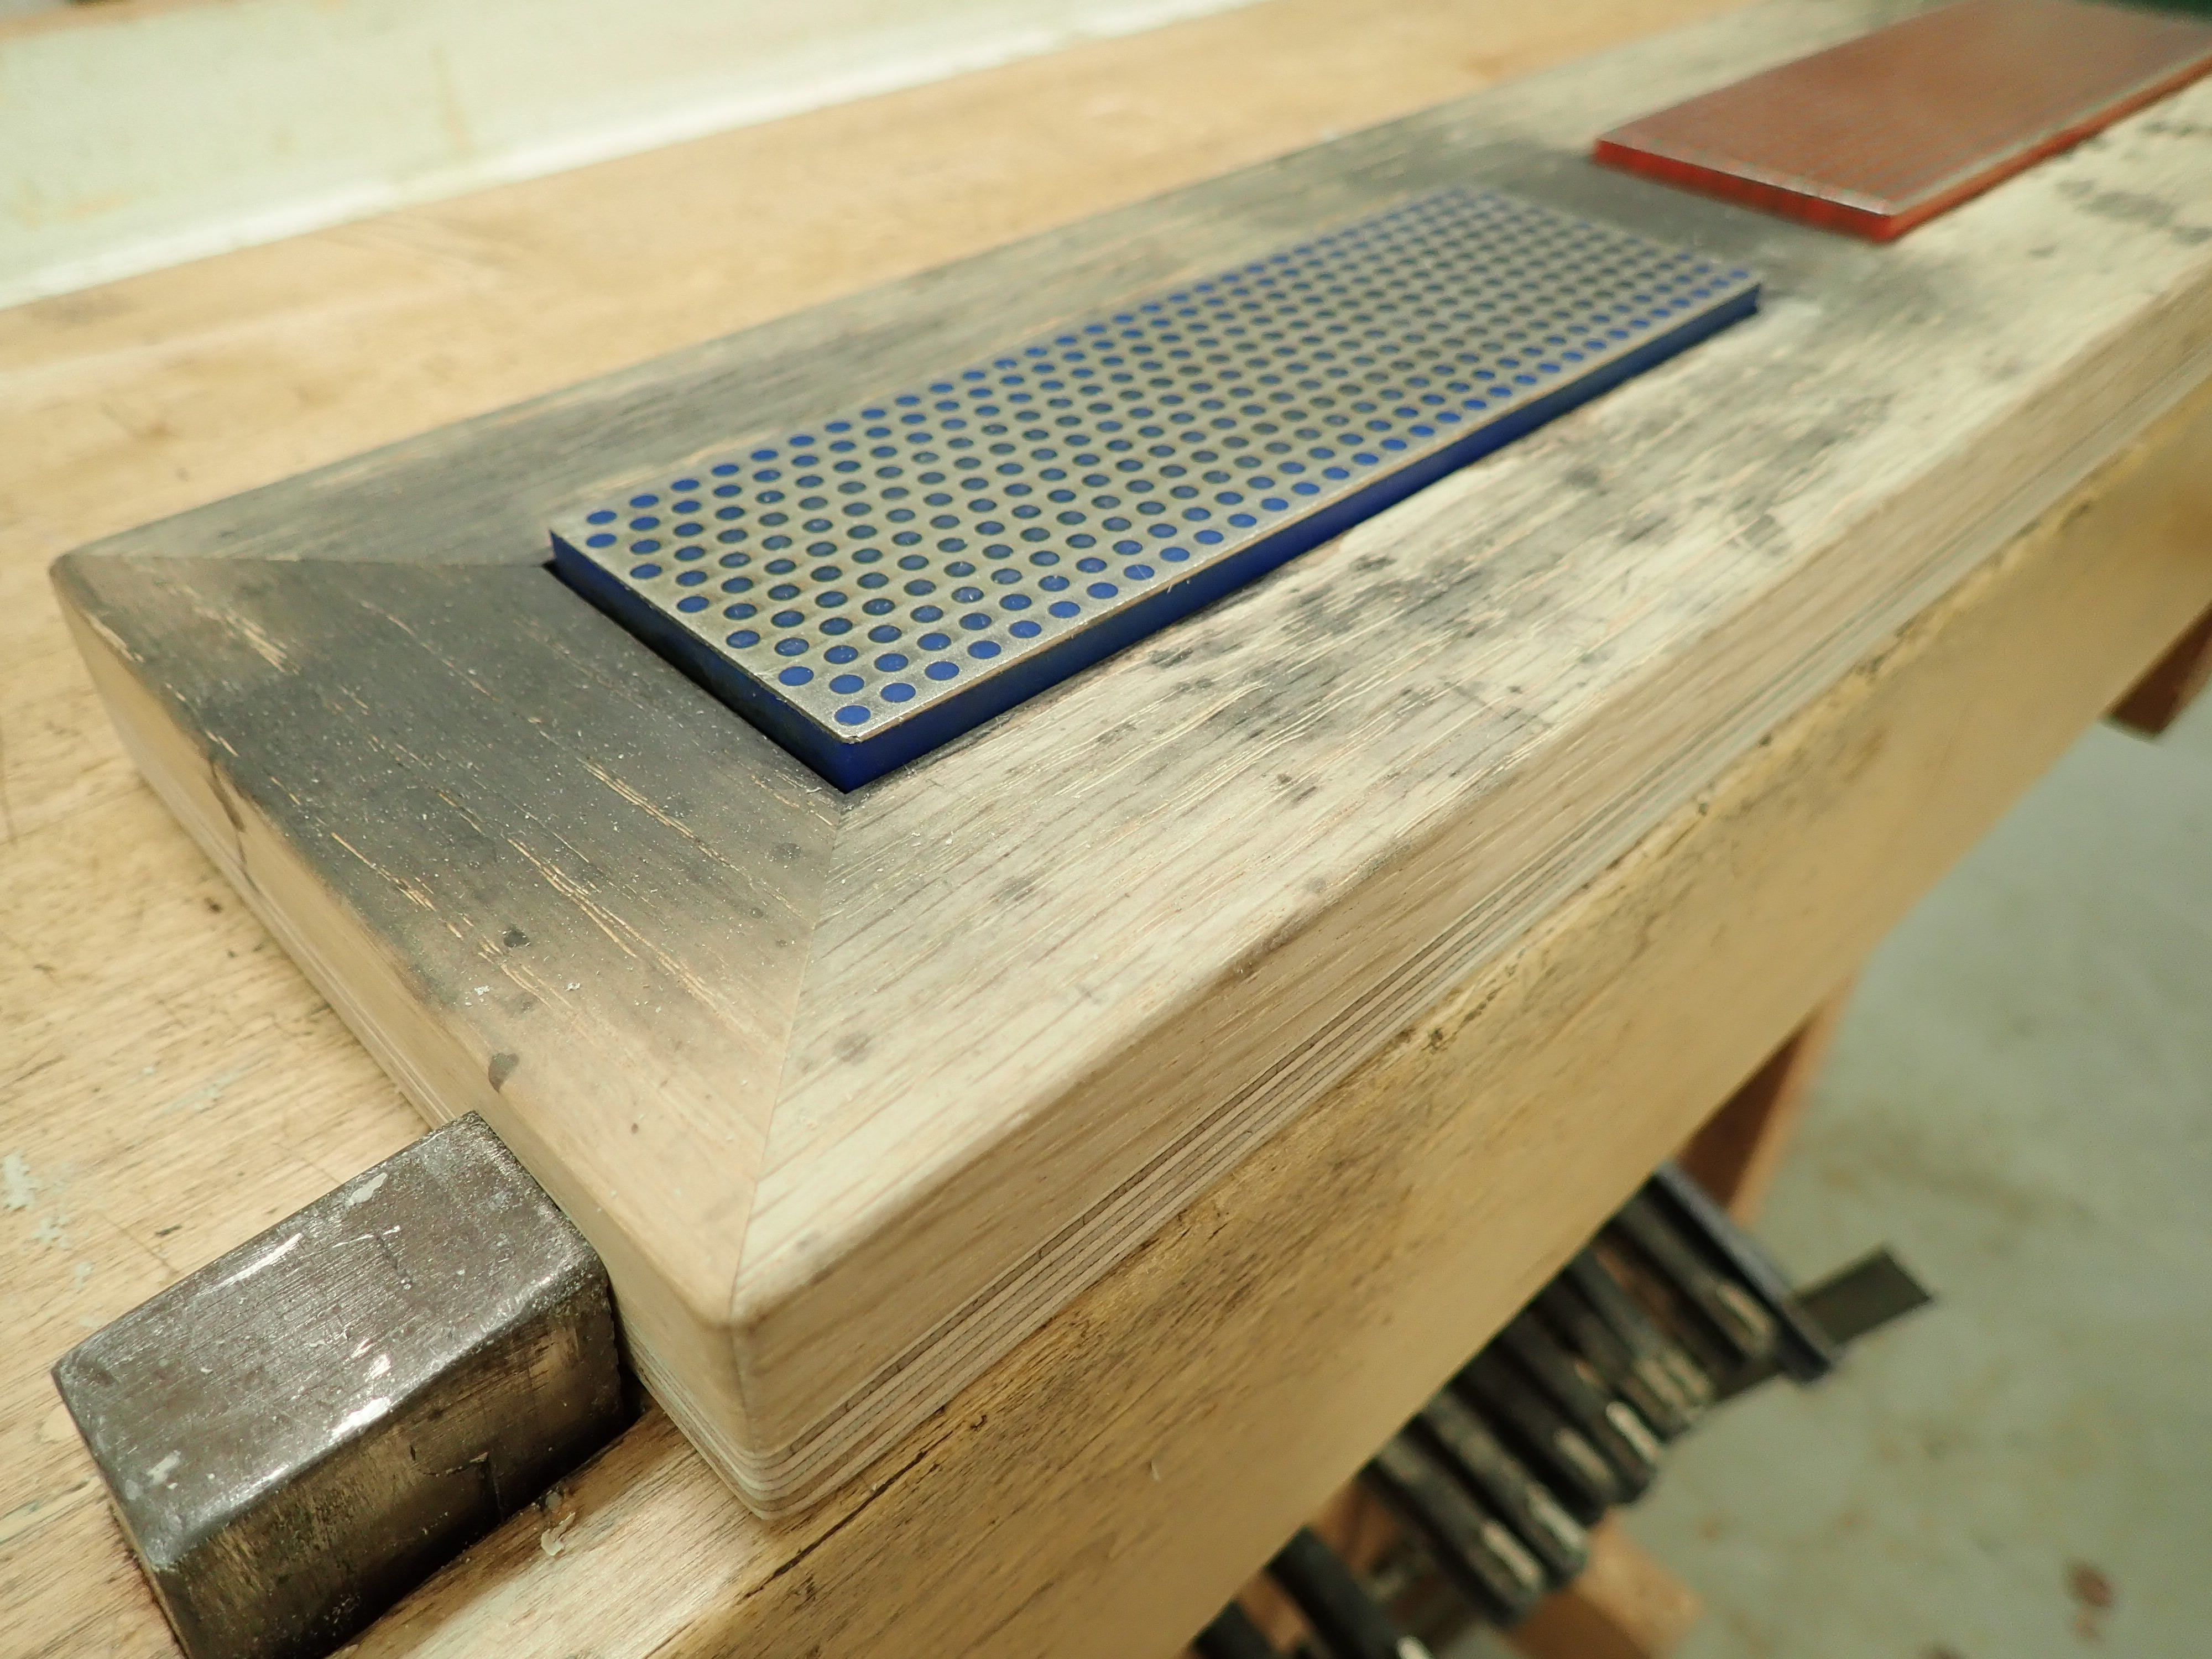
I was pleased with my diamond stones, execpt when honing thin chisels where the hole-pattern in the diamond surface would be unsuitable. Most newer diamond stones I’ve seen do not have these holes, but rather a continuous abrasive coat. The advantages of diamond stones are that they stay flat indefinitely and last a long time if you don’t use too much force on them — the diamonds themselves are hard but they are only stuck to the substrate; you are able to rub them off if you’re too heavy-handed! The disadvantage is that they are not available in very fine grits for honing.
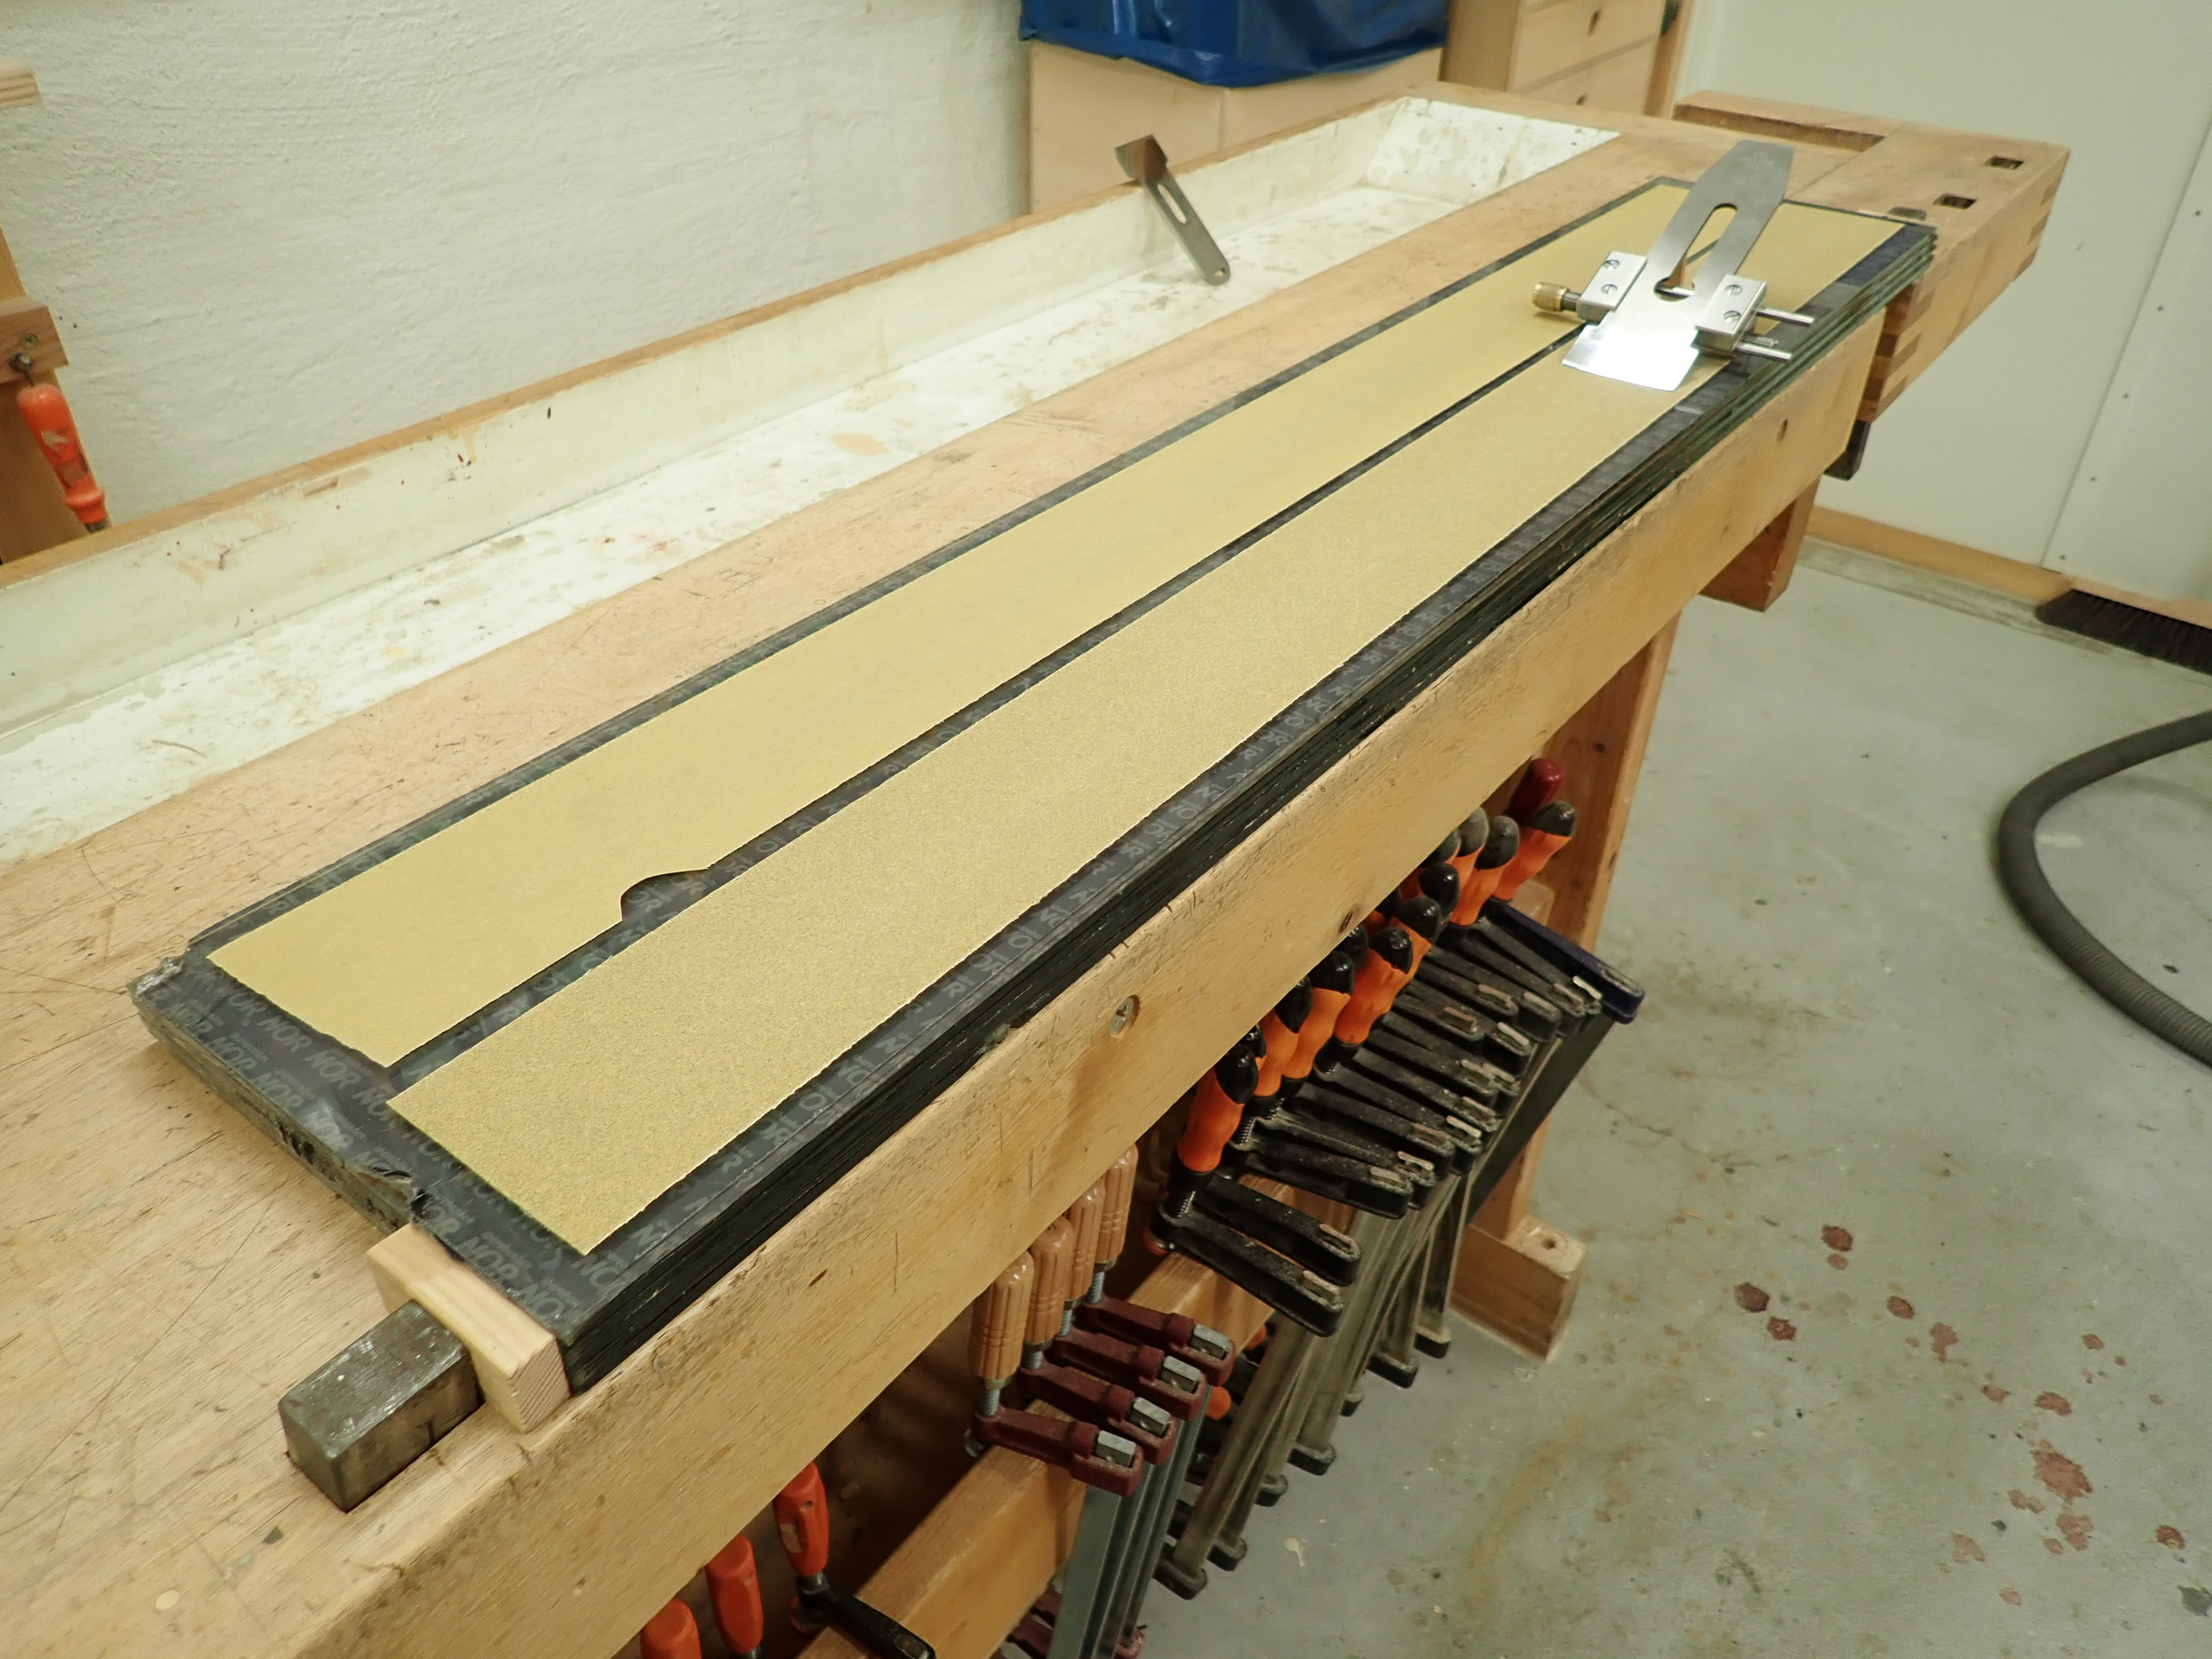
Before I started honing using self-adhesive abrasives on glass, I had a long, thick piece of laminated glass that I would stick normal sandpaper (AluminiumOxide on paper backing) to. I used it to flatten the soles of recalcitrant planes. Years later, after having bought some 80-grit sticky-back sandpaper, I tried using the ‘long glass’ in lieu of the bench grinder, to re-grind the primary bevels on some tools. And that’s how I wore out the wheel on my favourite honing guide …
But before we get to that, I thought I’d take you for a quick tour of my honing guides.
I can’t remember what prompted me to try, but less than ten years ago, I bought the ubiquitous $ 20 Eclipse Honing Guide. I was pretty proud of my ability to hone freehand, but had to admit that clamping the blade fast and rolling it back and forth offered several advantages; chiefly accuracy (regarding angle) and repeatability. I haven’t looked back.
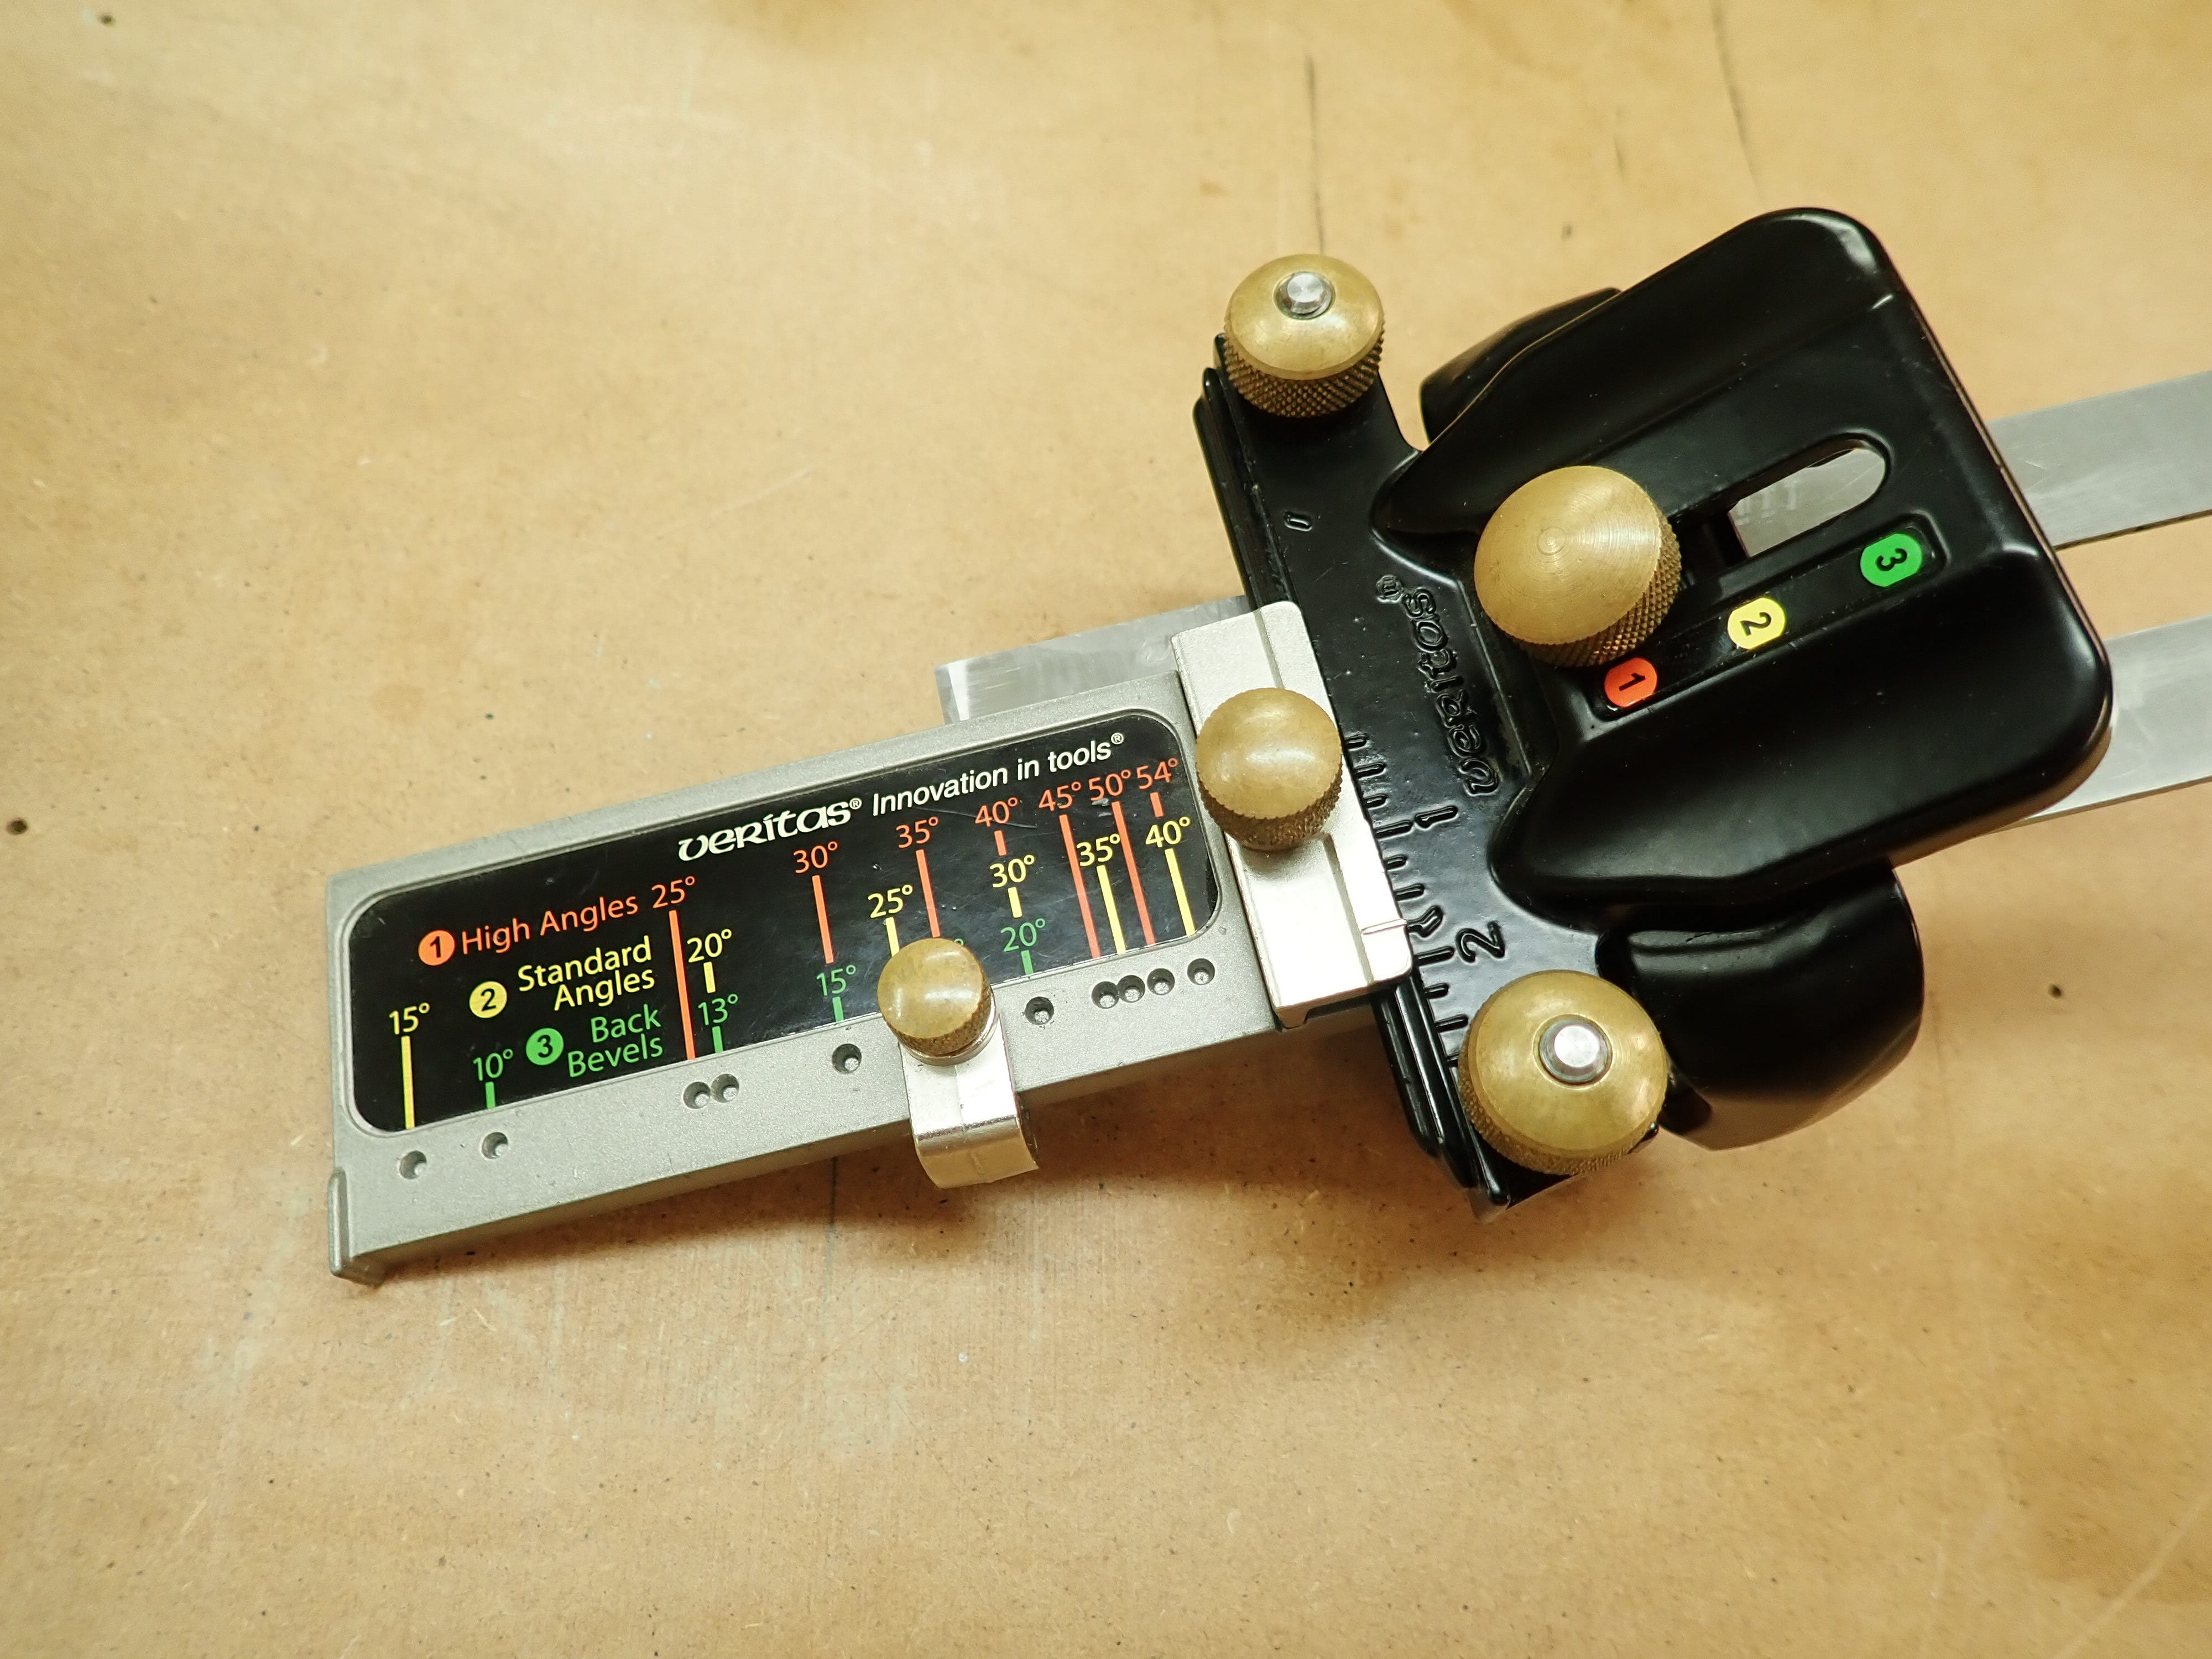
The Eclipse is not a high quality tool so I started looking around for a better alternative. Being a sucker for bells and whistles I chose Veritas’ Mk.II Deluxe Honing Guide Set.
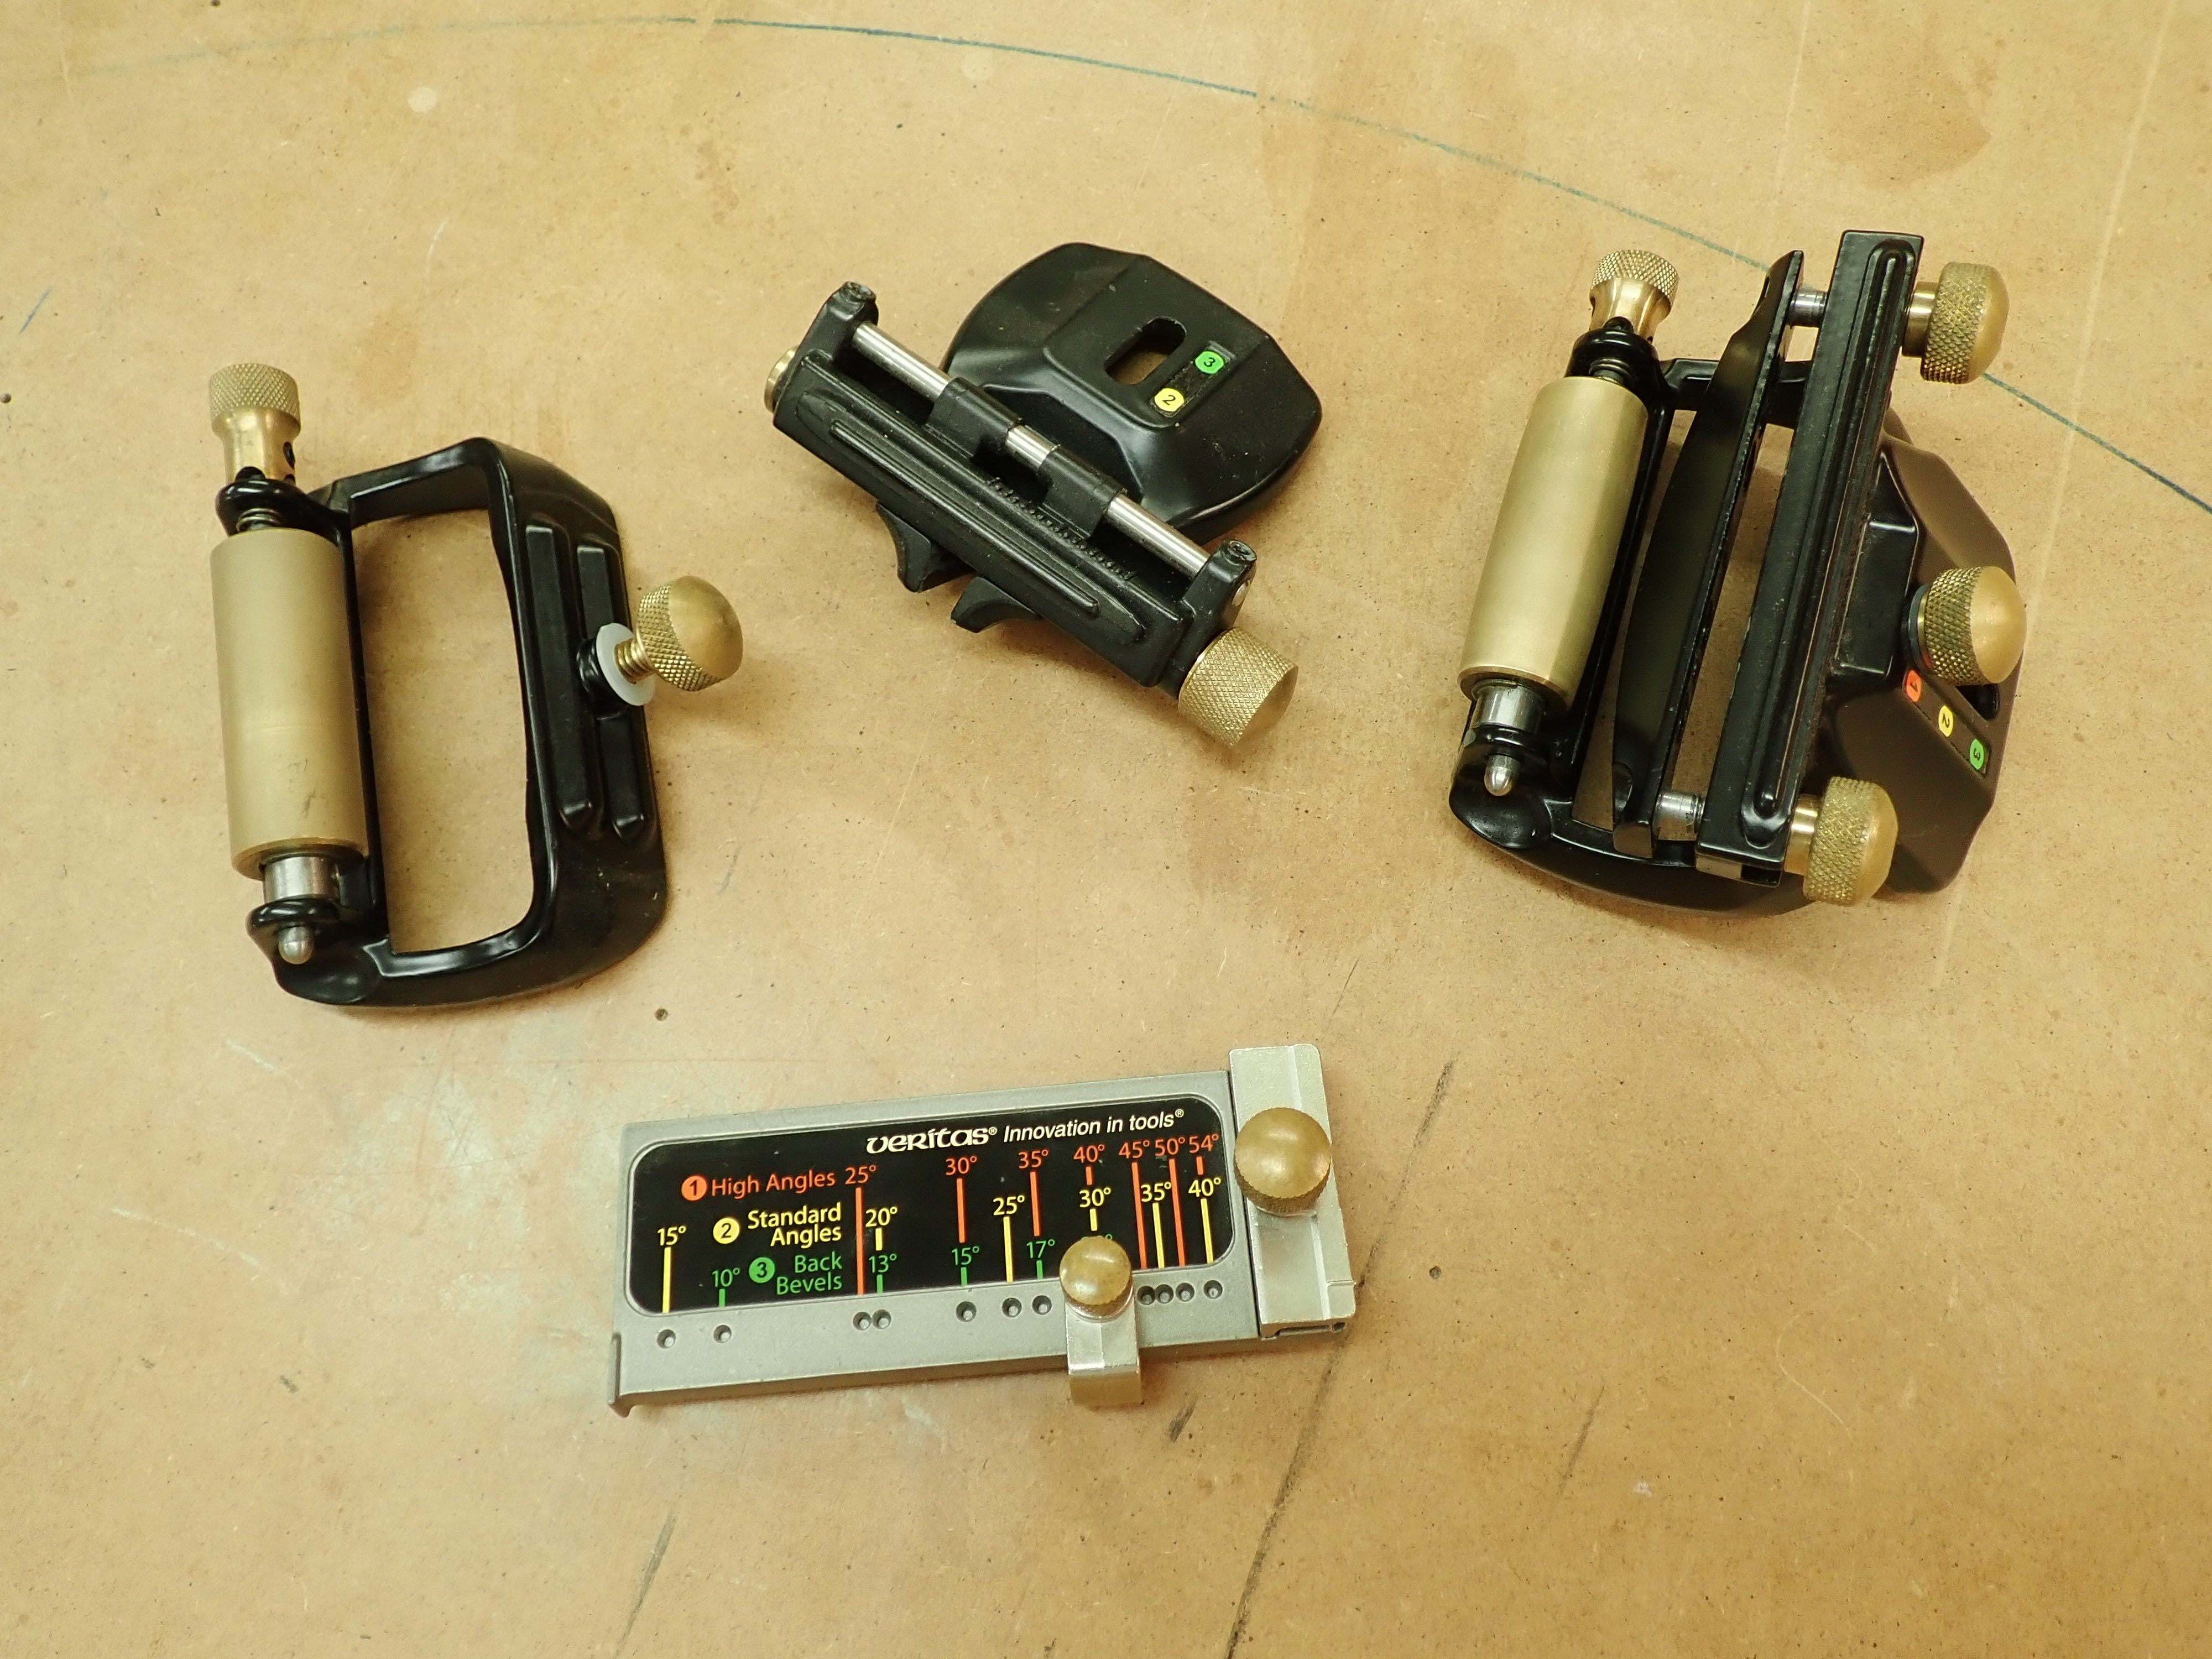
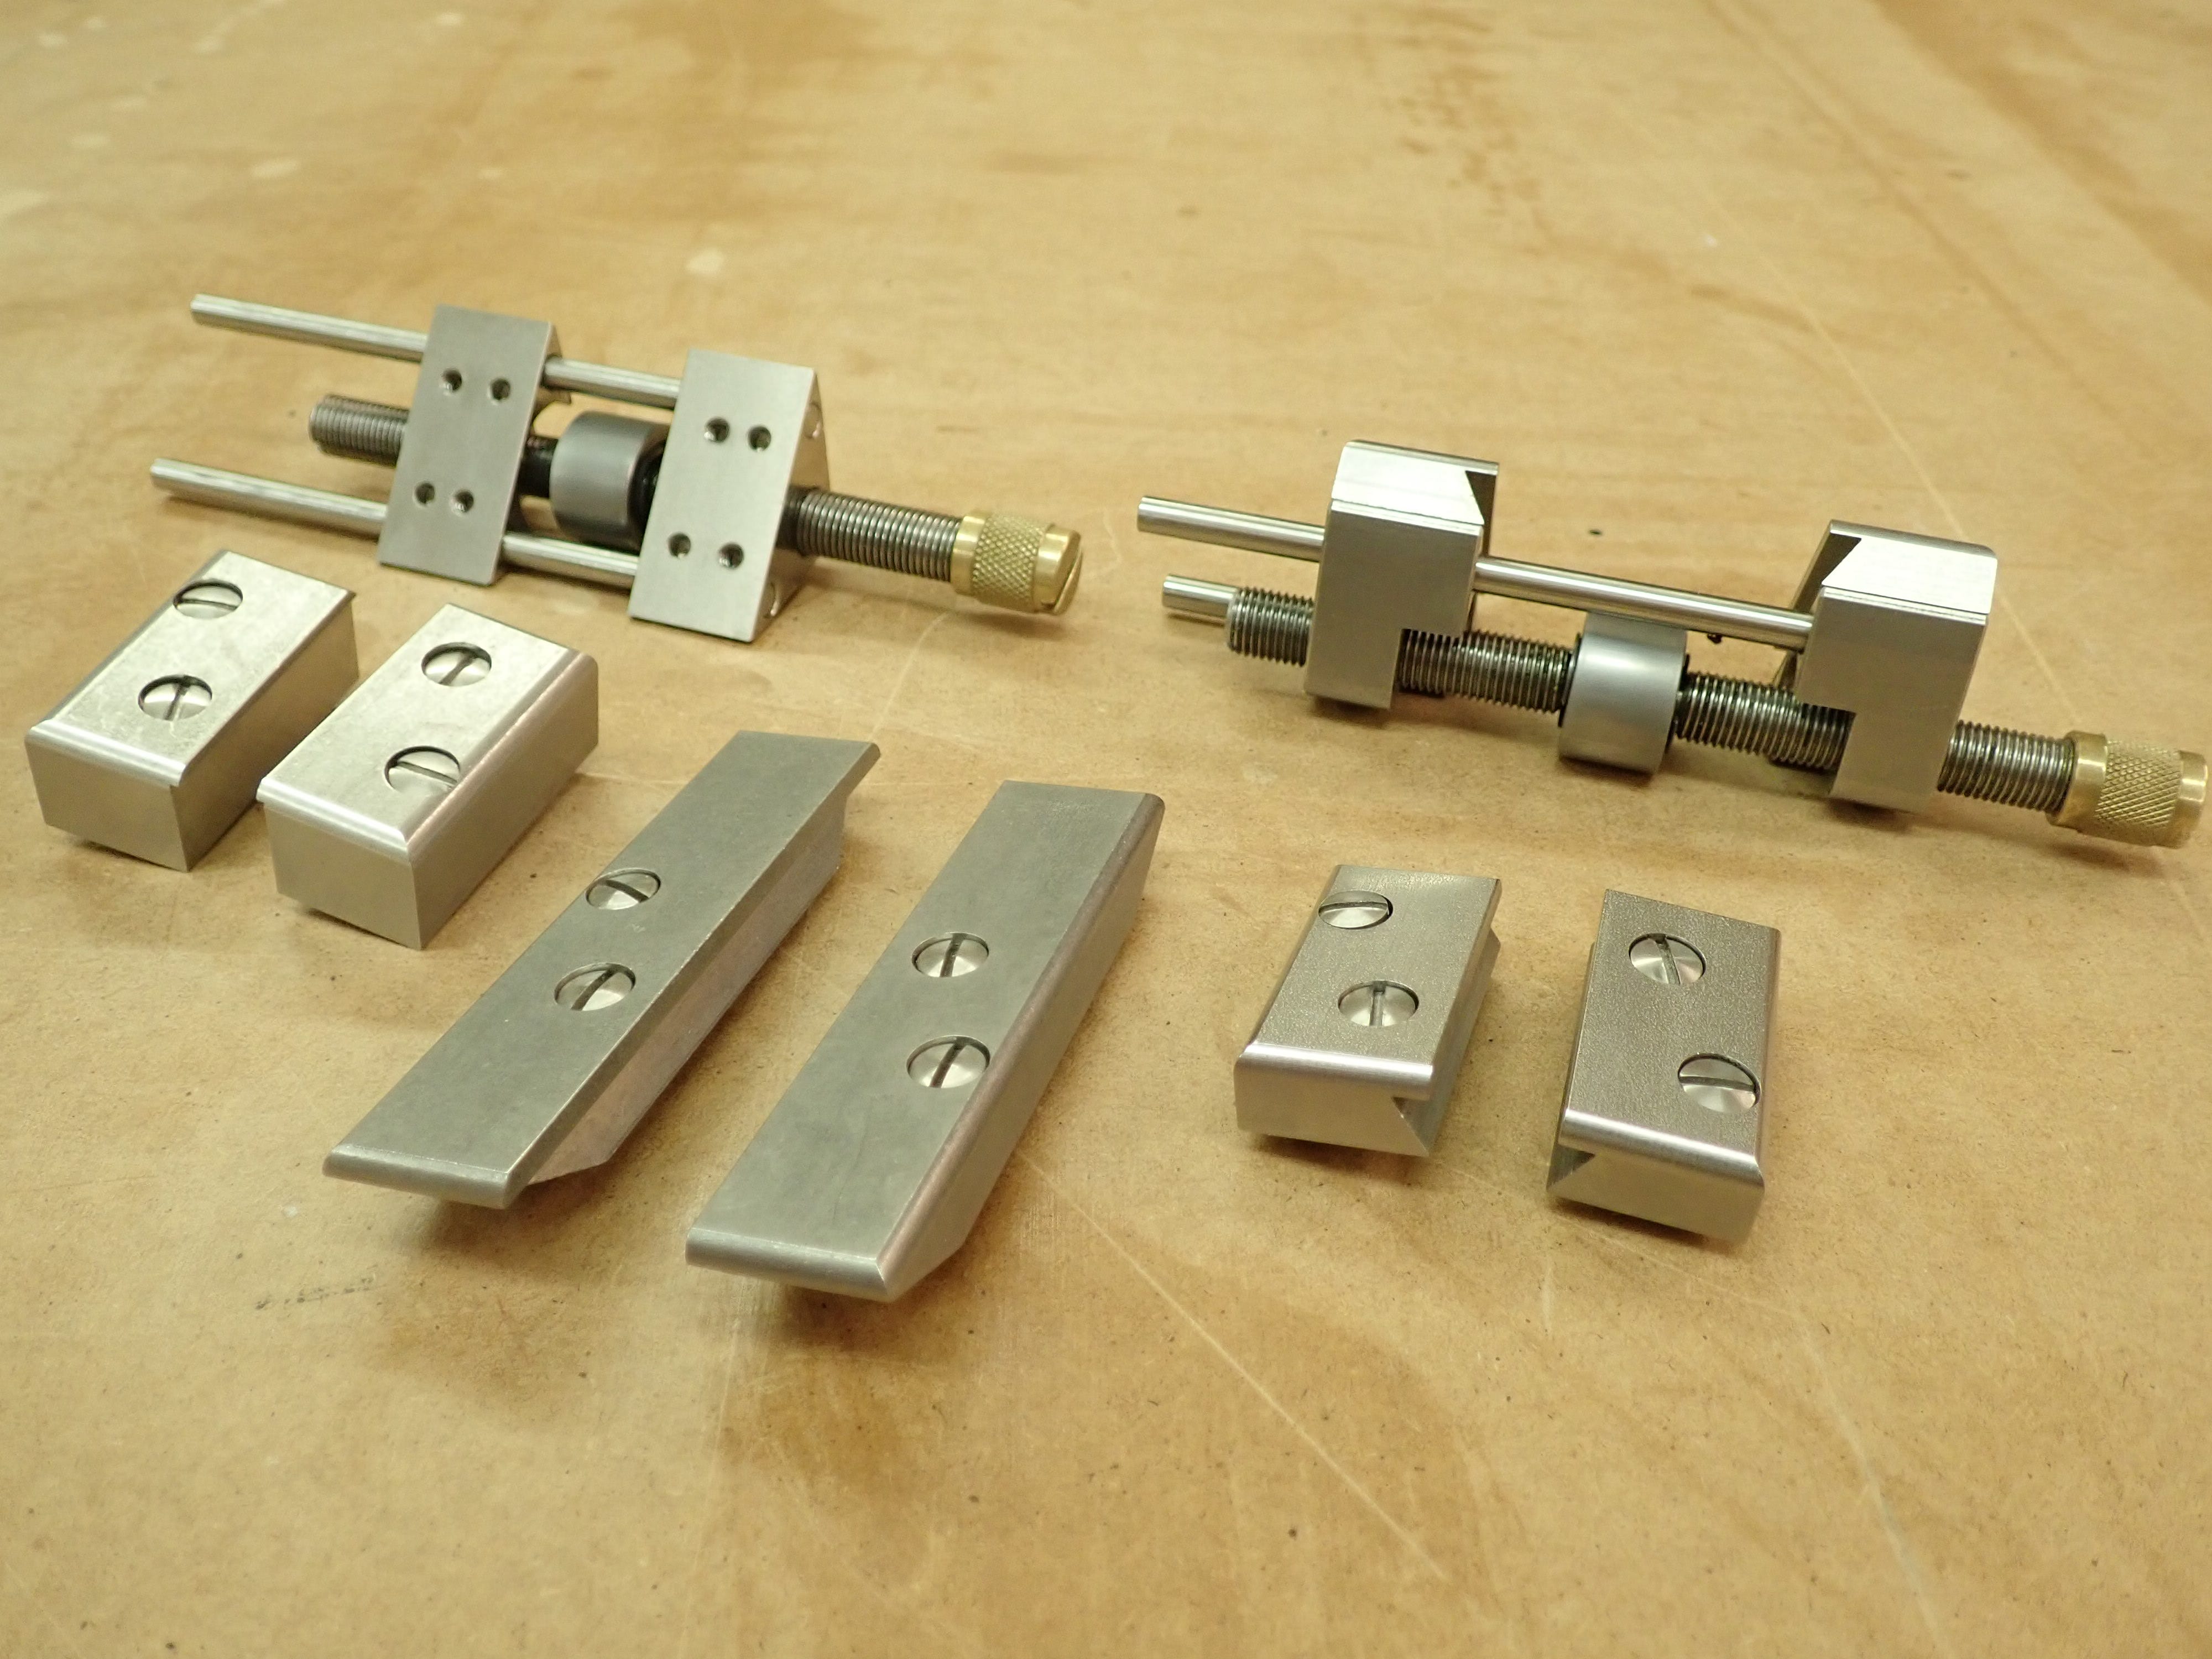
This honing guide consists of two parts: the roller (straight or cambered) and the clamp (vertical or horizontal pressure), complemented by a extension / angle setting jig.
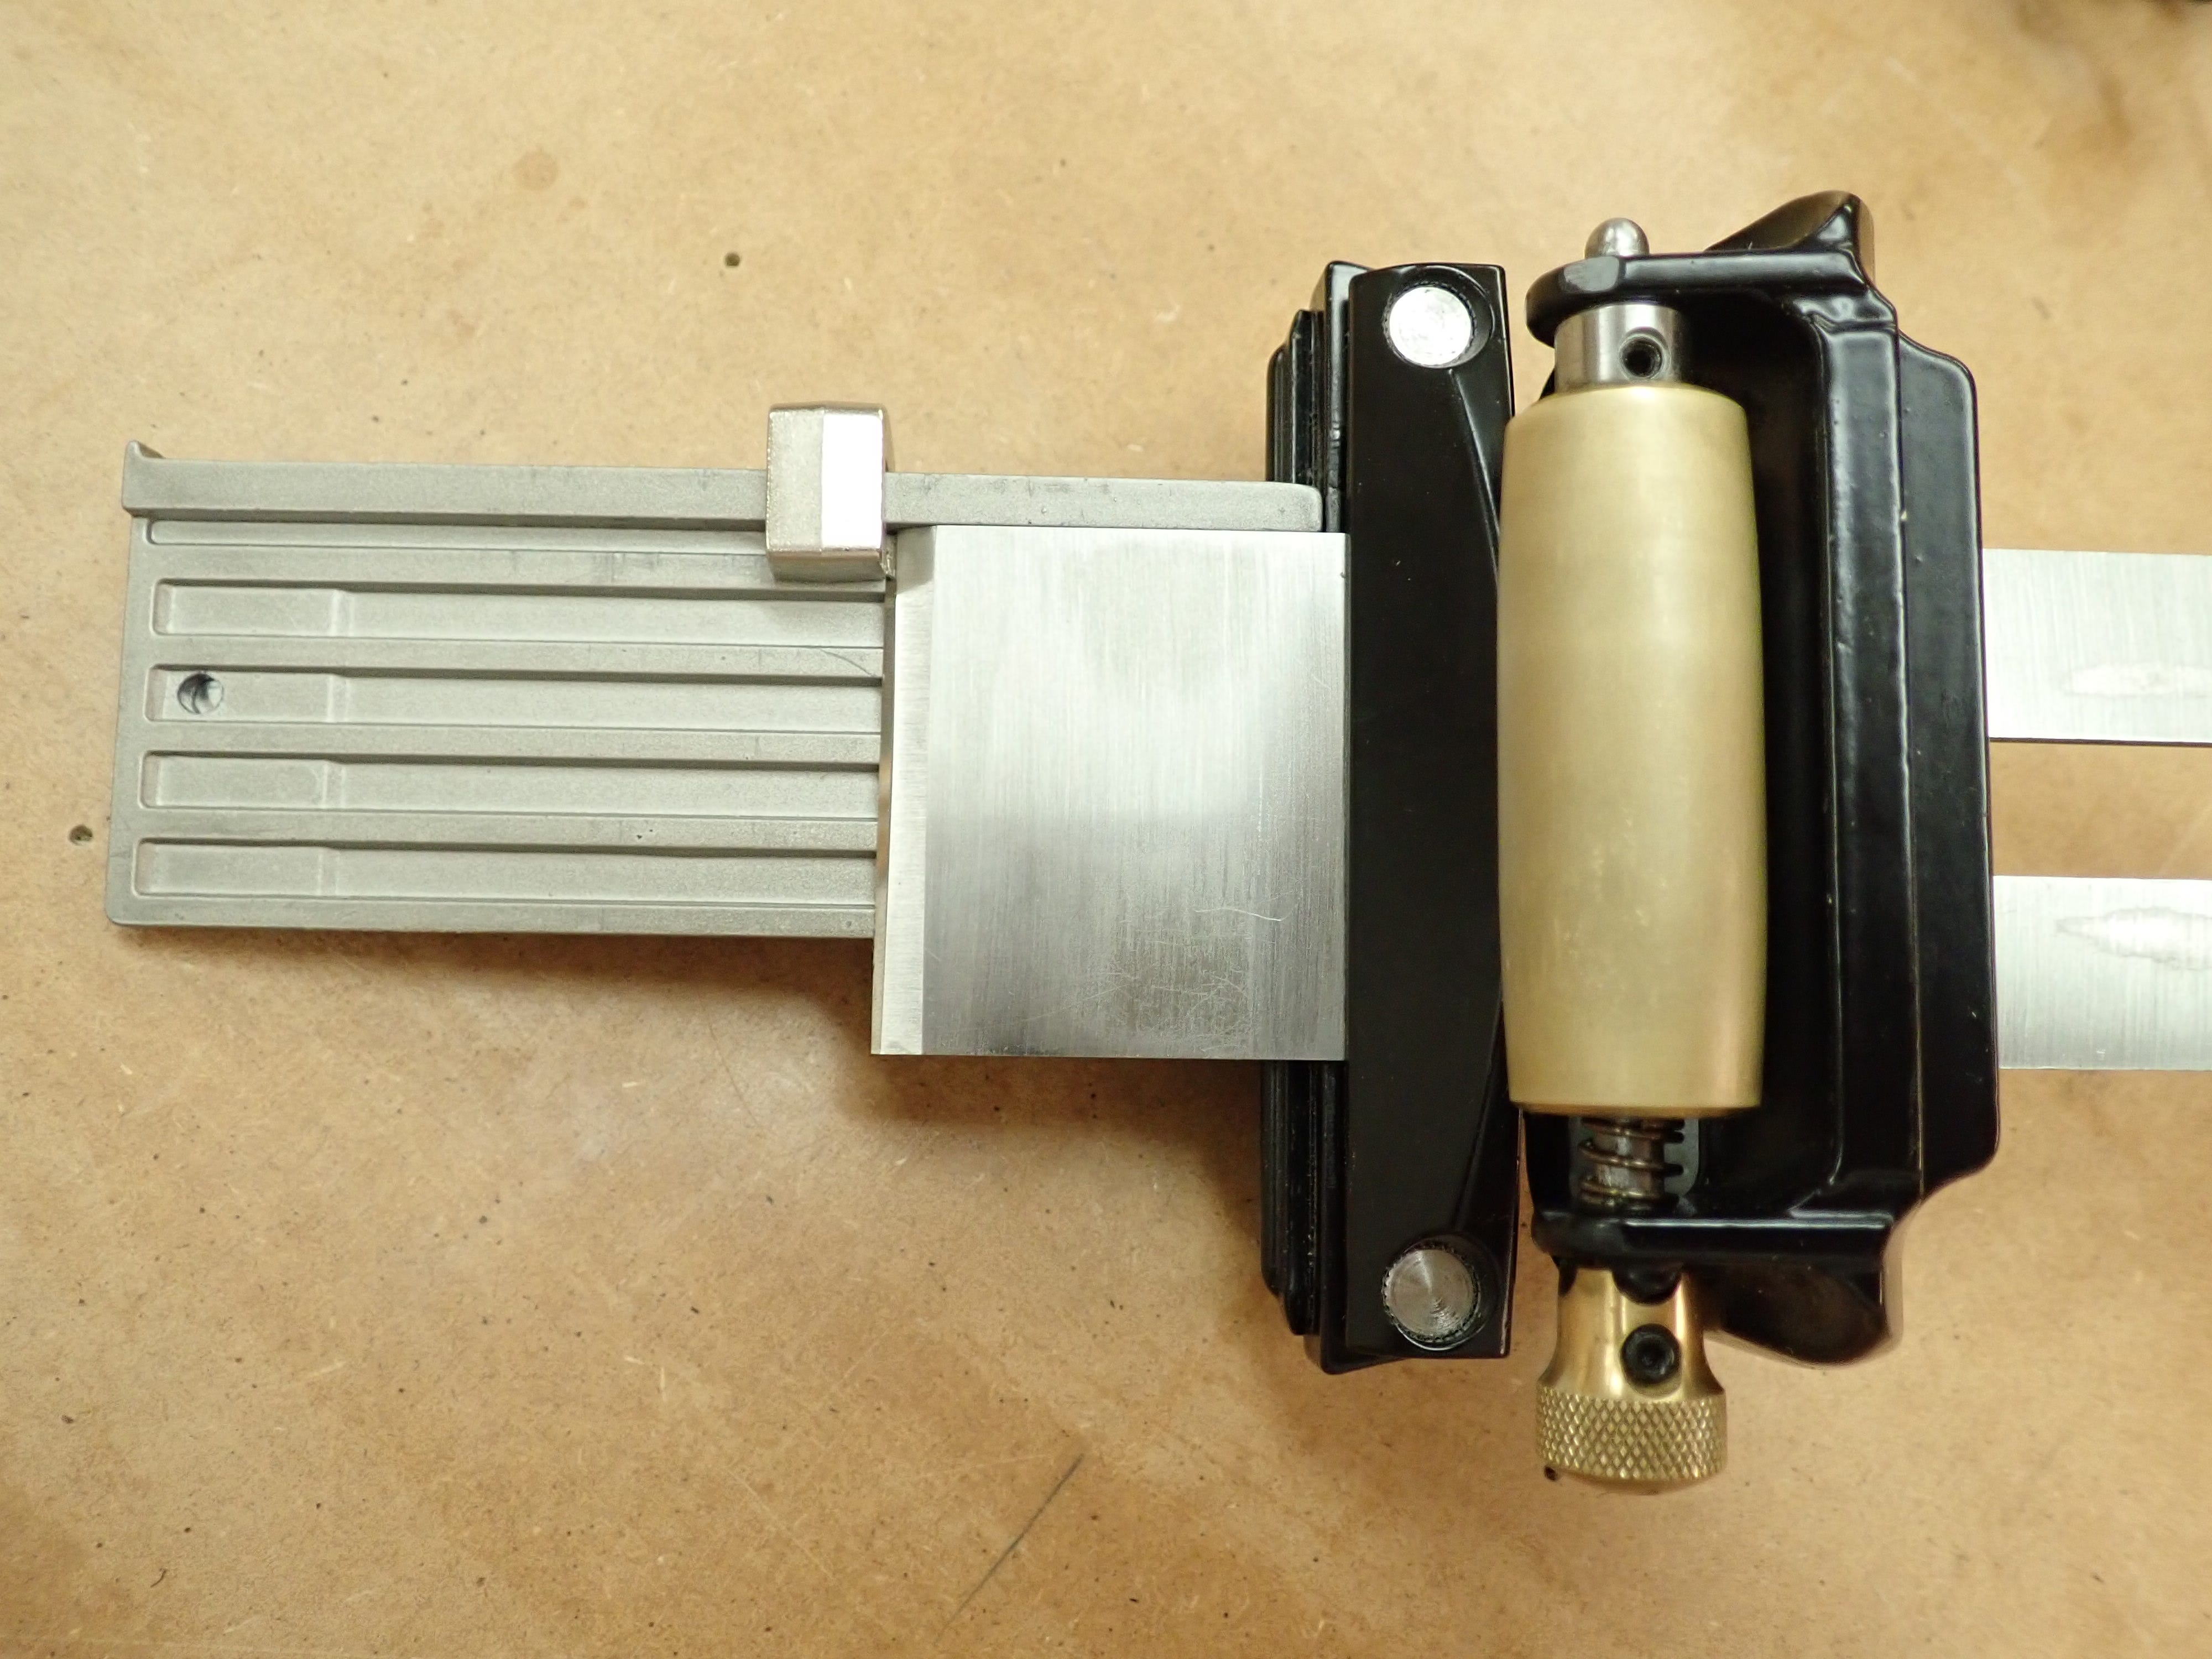
This honing guide system works well enough, is quite versatile and has some useful features. I like the cambered roller for putting a proper curve on my more aggressive jack plane irons. The ability to put high angle back-bevels on plane irons can also come in handy when you’re struggling with difficult grain and have an extra iron you’re willing to modify.
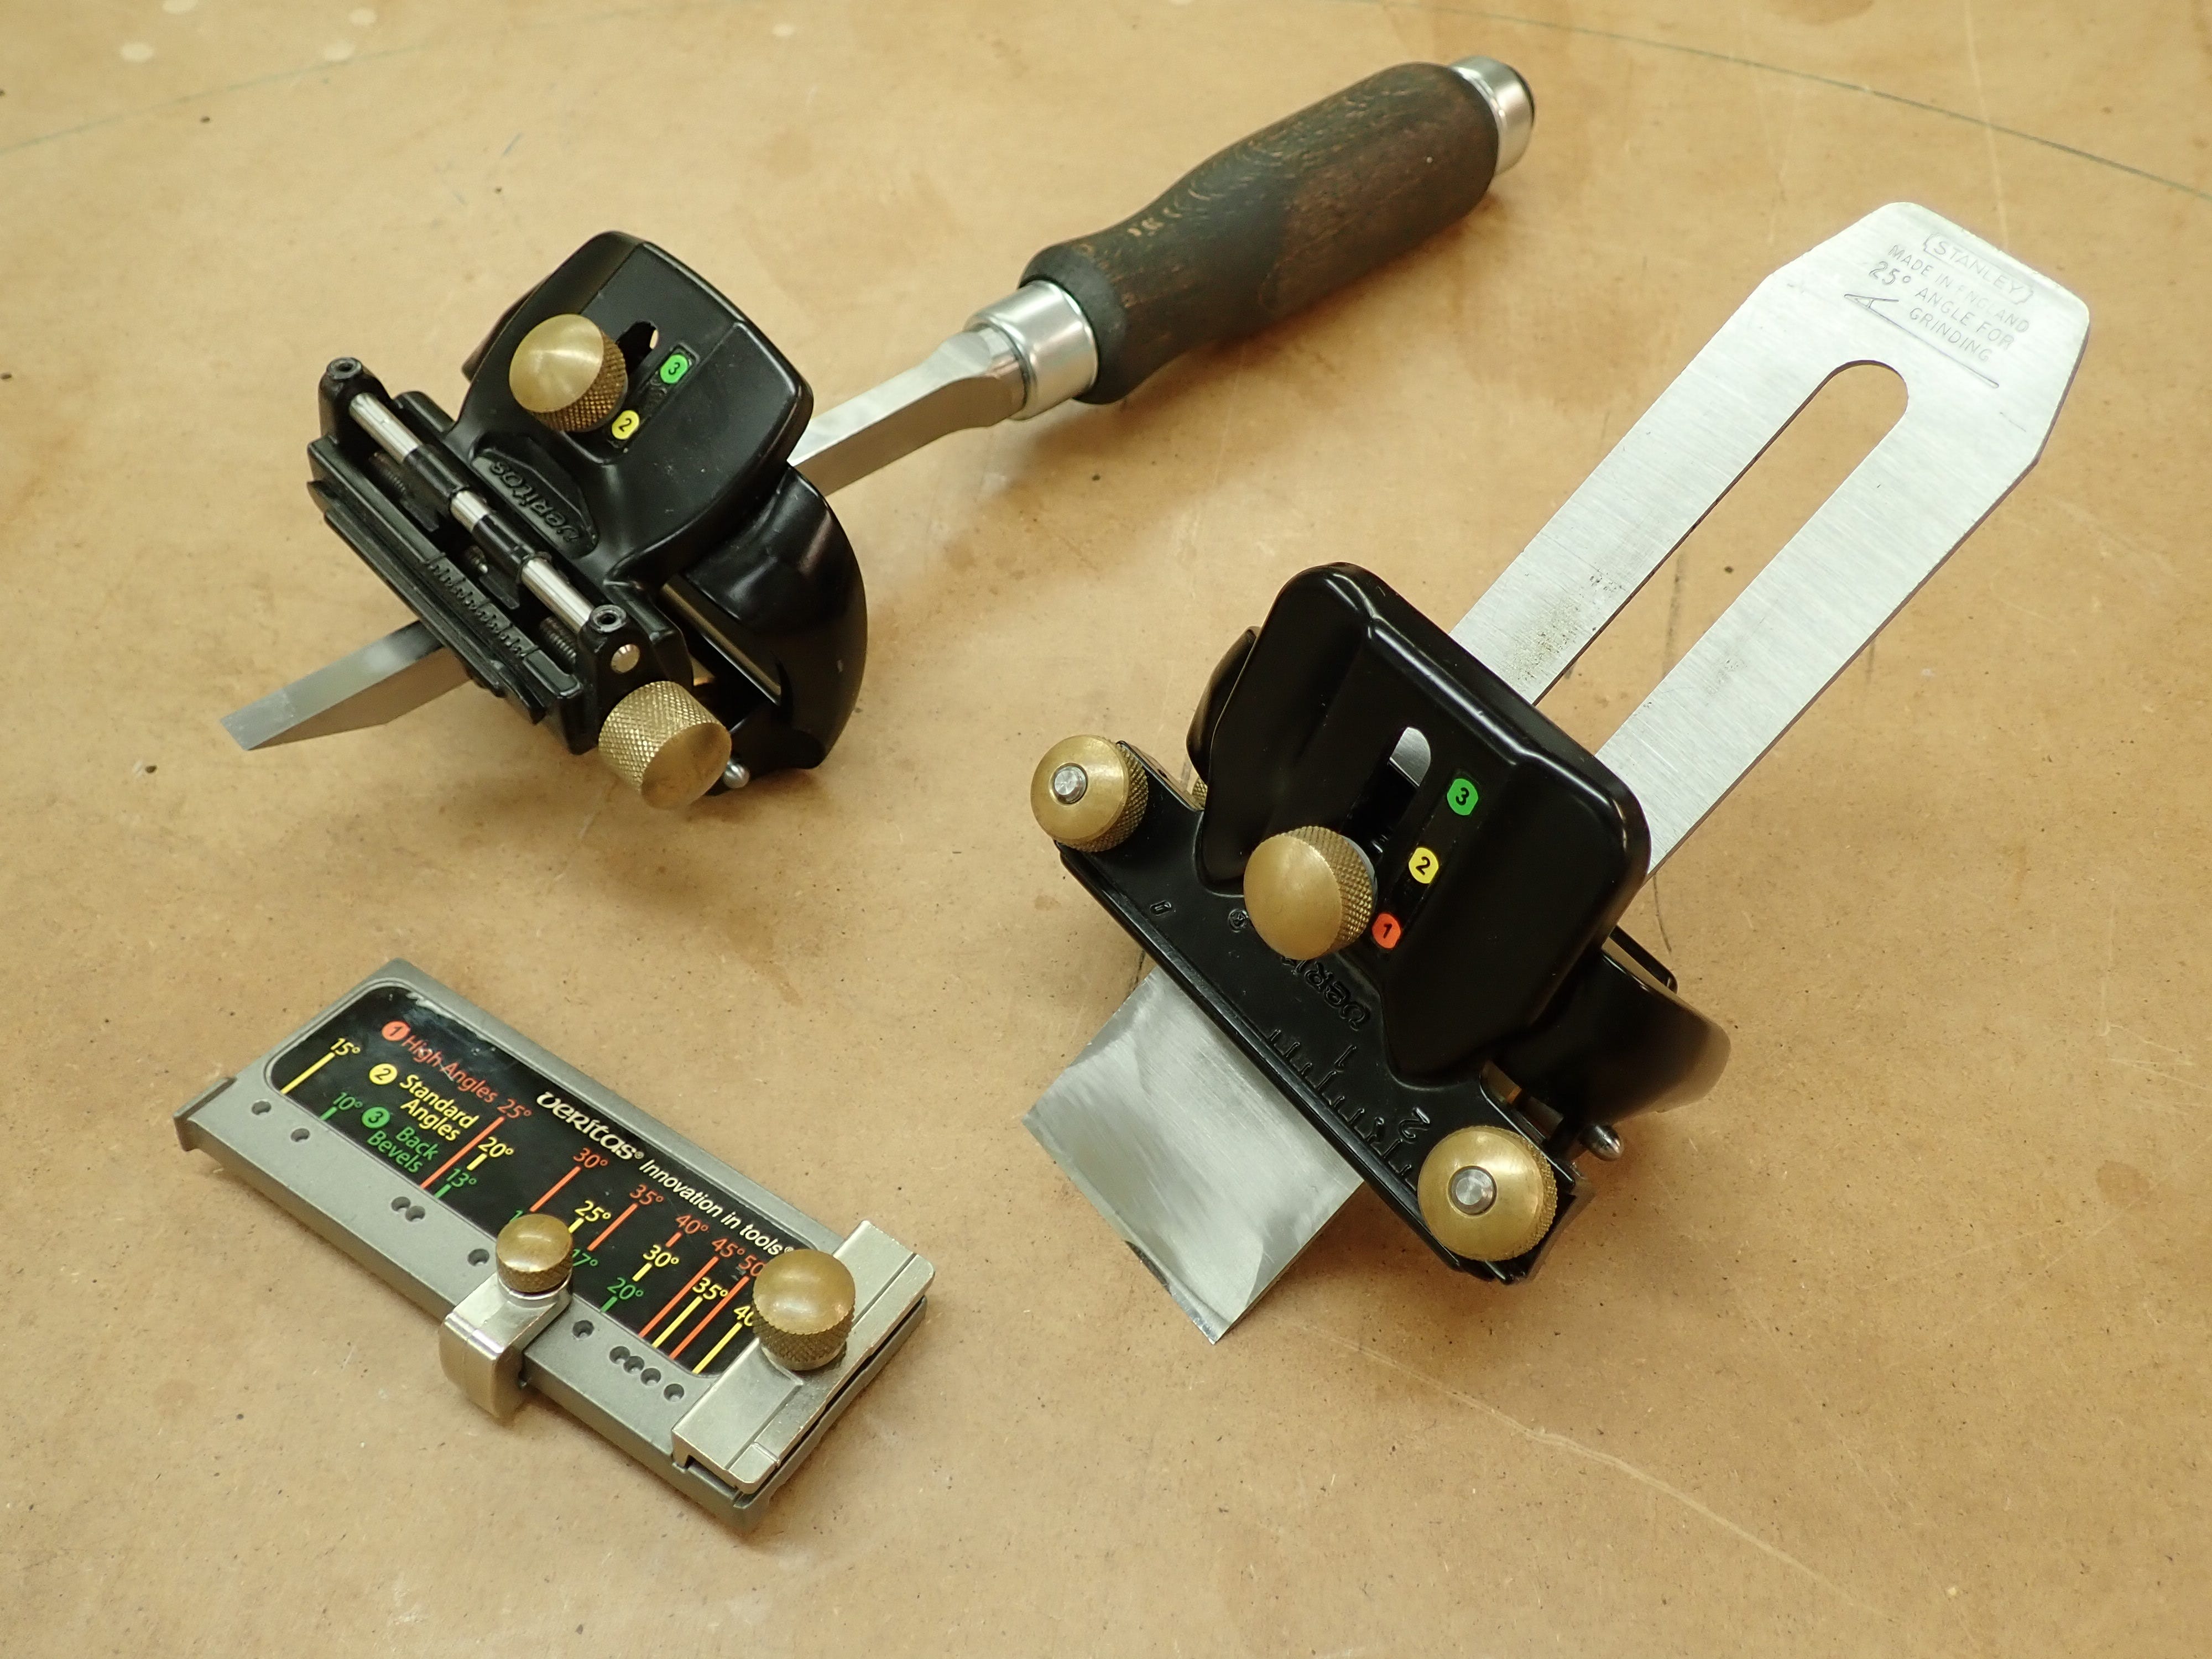
But all in all, I find this type of honing guide too clunky. It’s fiddly to set up and it does not grip some blades / chisels all that well. It’s too complex — over-engineered.
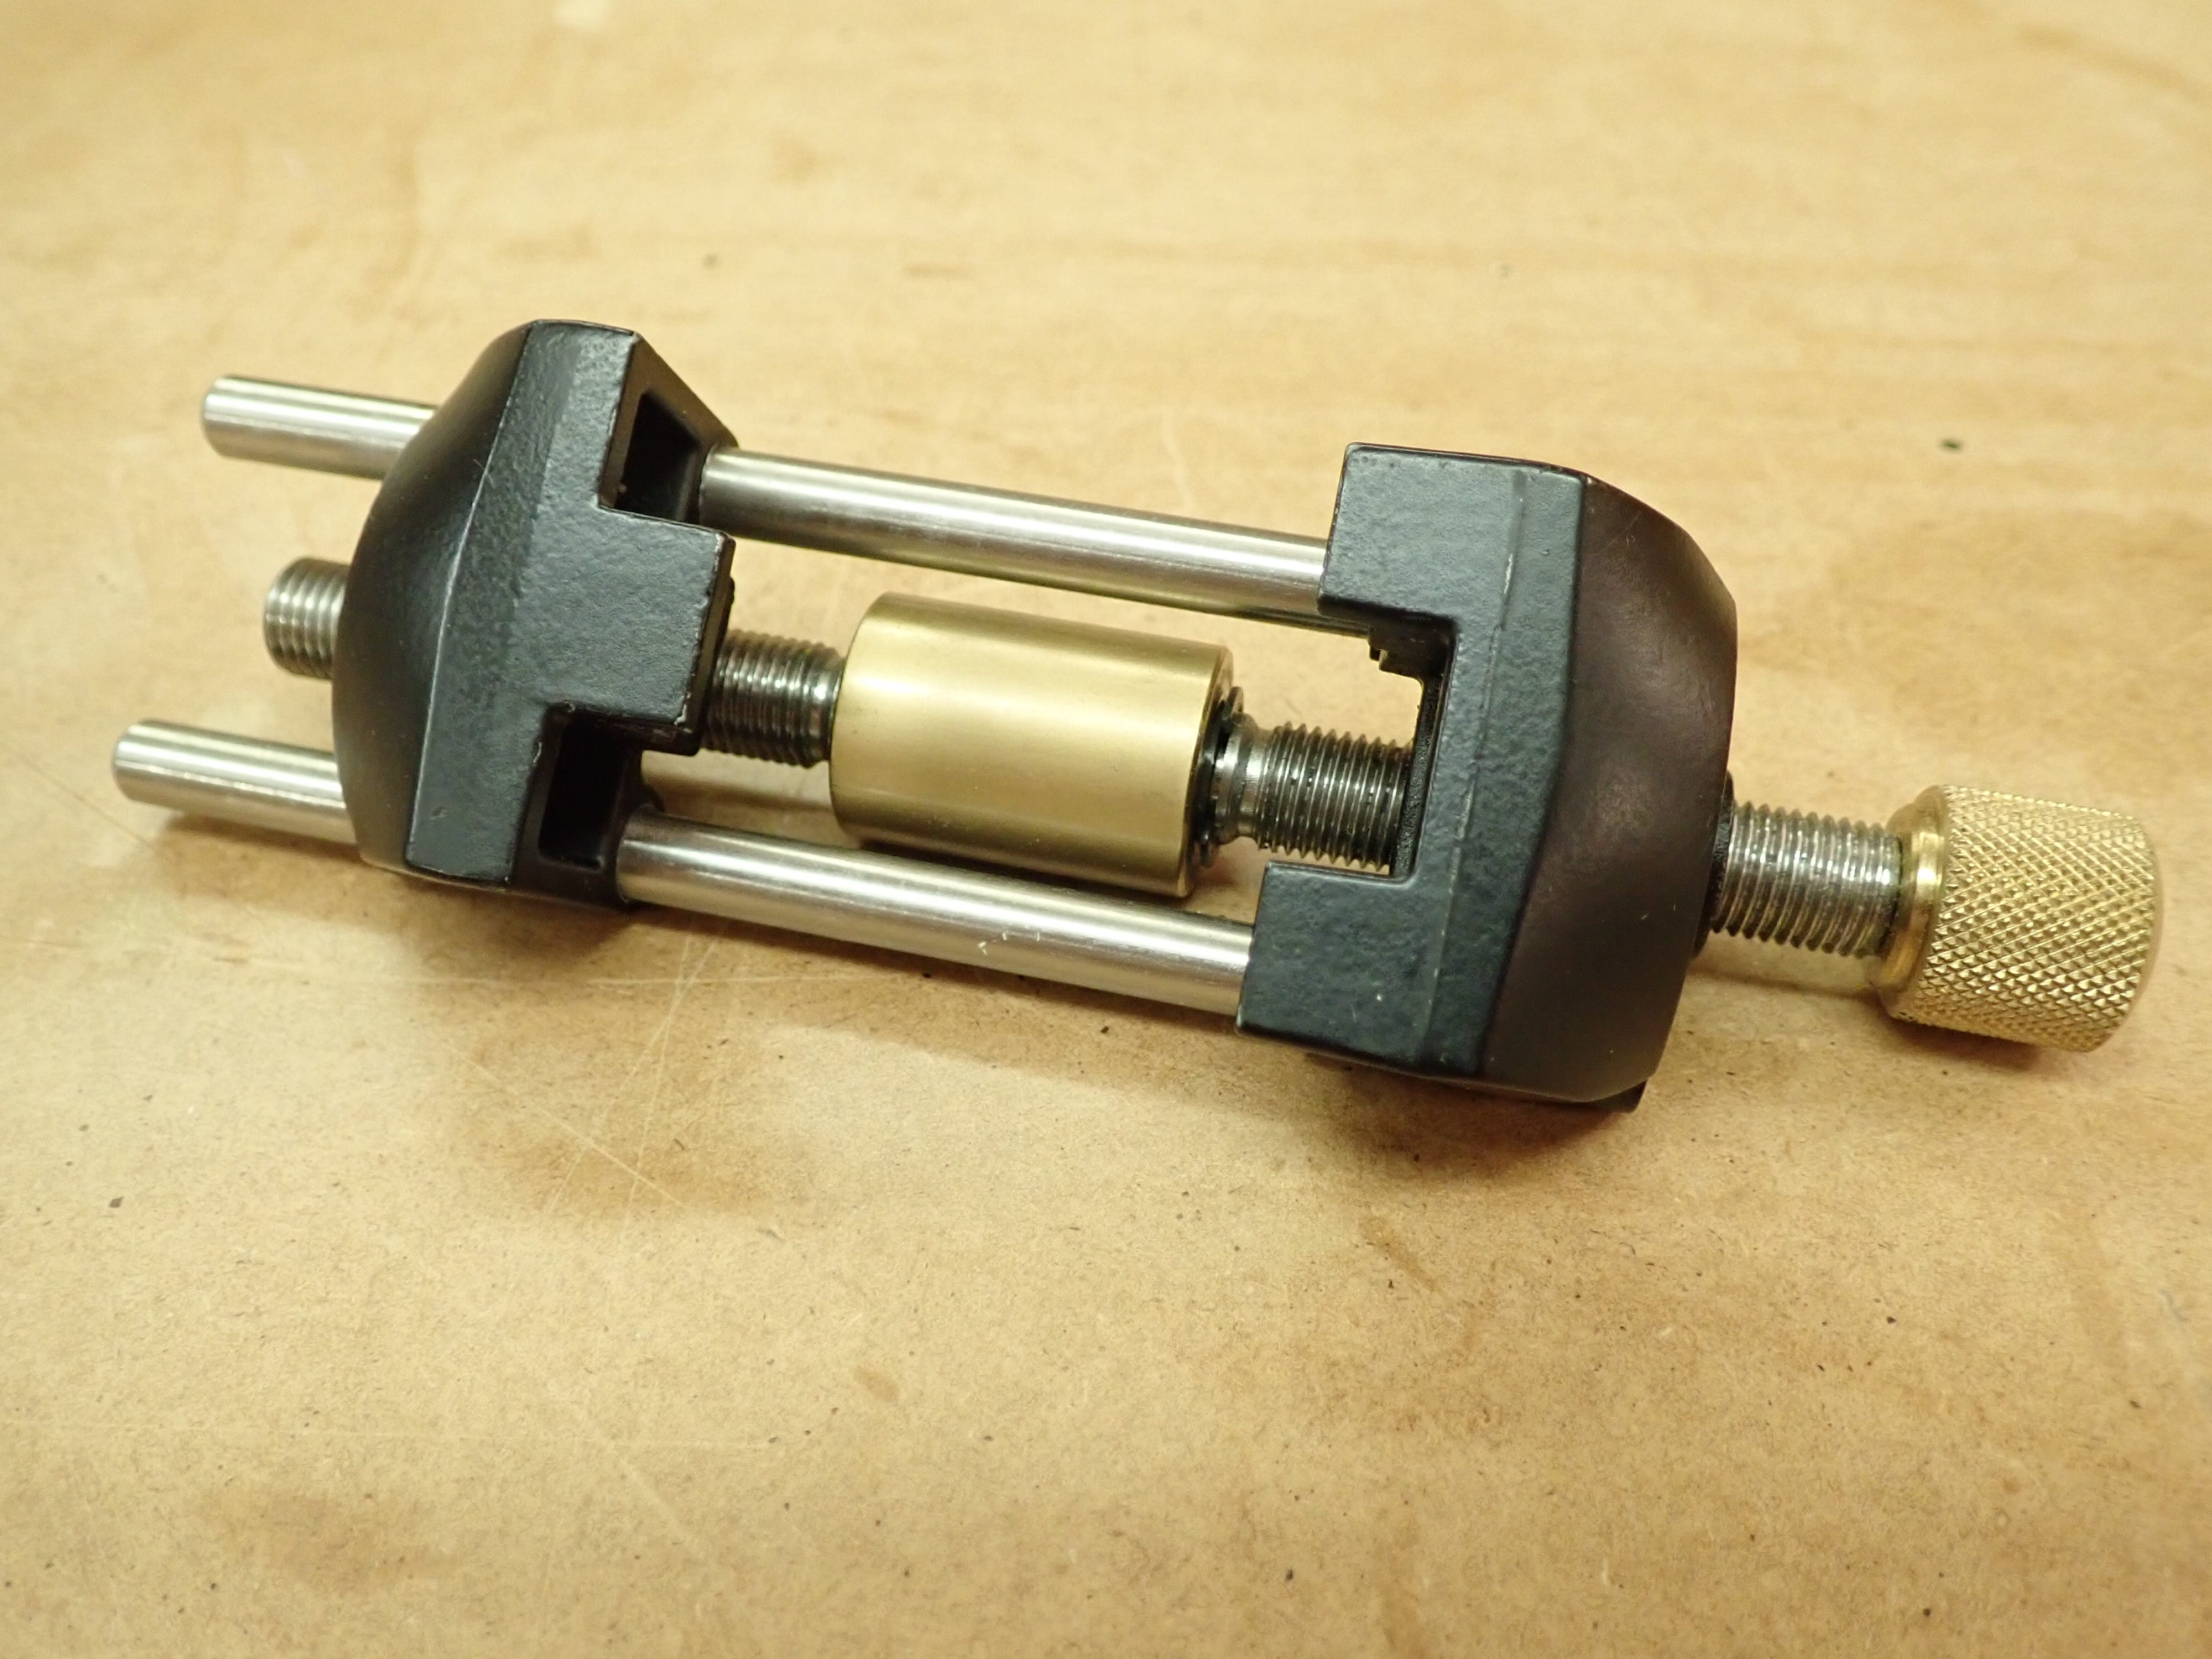
My next venture was to try Lie-Nielsen’s side-clamping stainless roller.
Simple, well made and functional, it quickly became my favourite. You have to make your own extension / angle setter, but that need be no more than a bit of plywood with a couple of stops, or you can go overboard as I tend to.
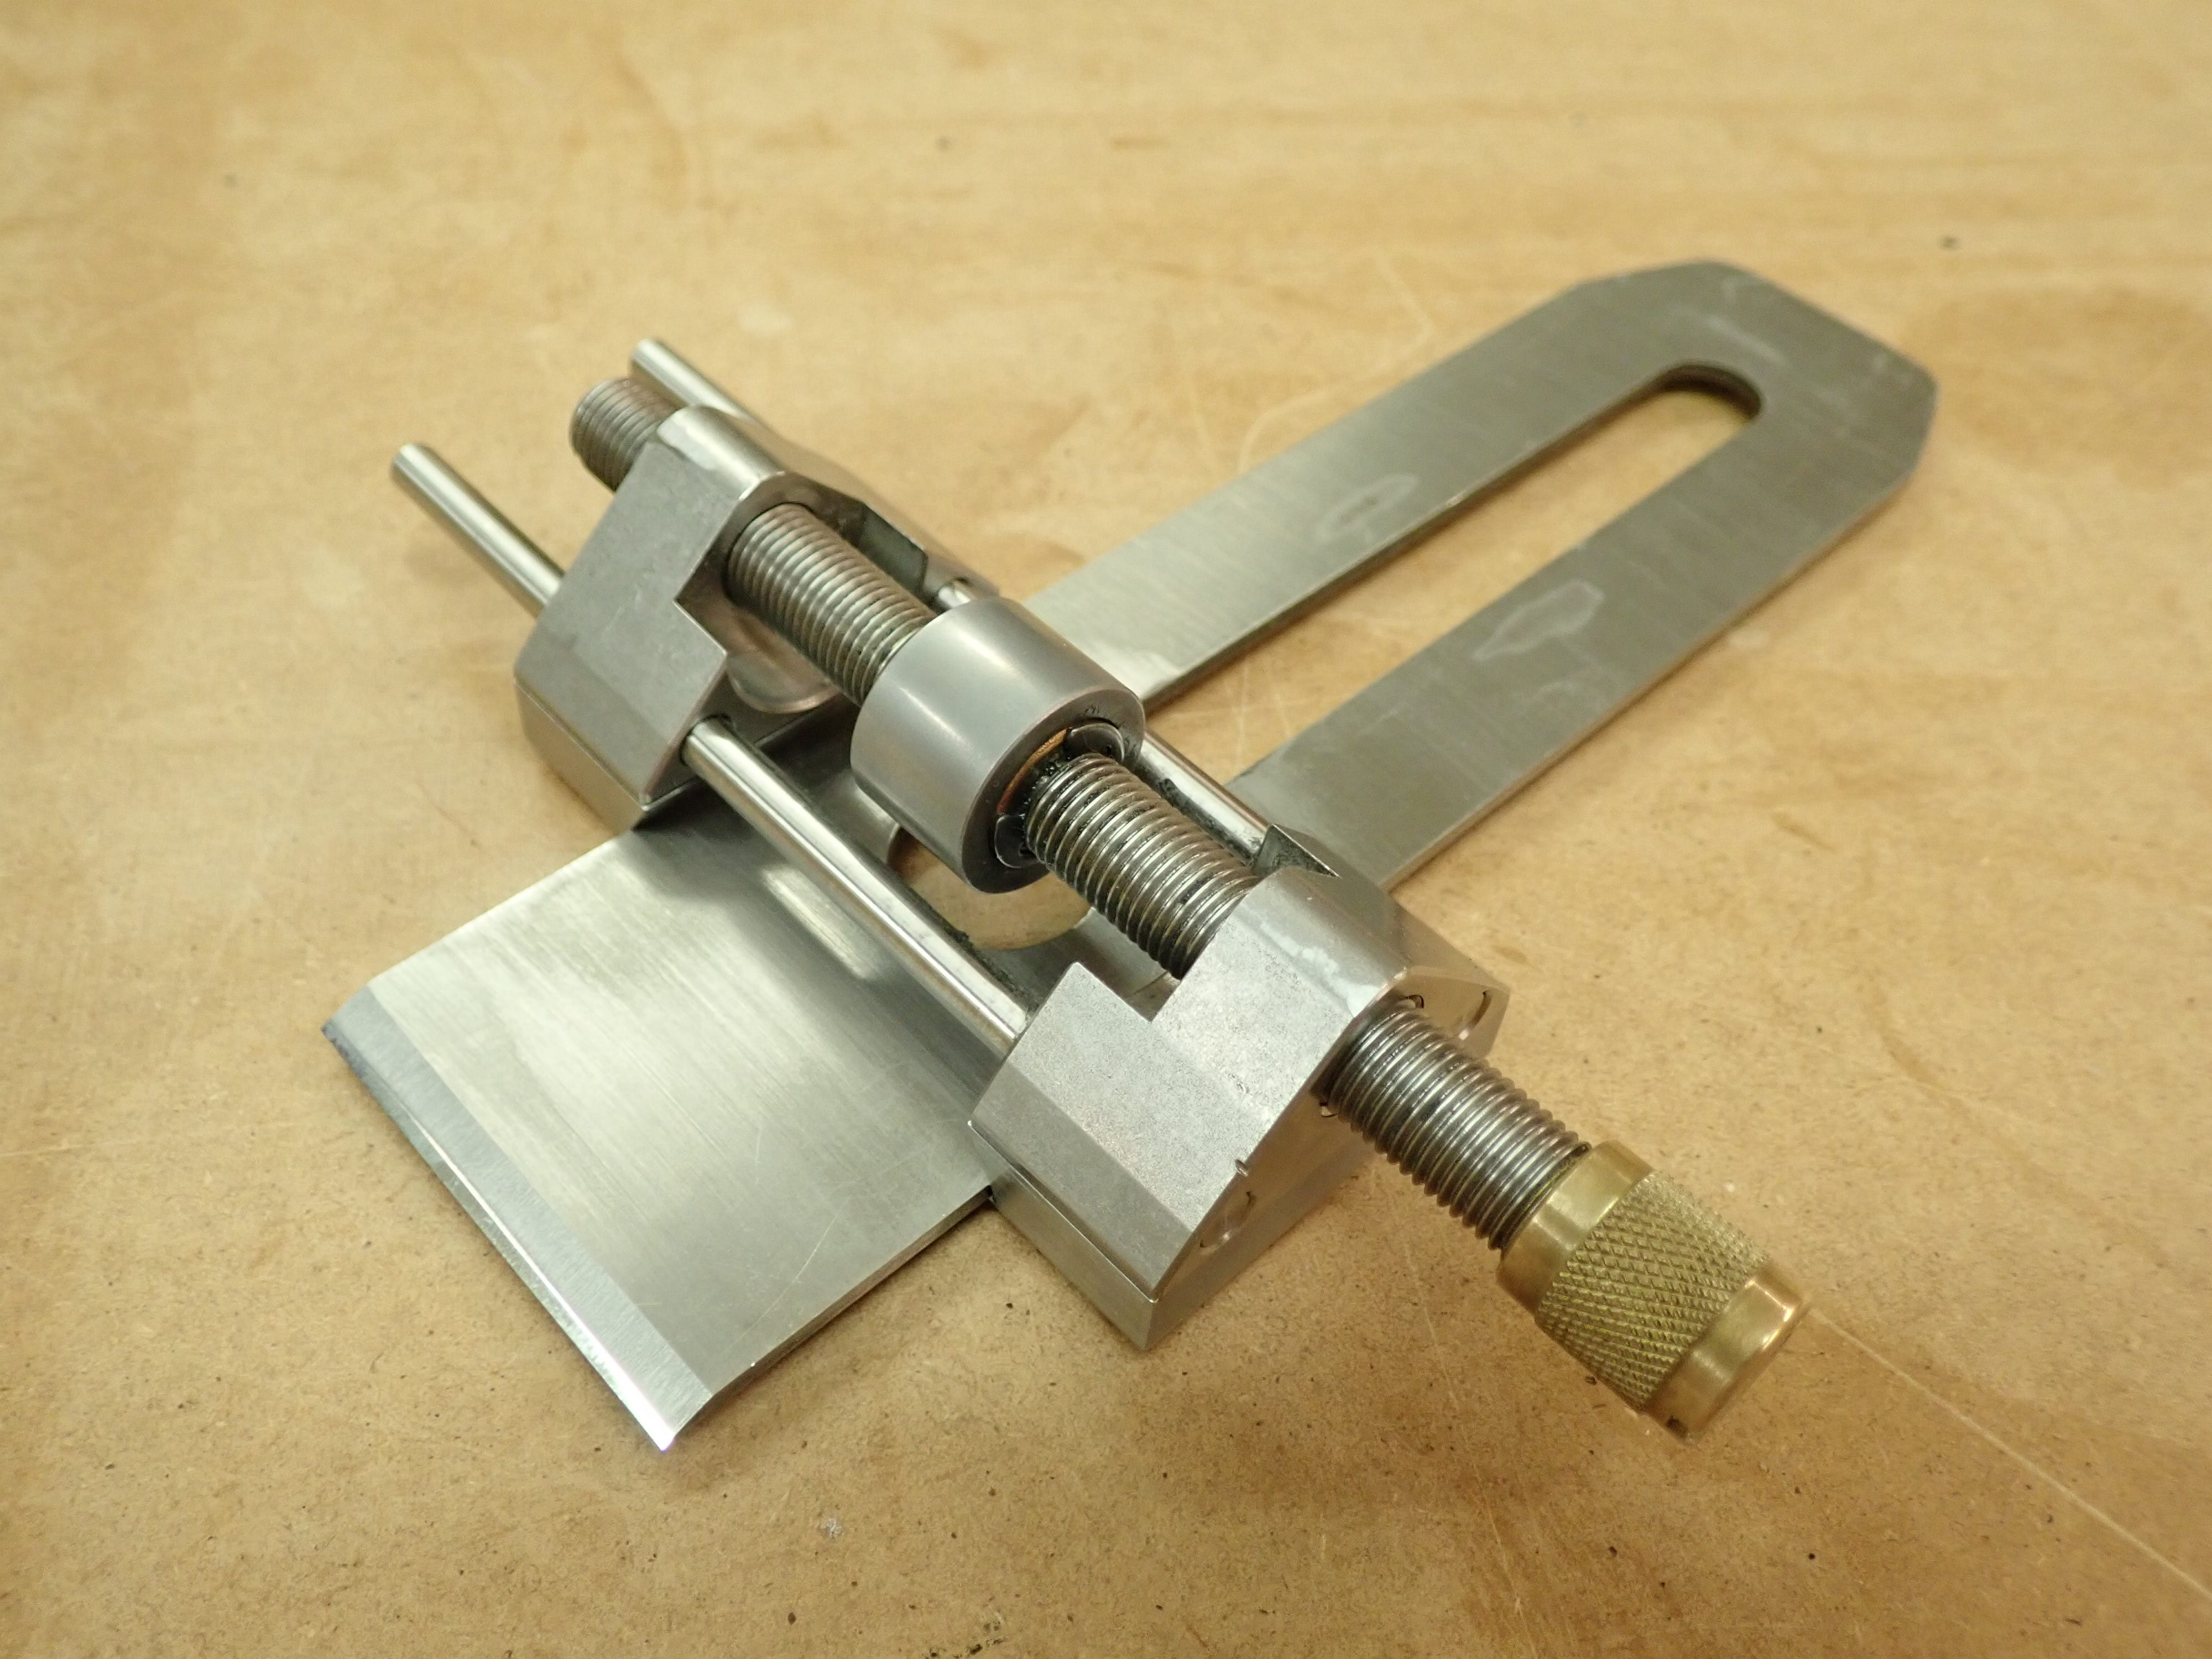
I liked and used my Lie-Nielsen honing guide so much that I wore out the rolling wheel on it, as I mentioned earlier. I noticed that the bronze roller had become a bit sloppy on its axle and had acquired a shiny wear-pattern where it would rub against the close-fitting ‘wheel well’ in the main body. I deduced that it had worn out on the inside.
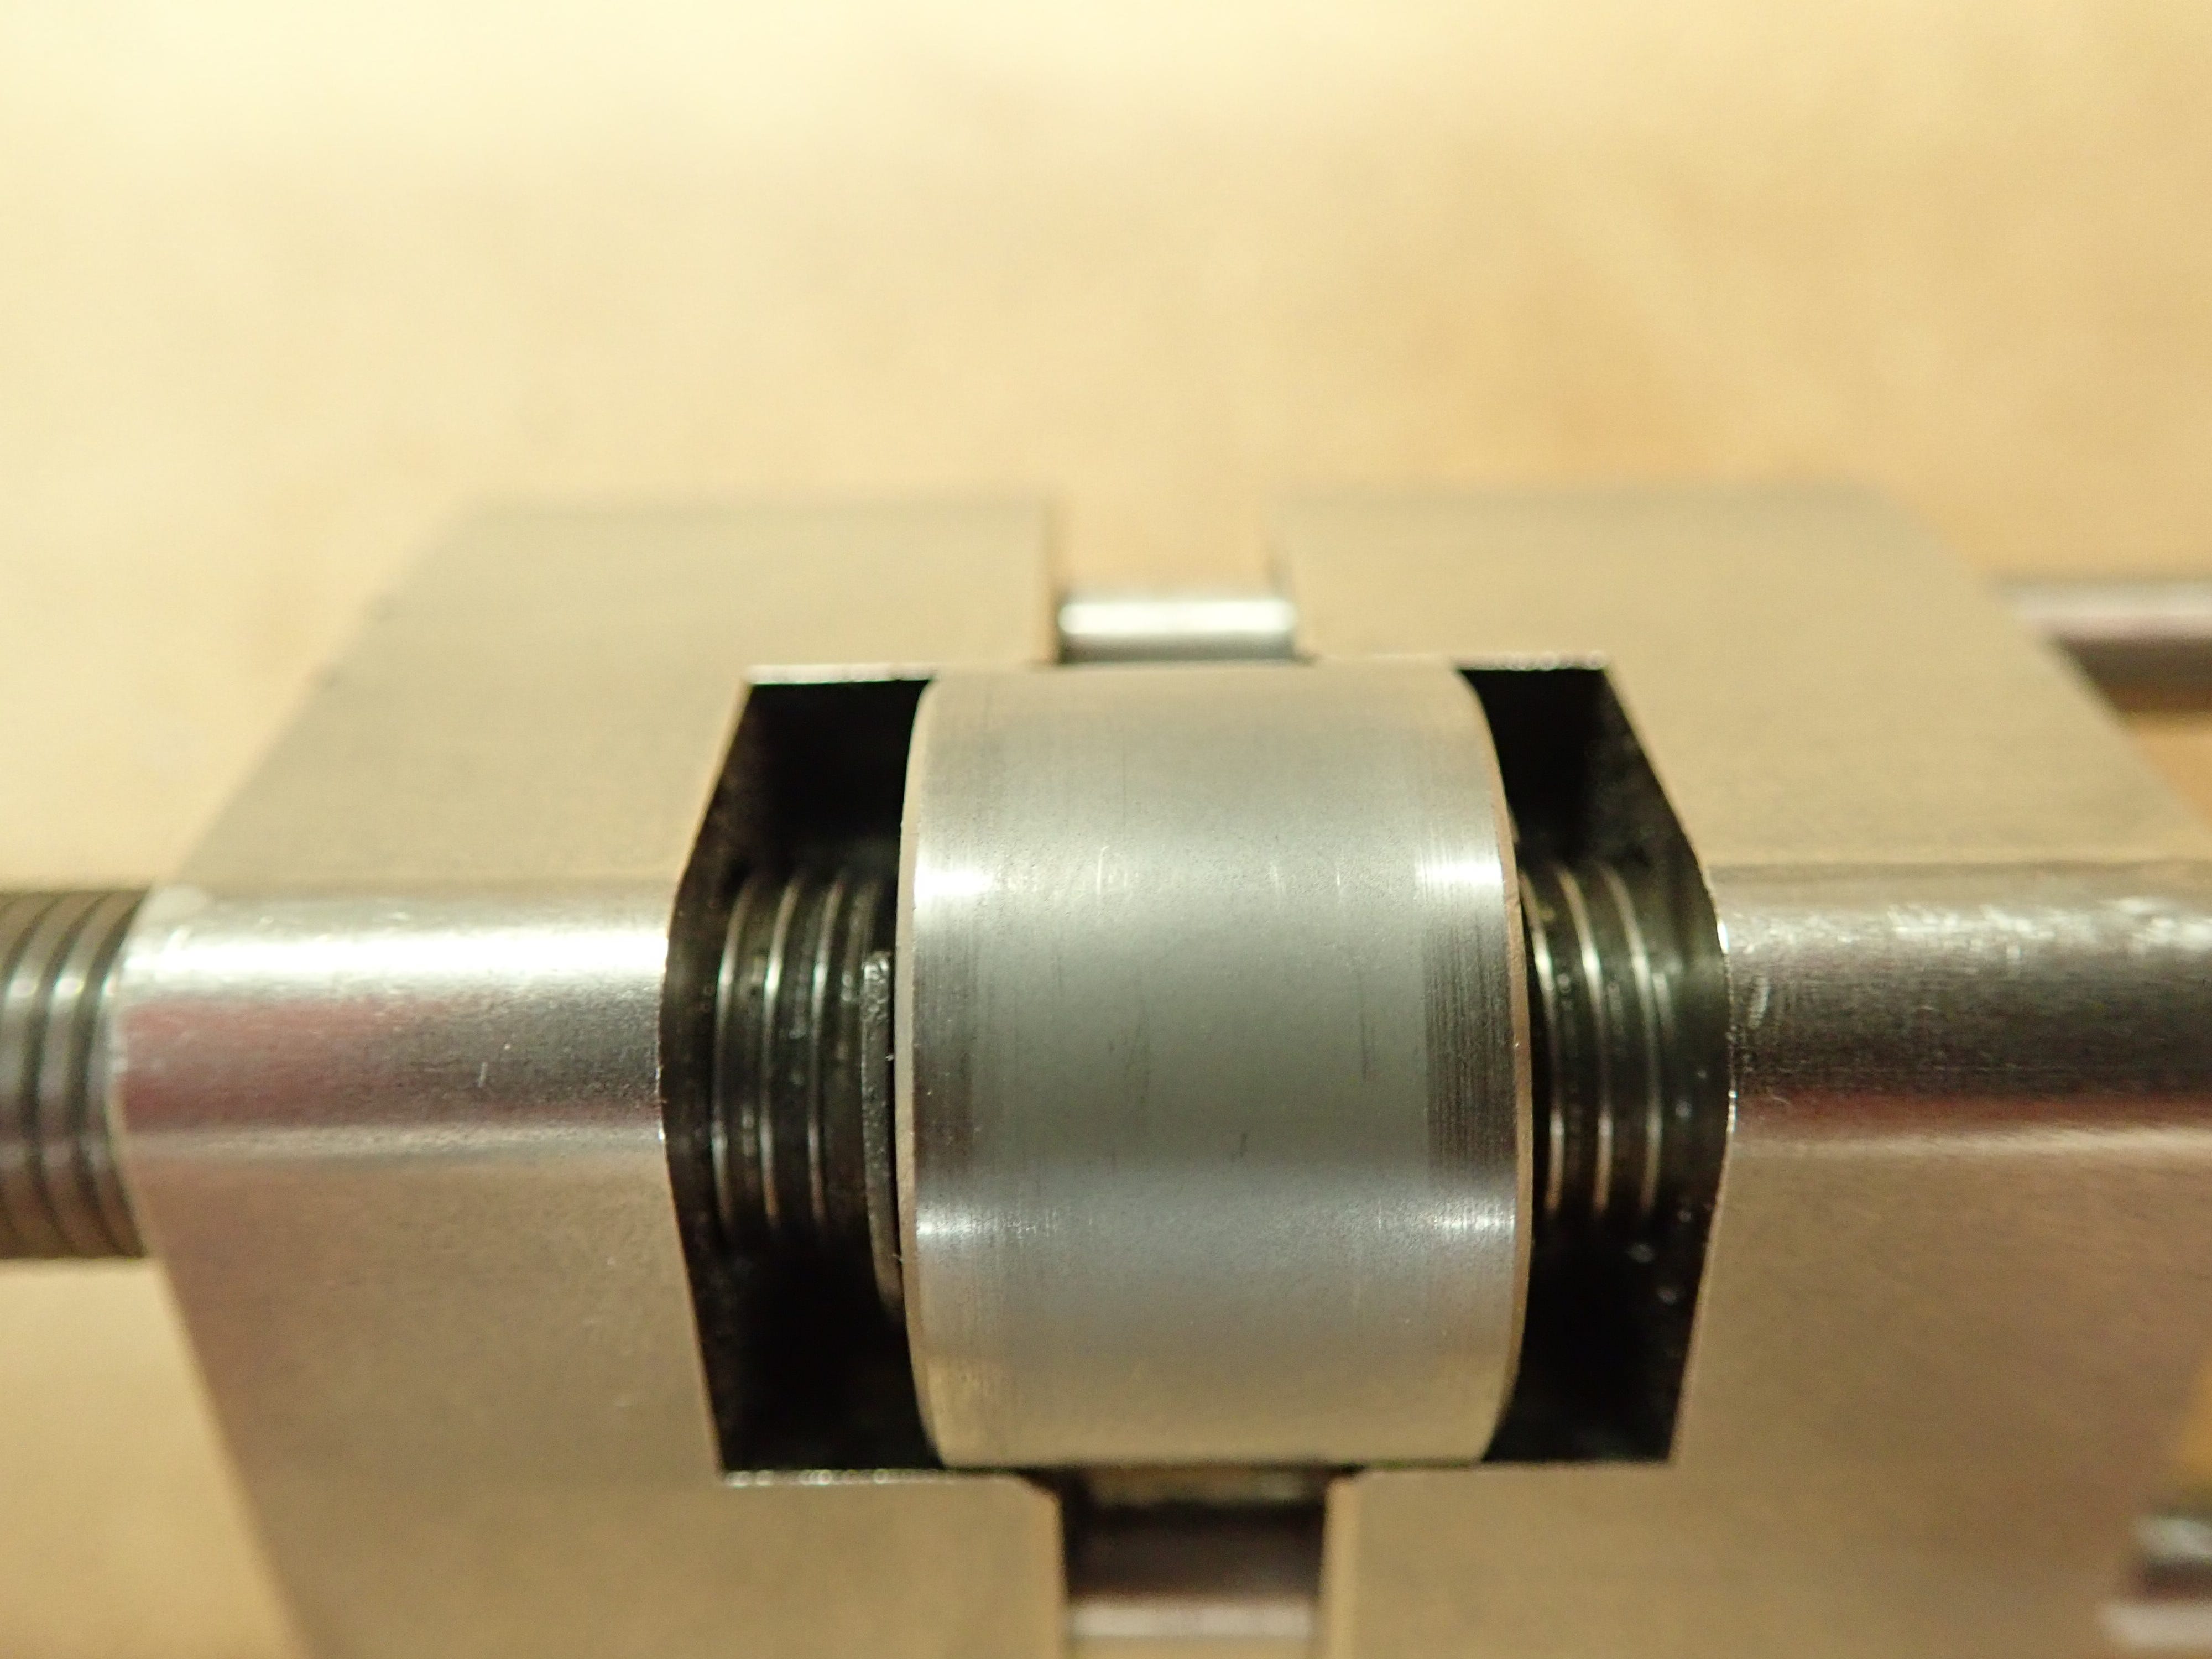
So, I ordered a second honing guide (Have too much of a good thing? I think not!) and five ‘wheels’ or bronze-lined steel bushings, to be precise.
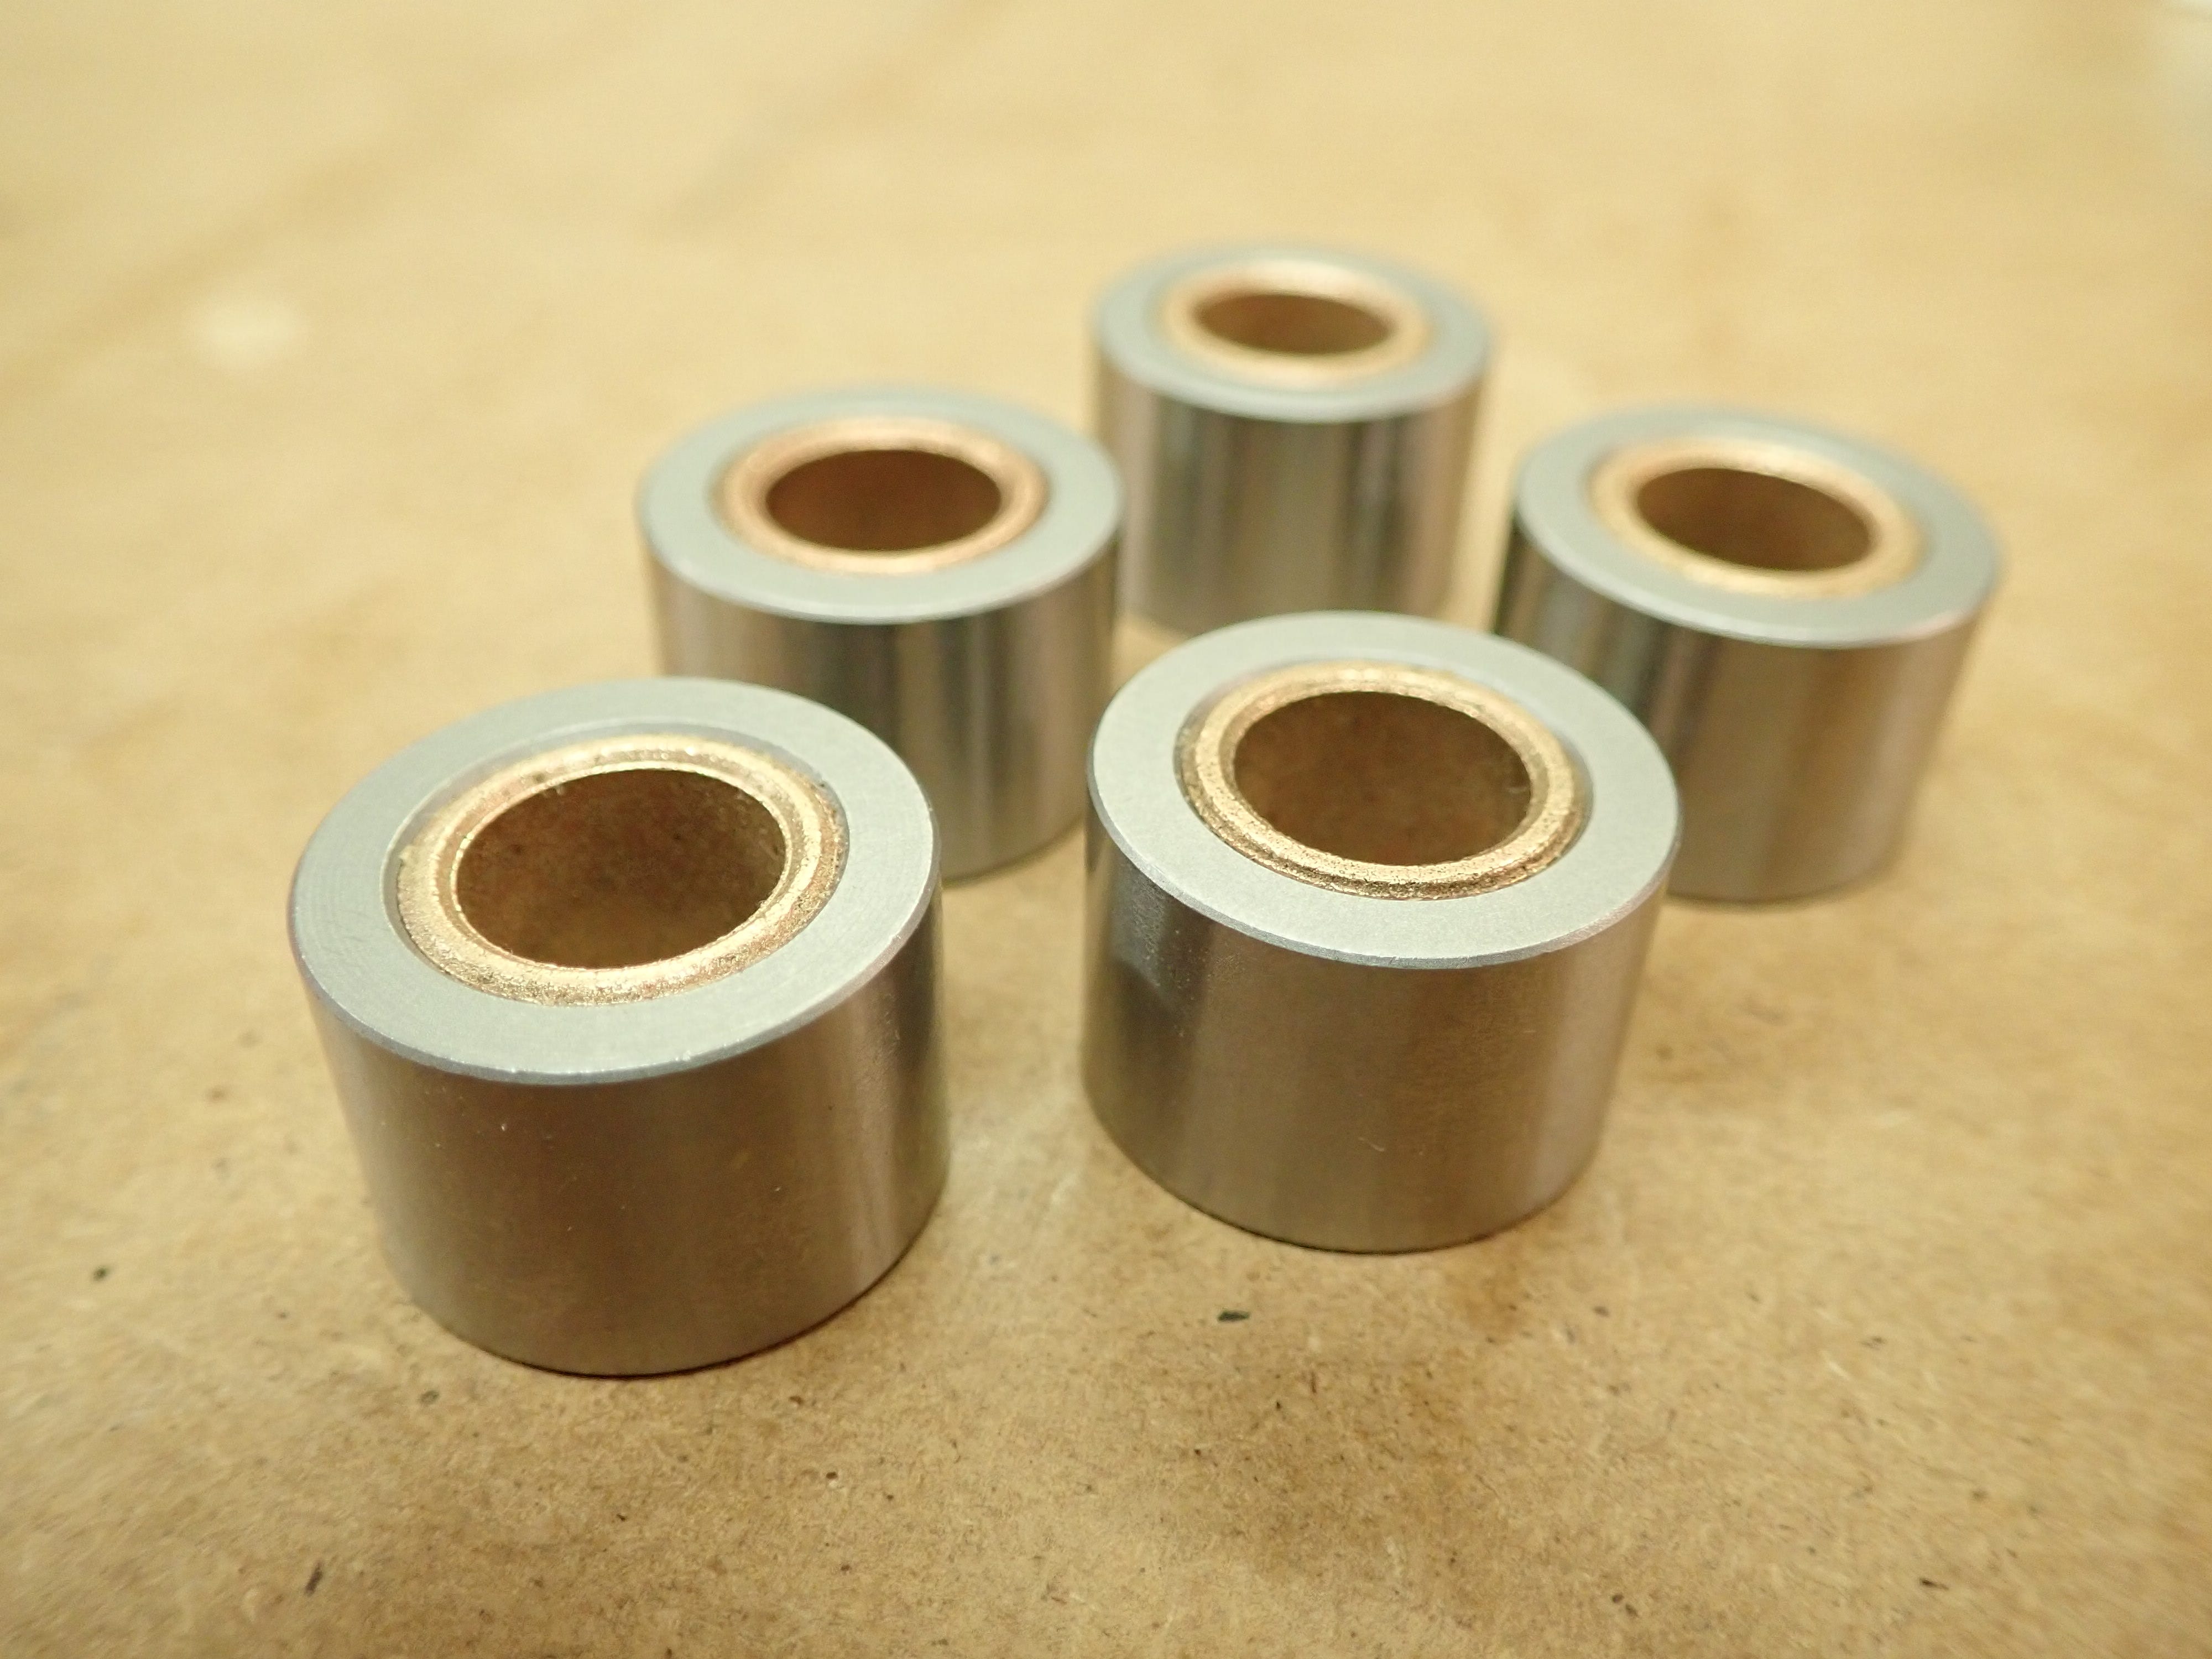
I bought five: one for now and four to see me out. Delivered by my excellent Norwegian supplier of high quality tools. Here is a video showing how to dismantle the thing.
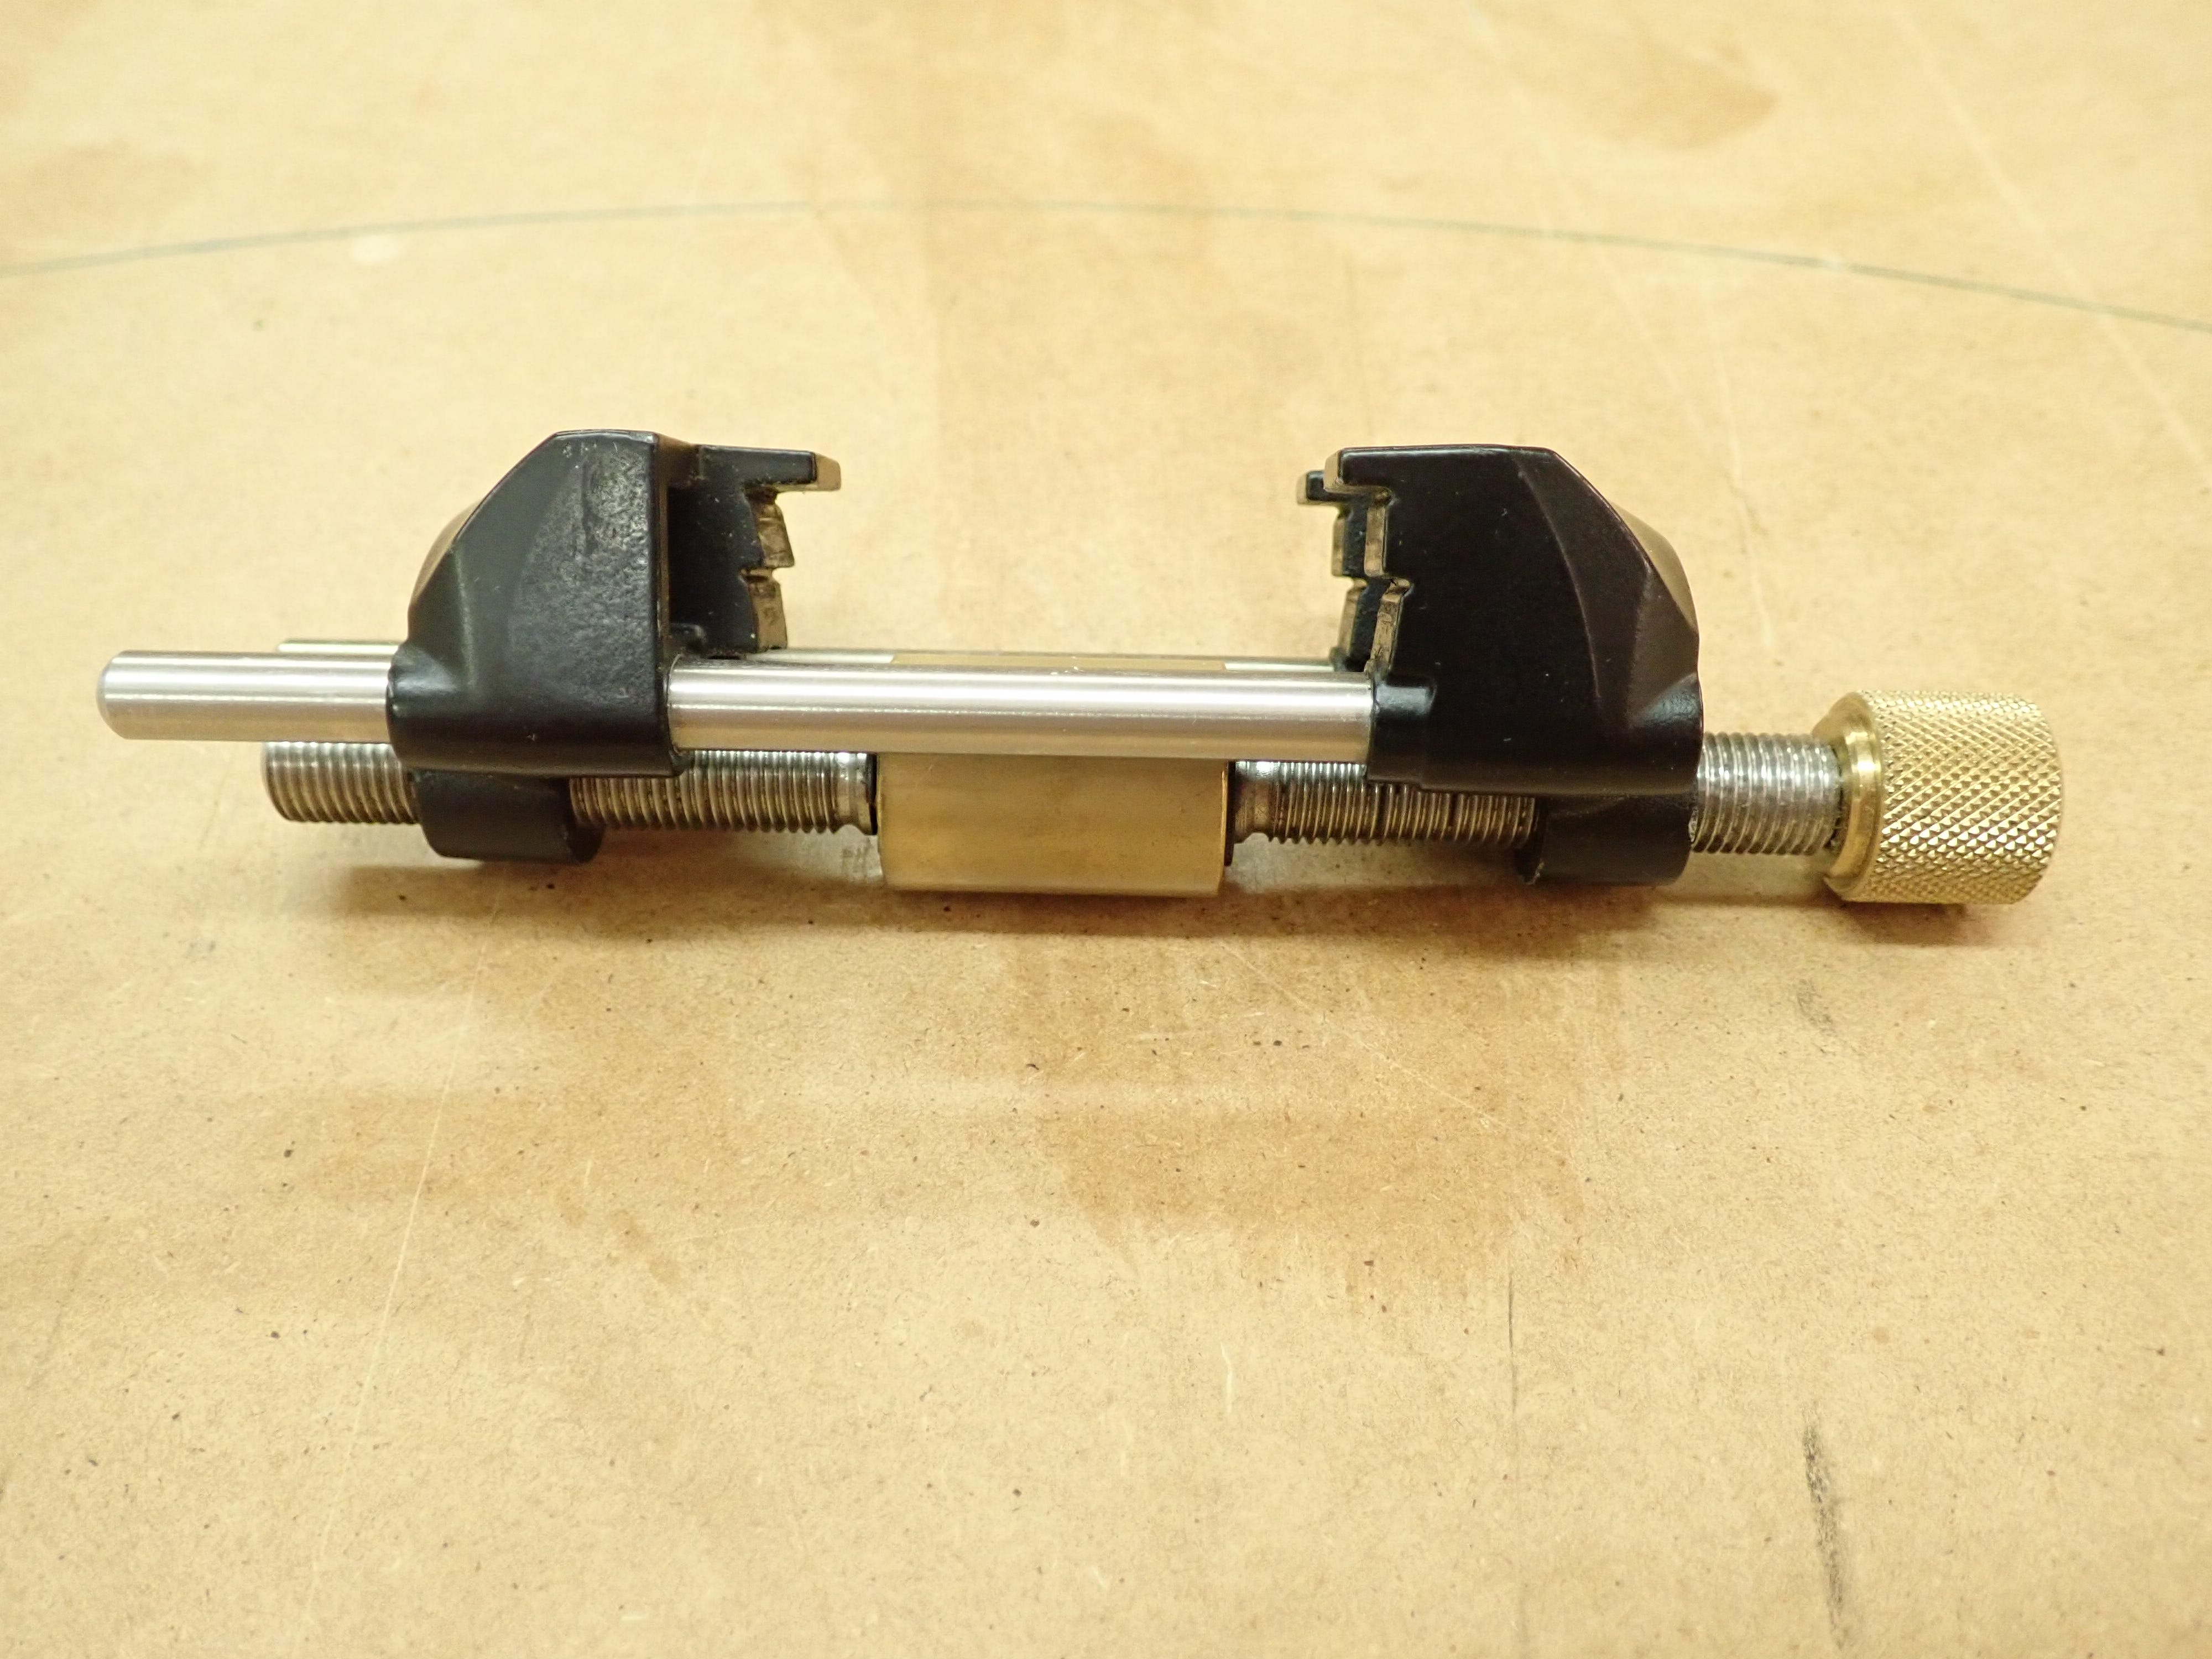
The gist of it is that you have to unscrew the knurled bronze nut on the end of the threaded rod in order to get all the pieces apart. In theory you should be able to do this with a pair of big, flat screwdrivers …
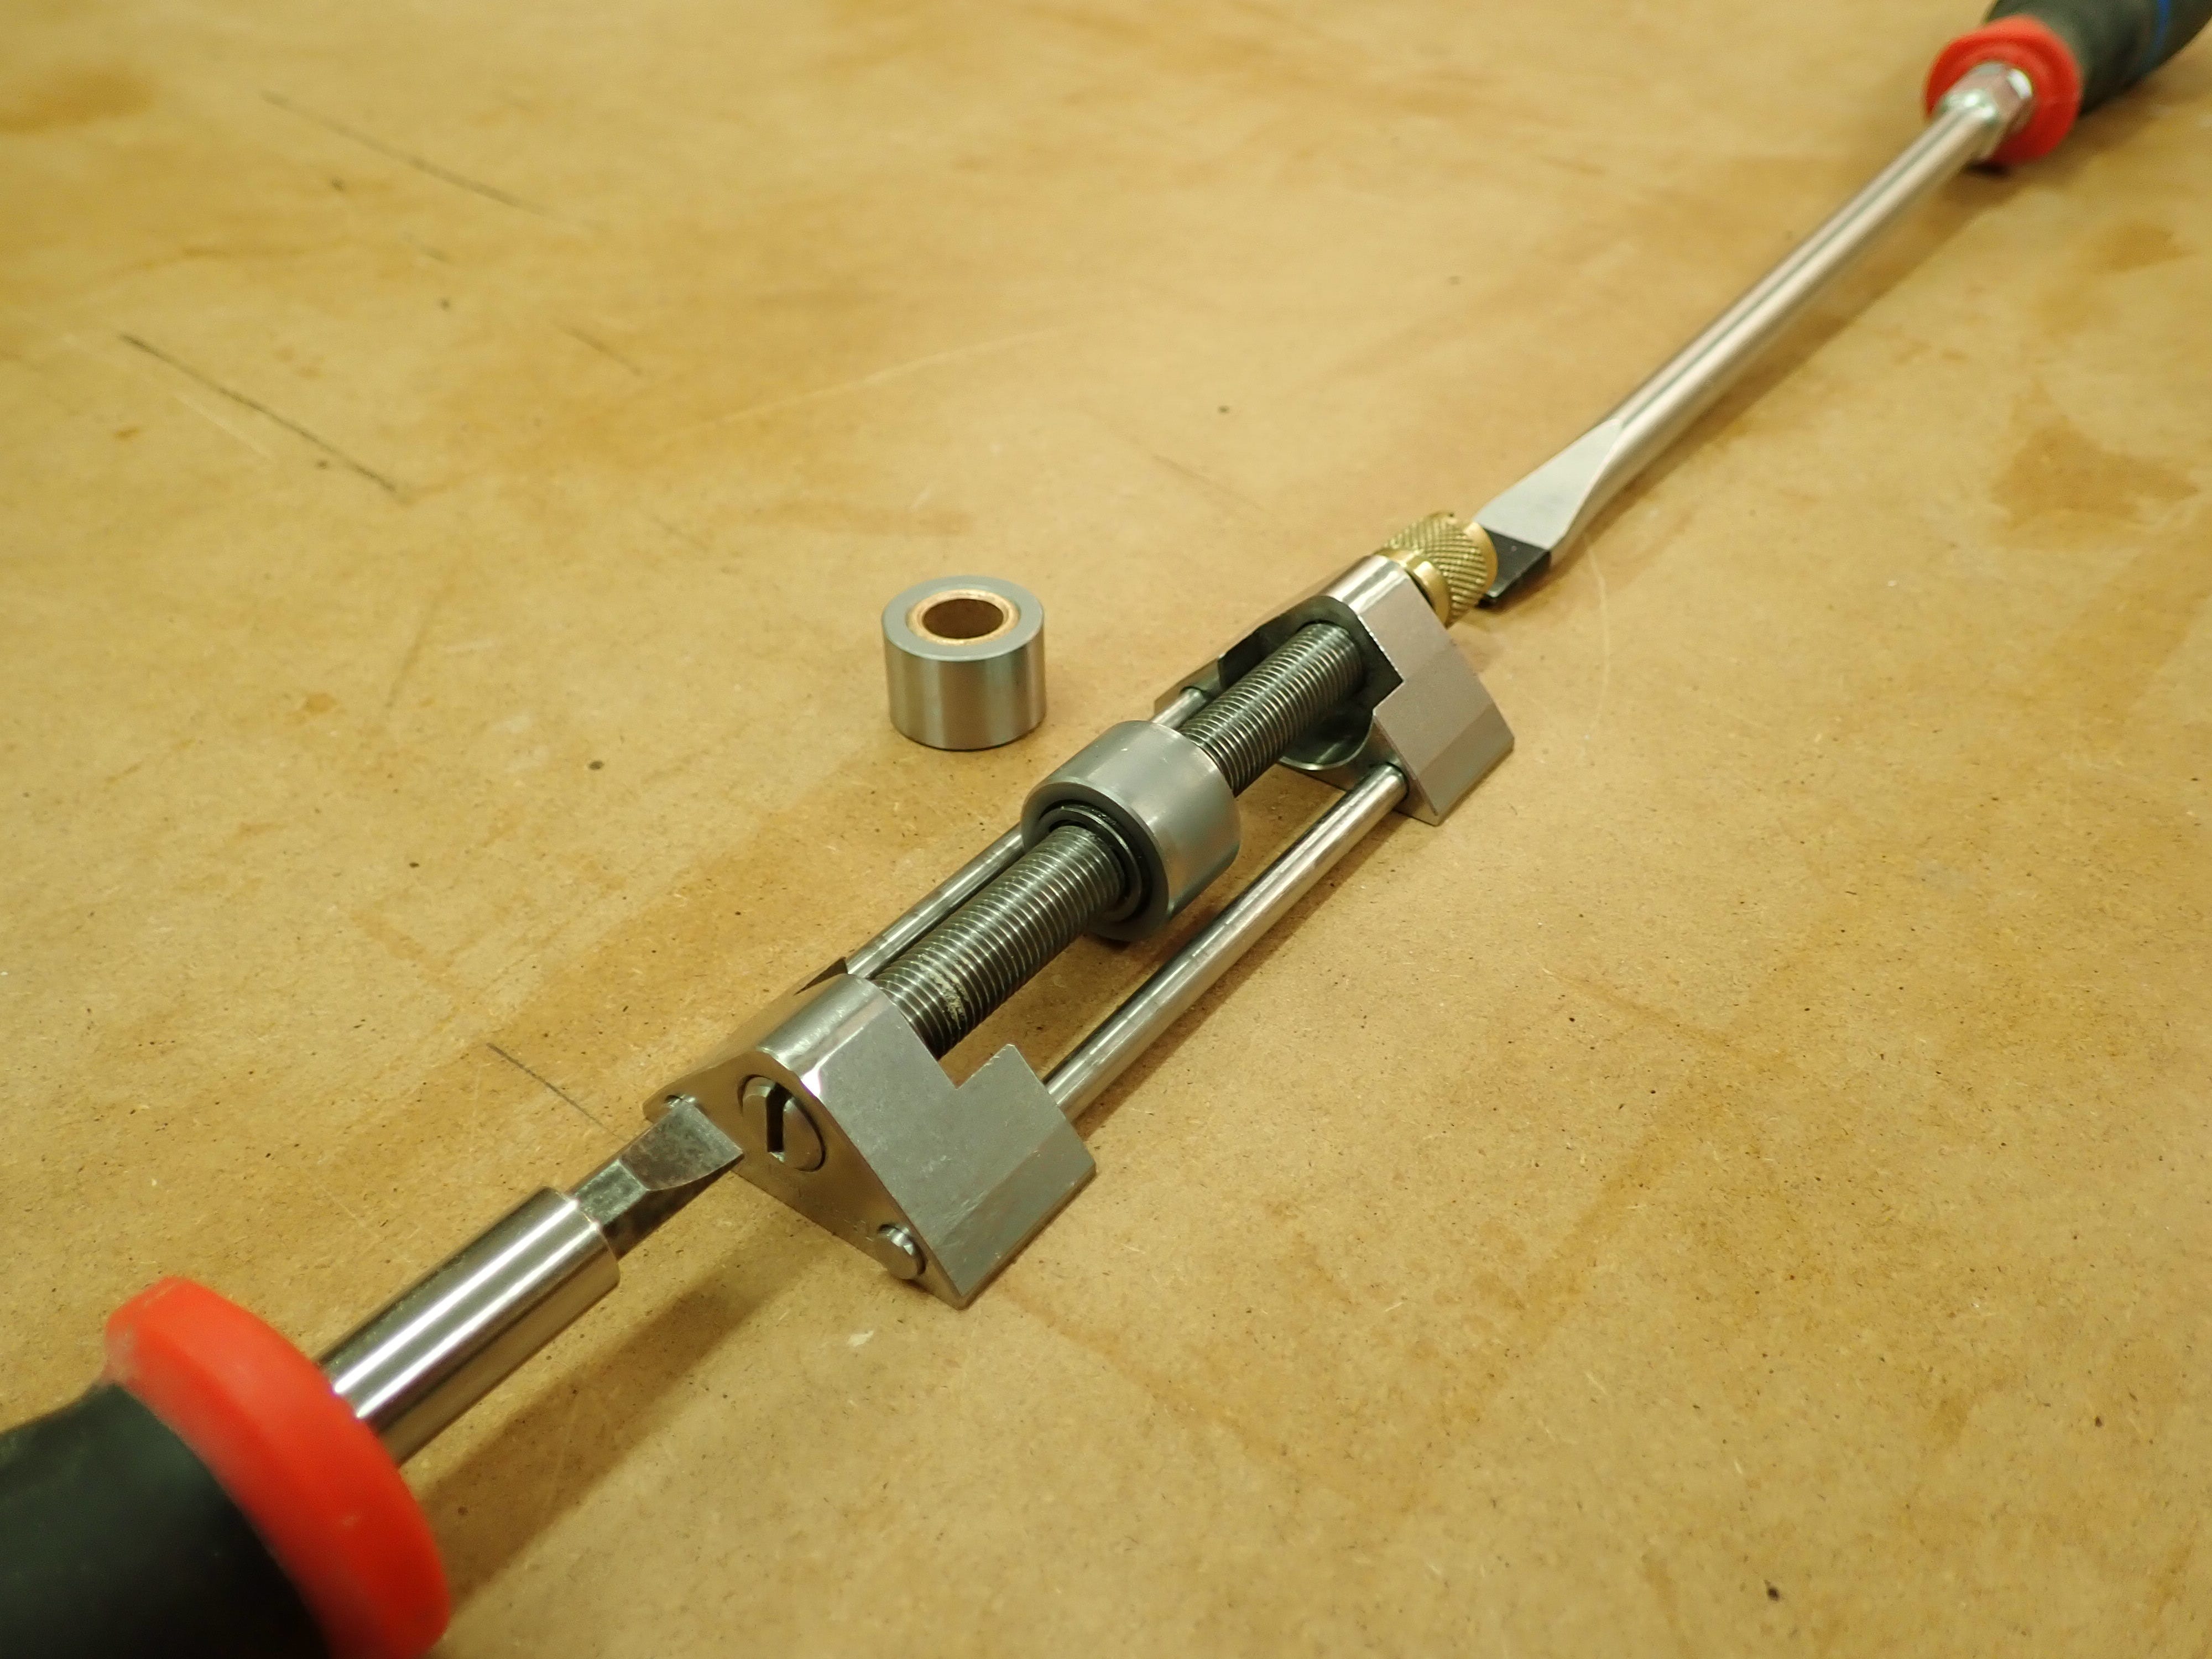
… but in real life this set-up is too wobbly. Instead I did it like this:
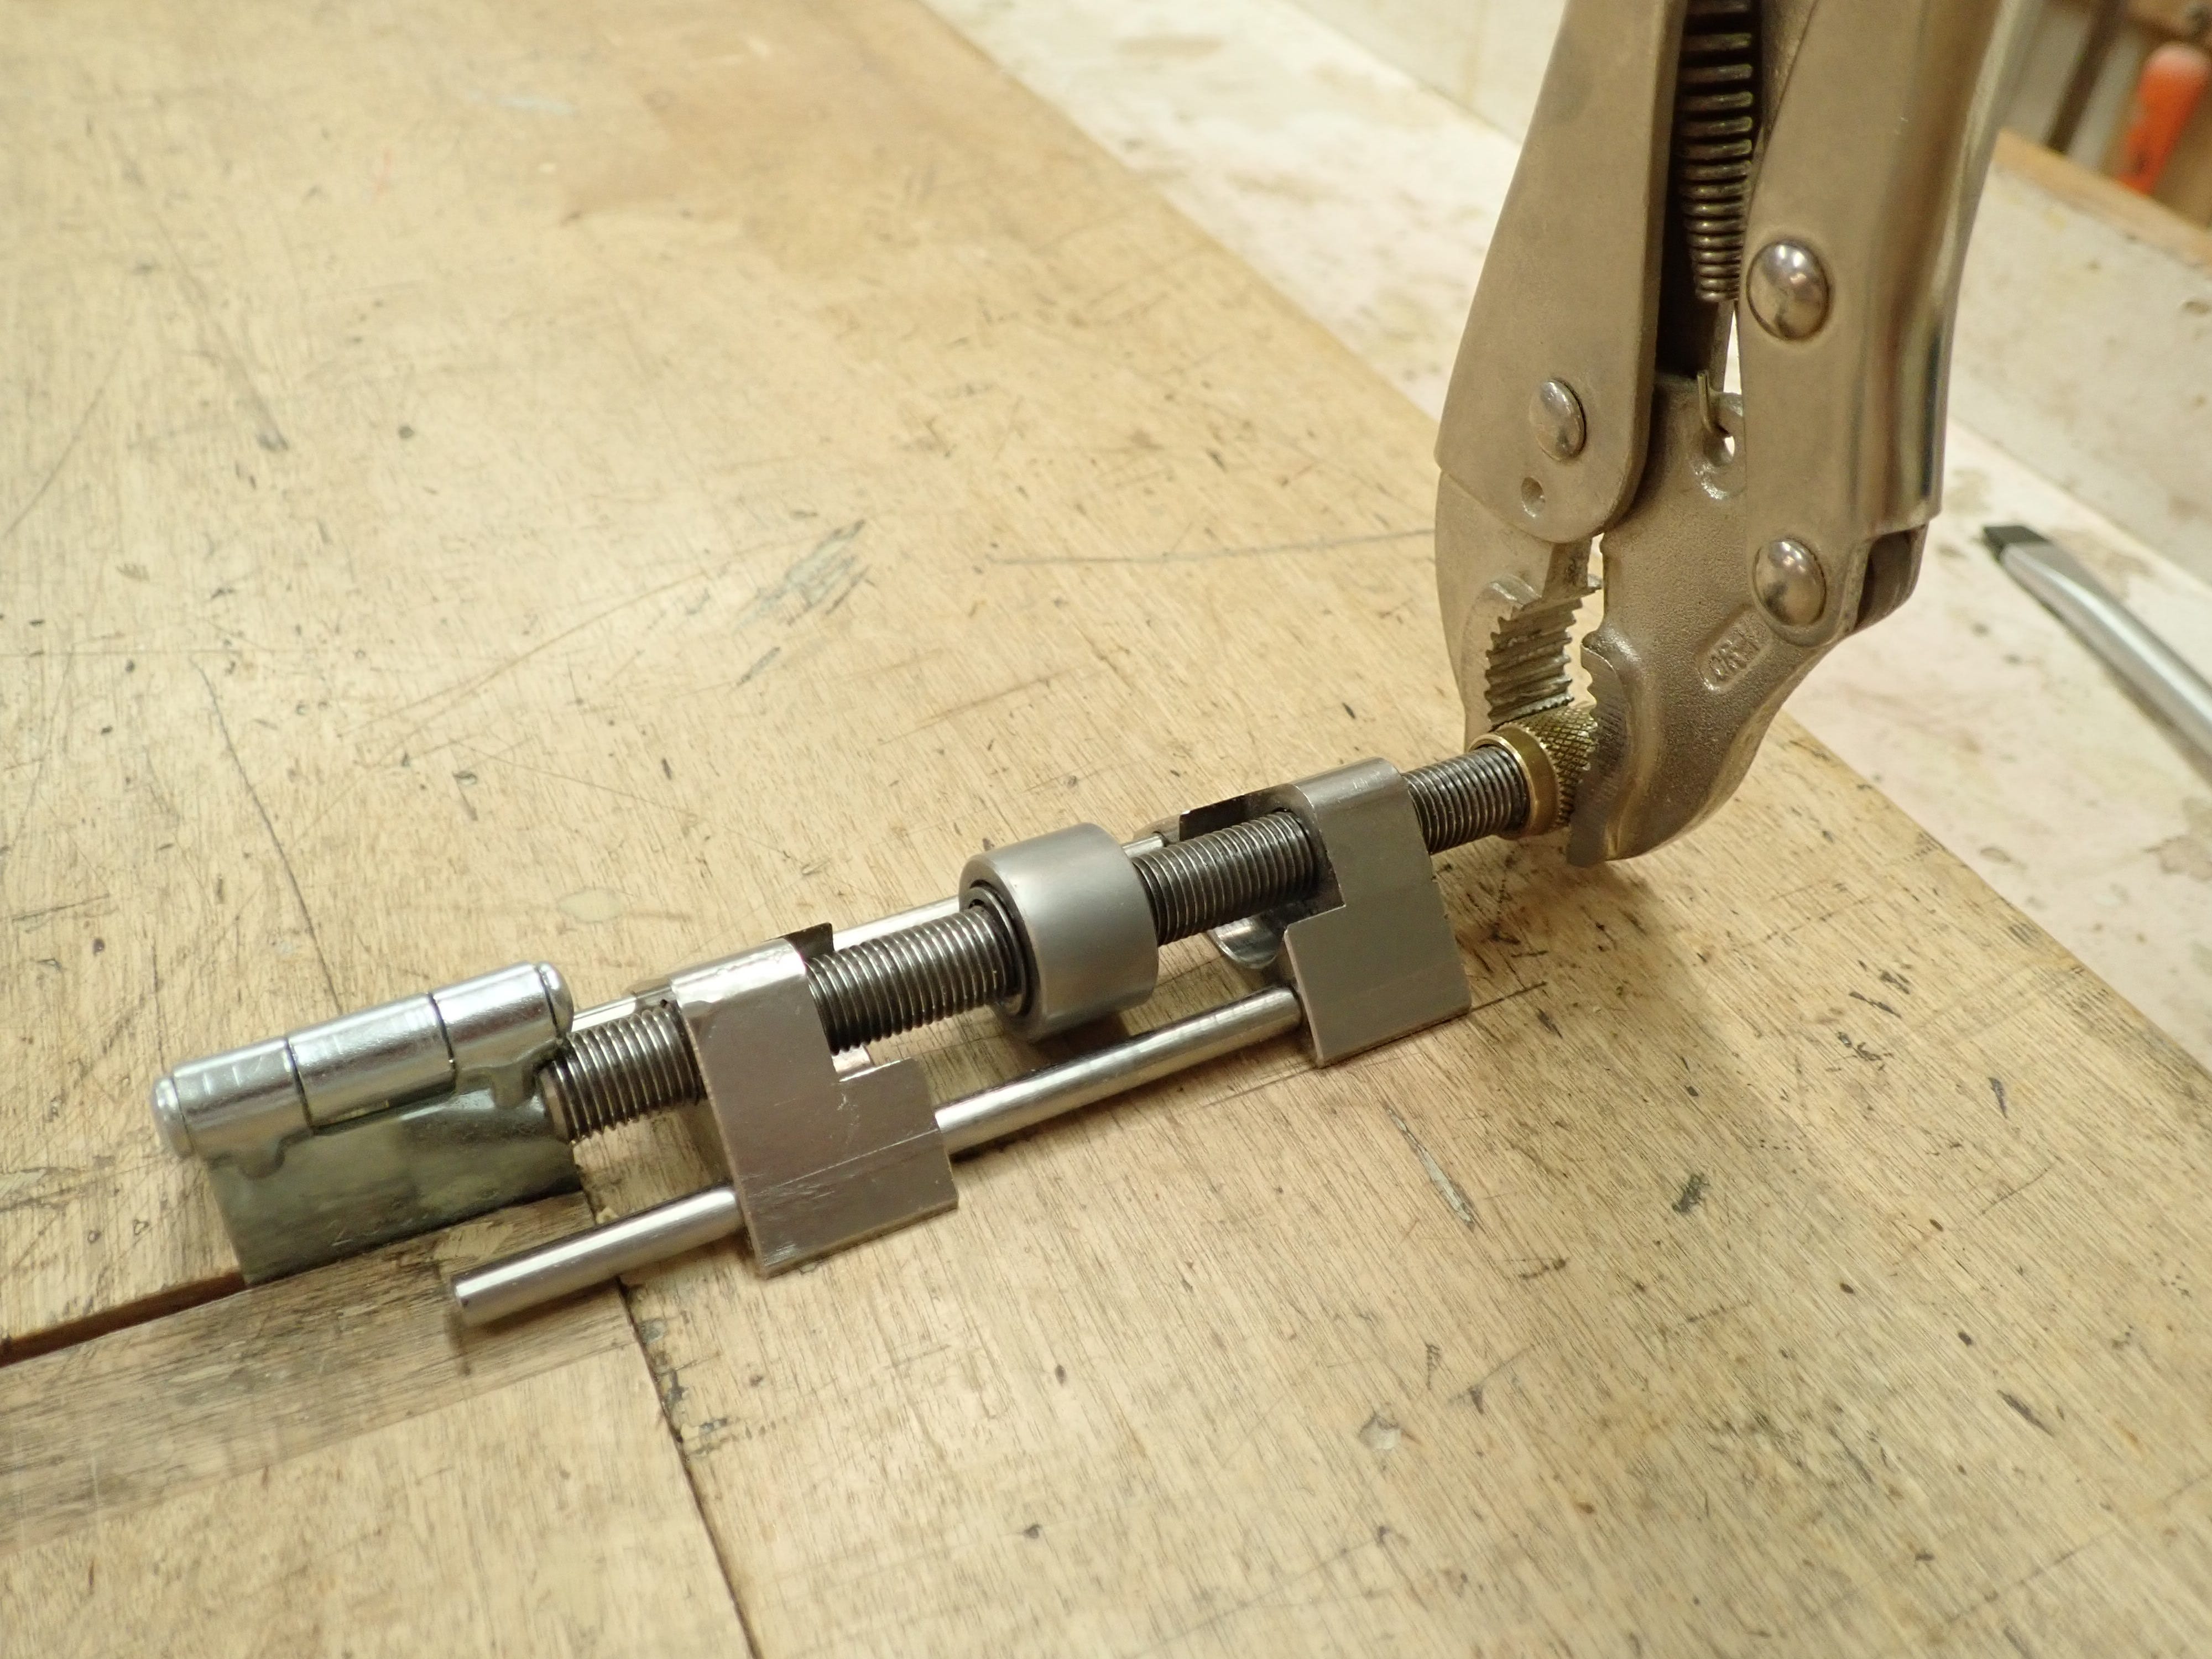
Bear in mind that the bronze nut is left-hand (reverse) threaded! Once you get it loose the rest is a walk in the park; even the circlips holding the roller in place are easy to get off and on again. I won’t go into details.
So now I have two L-N honing guides, both with fresh, tight-fitting rollers.
The Lie-Nielsen honing guide retails at $ 150 which is not to be sneezed at. Lately, Veritas have come up with their own version of the side-clamping honing guide, costing about $ 50.
It’s well made, though not as thoroughly excellent as L-N’s, and has two clamping positions: high and low. This adds a bit of versatility (short blades).
I’ve just bought it quite recently so I don’t have a lot of experience with it, but from what I can tell it works well and would be the best value for money deal.
***
Afterthought: Quite a few of the craftsmen and colleagues who have visited my shop and been shown around have commented on the effort I’ve put into my honing set-up. Usually along the lines of “It’s very nice but it seems a lot of work; I just use … “ After having read this post (and perhaps some of my previous ones touching on the same subject) you might be inclined to agree. You’d not be wrong: I have put a bit of effort into my tool sharpening regime.
The reason is very simple: Sharp steel is the sine qua non of woodworking. Honing was one of the first things we were taught to do at trade school. Without sharp cutting edges your hand tools are purely ornamental. The ability to sharpen tools is in effect the skill that distinguishes the woodworkers from the carpenters. They are limited to power tools with disposable blades. Most of them have an old plane and some rusty chisels rattling around somewhere, but they are unable to maintain or use them (there are of course exceptions).
When they visit my shop and see the possibilities offered by sharp hand tools they sometimes get enthusiastic and ask if I would be willing to sharpen their blunt and mistreated edge tools. I decline but instead offer to teach them how to sharpen and maintain their own tools — free of charge. Then they ask what that would involve and I explain that they would have to invest in two or three honing stones, a honing guide and a dedicated, little box to keep the stuff in. When I tell them that they would have to set aside a couple of hours to learn the basics, their enthusiasm soon wanes. They’re very busy. Fair enough.
On the other end of the spectrum (I deliberately use that term here) we find the honing wankers. You might stumble across them on YouTube; the guys who do not seem to ever make much out of wood, but who are fanatically interested in honing excellence. More often than not this involves very expensive tool steel, hand made by 17’th generation Japanese master, ditto water stones and vast amounts of arcane knowledge. They’re clearly superior. Fair enough.
To each his own.
Me? I used to think I was clever, but now I doubt that. I enjoy making steel very, very sharp and then cutting wood with it. I’ve been sawing, cutting, chopping and making whistling shavings for 30 years now and it pleases me every time.
I think I’ve become a wood-planing fool. I don’t mind :-)
Happy New Year!
***
Thanks Walter, I use a the fancy Veritas M2 and water stones(I agree with the amount of fuss they require) but I have a cheap side clamping guide that I use to grind my primary bevel on Sandpaperer. (I don't own a grinder)
I chuckled out loud when you mentioned the sharpening wankers. When sharpening becomes the hobby instead of woodworking, it can get a bit silly. I do love my sharpening setup and the sharpening process though, so I do fall further towards the wanker side of the spectrum.
I didn’t find it somewhat interesting that you went from the Veritas set up to that simpler aluminum honing guide. Oddly enough, I started with a honing guide very similar to that one, and then migrated over to the Veritas!