

Veritas Custom planes

[ soundtrack : Le Mystère des Voix Bulgares - Volume 1 ]
I have 2 Veritas Custom planes: a # 5½ and a # 4½. I’ve only had them for a year or two, so I have only a superficial experience using them, but thought I’d try to put into words my impressions so far.
I’ve fitted them both with a 55° frog with the idea of using them for ornery, curly hardwoods that benefit from a cut approaching scraping. So, it’s quite heavy pushing, but it’s not like I use them to remove any great amount of wood; they are smoothing planes for difficult grain. The 5½ is set to take a medium-to-light cut, the 4½ to just kiss the wood. I give the irons a 32,5° cutting bevel and a 2,5° back bevel, though this may change as my preferences develop.

Firstly — I’ll make no excuses: I like the tools Veritas make and their PM-V11 tool steel. I find their devotion to blending innovation with tradition very appealing, have bought many of their tools (mostly planes) and I am very pleased with most of them. Excellent build quality, good design and good value for money (No, I’m not sponsored, but will consider propositions :-)
Secondly — Veritas’ Custom line of planes seeks to introduce an element of modularity to the world of woodworking planes. You ‘compose’ your own plane by choosing body (size), frog (angle : 40°,45° & 55°), blade (steel type : O1 or PM-V11), tote (size & style) & knob (style) when you order. You can also order a ‘slow adjuster’ — a more finely threaded ‘Norris-style adjustment mechanism’. The steeper the frog, the more finicky the setting. Good ideas!

I like the look of these planes. Is that important? Of course it is!
I like the ‘wave’ profile of the body and the way the sole’s thickness increases as it rises to seat the frog. These plane bodies are shapely — I enjoy that.

As for the ‘Norris-style adjustment’ … I prefer the Stanley-type mechanism where the lateral and depth adjustments are separated, but I quickly got used to the Norris way of doing things, so I can live with that.
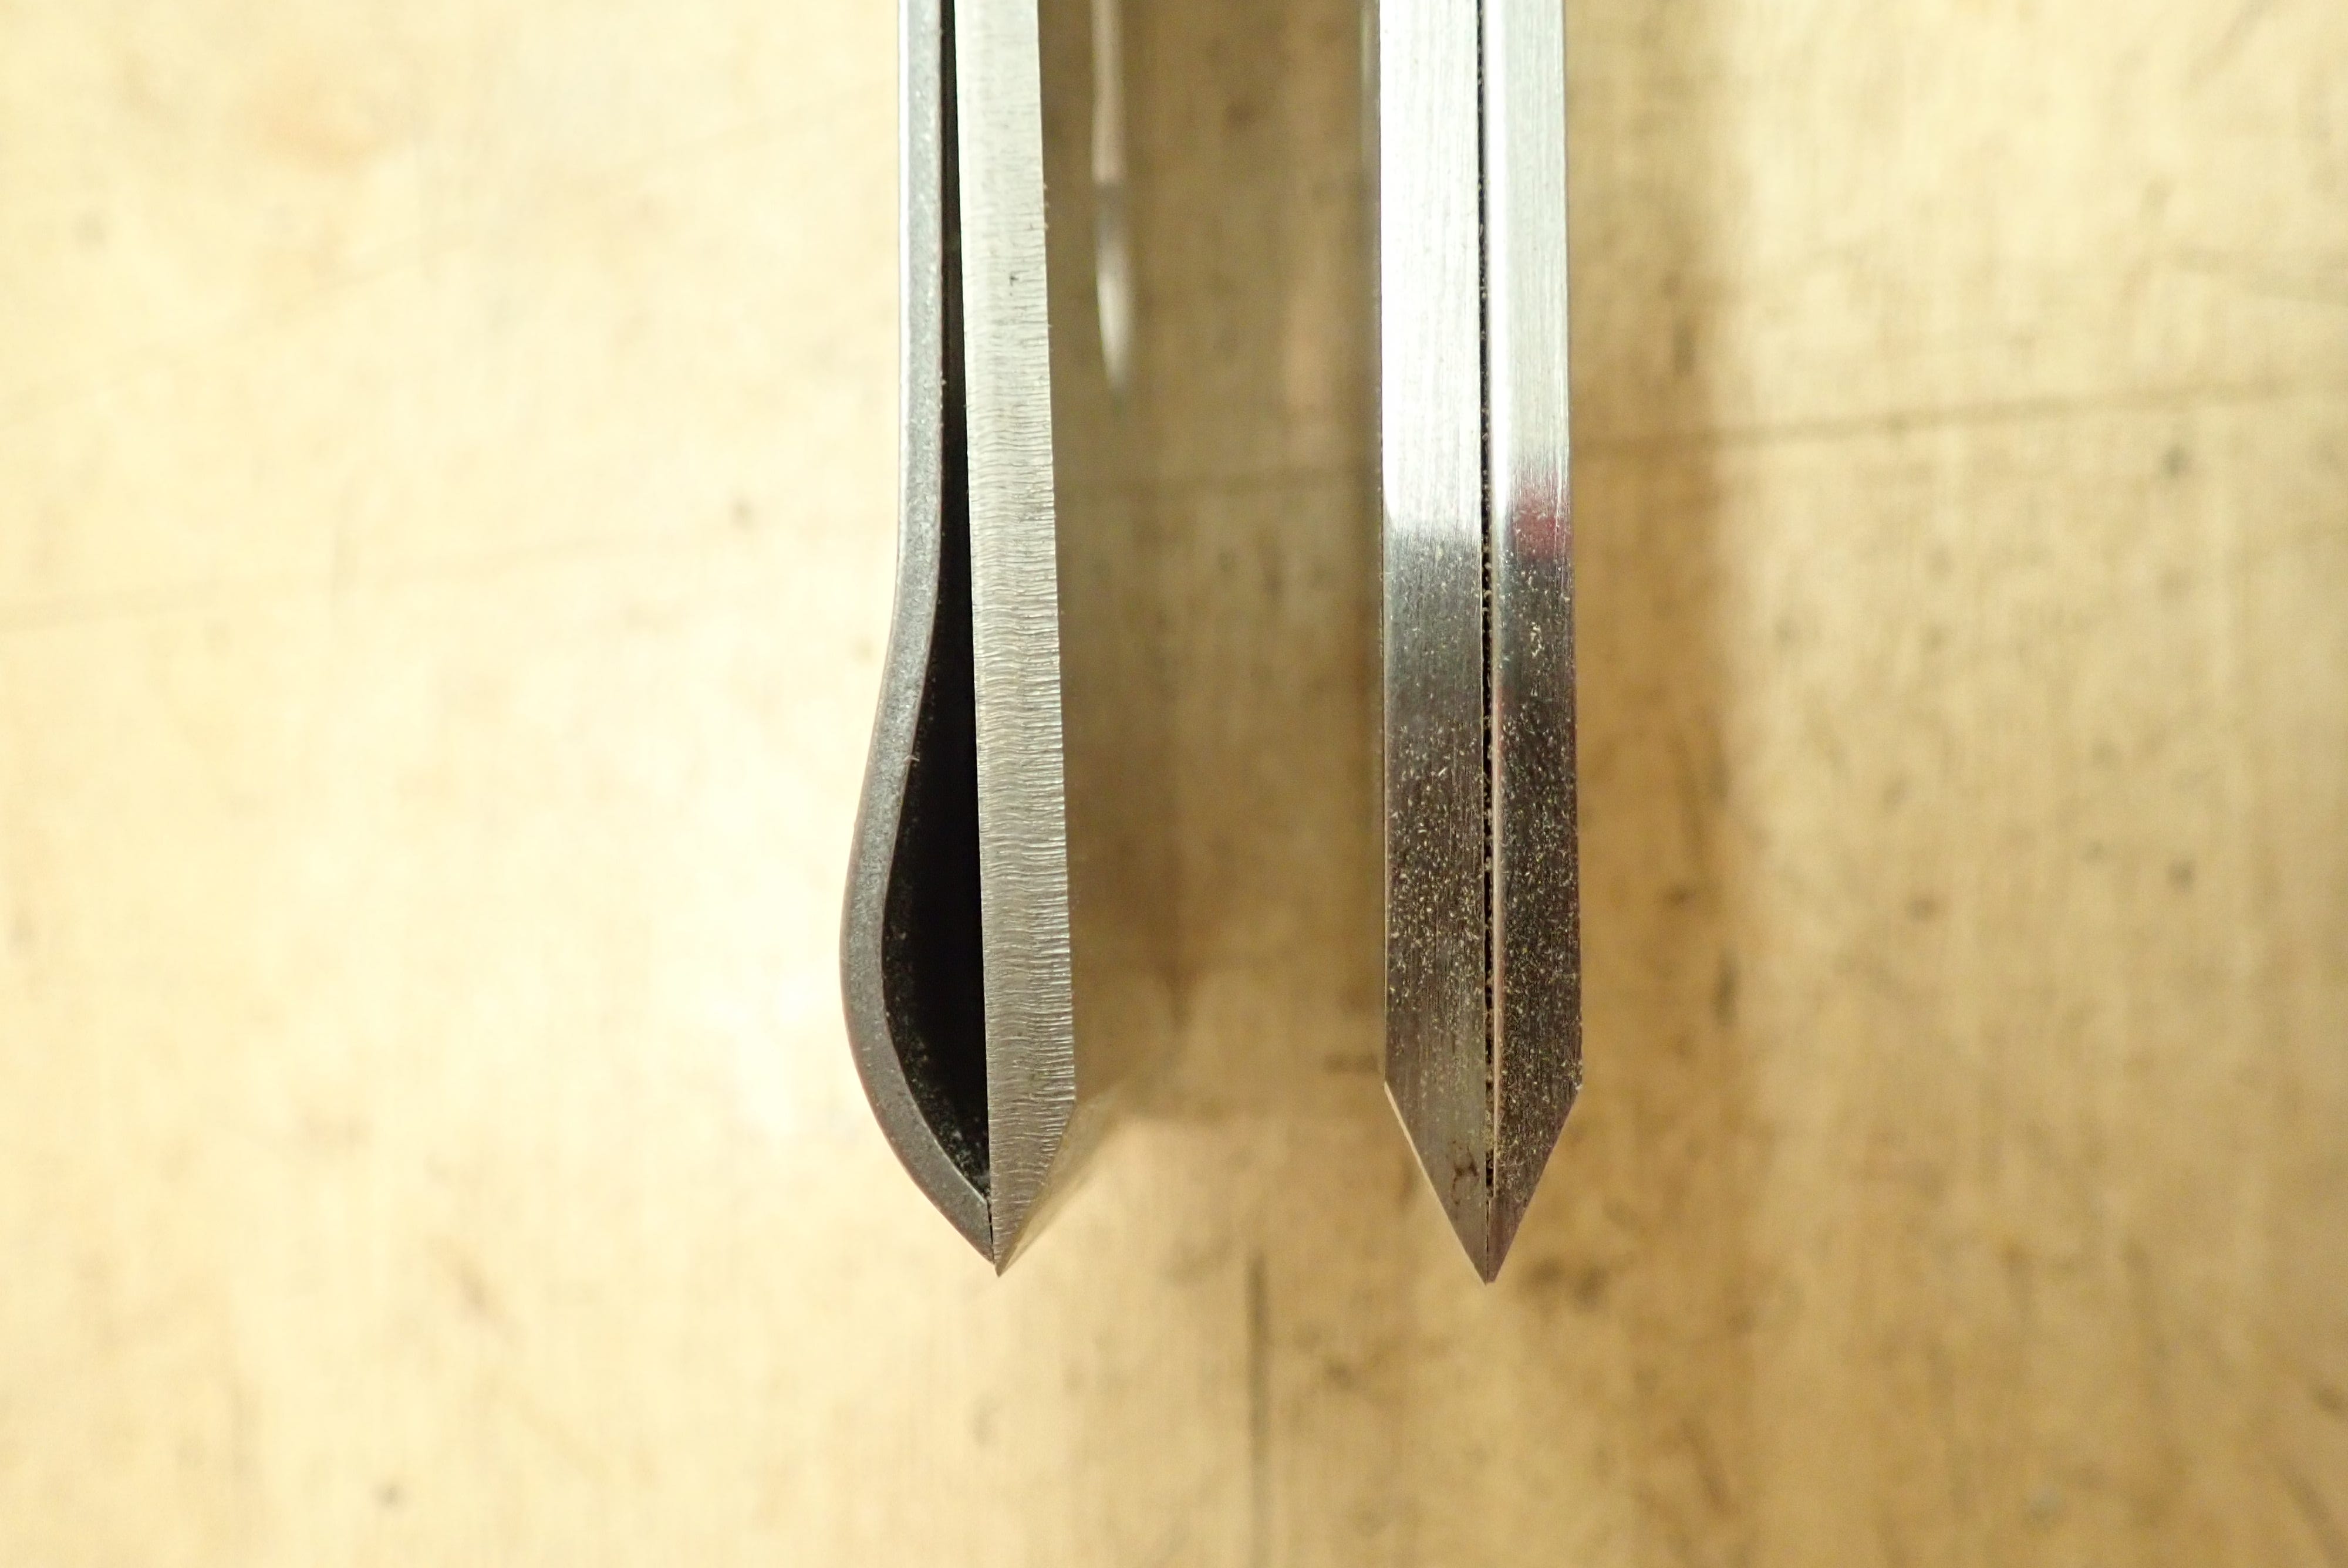
What I do have serious misgivings about is the way the chip breaker is attached to the blade.


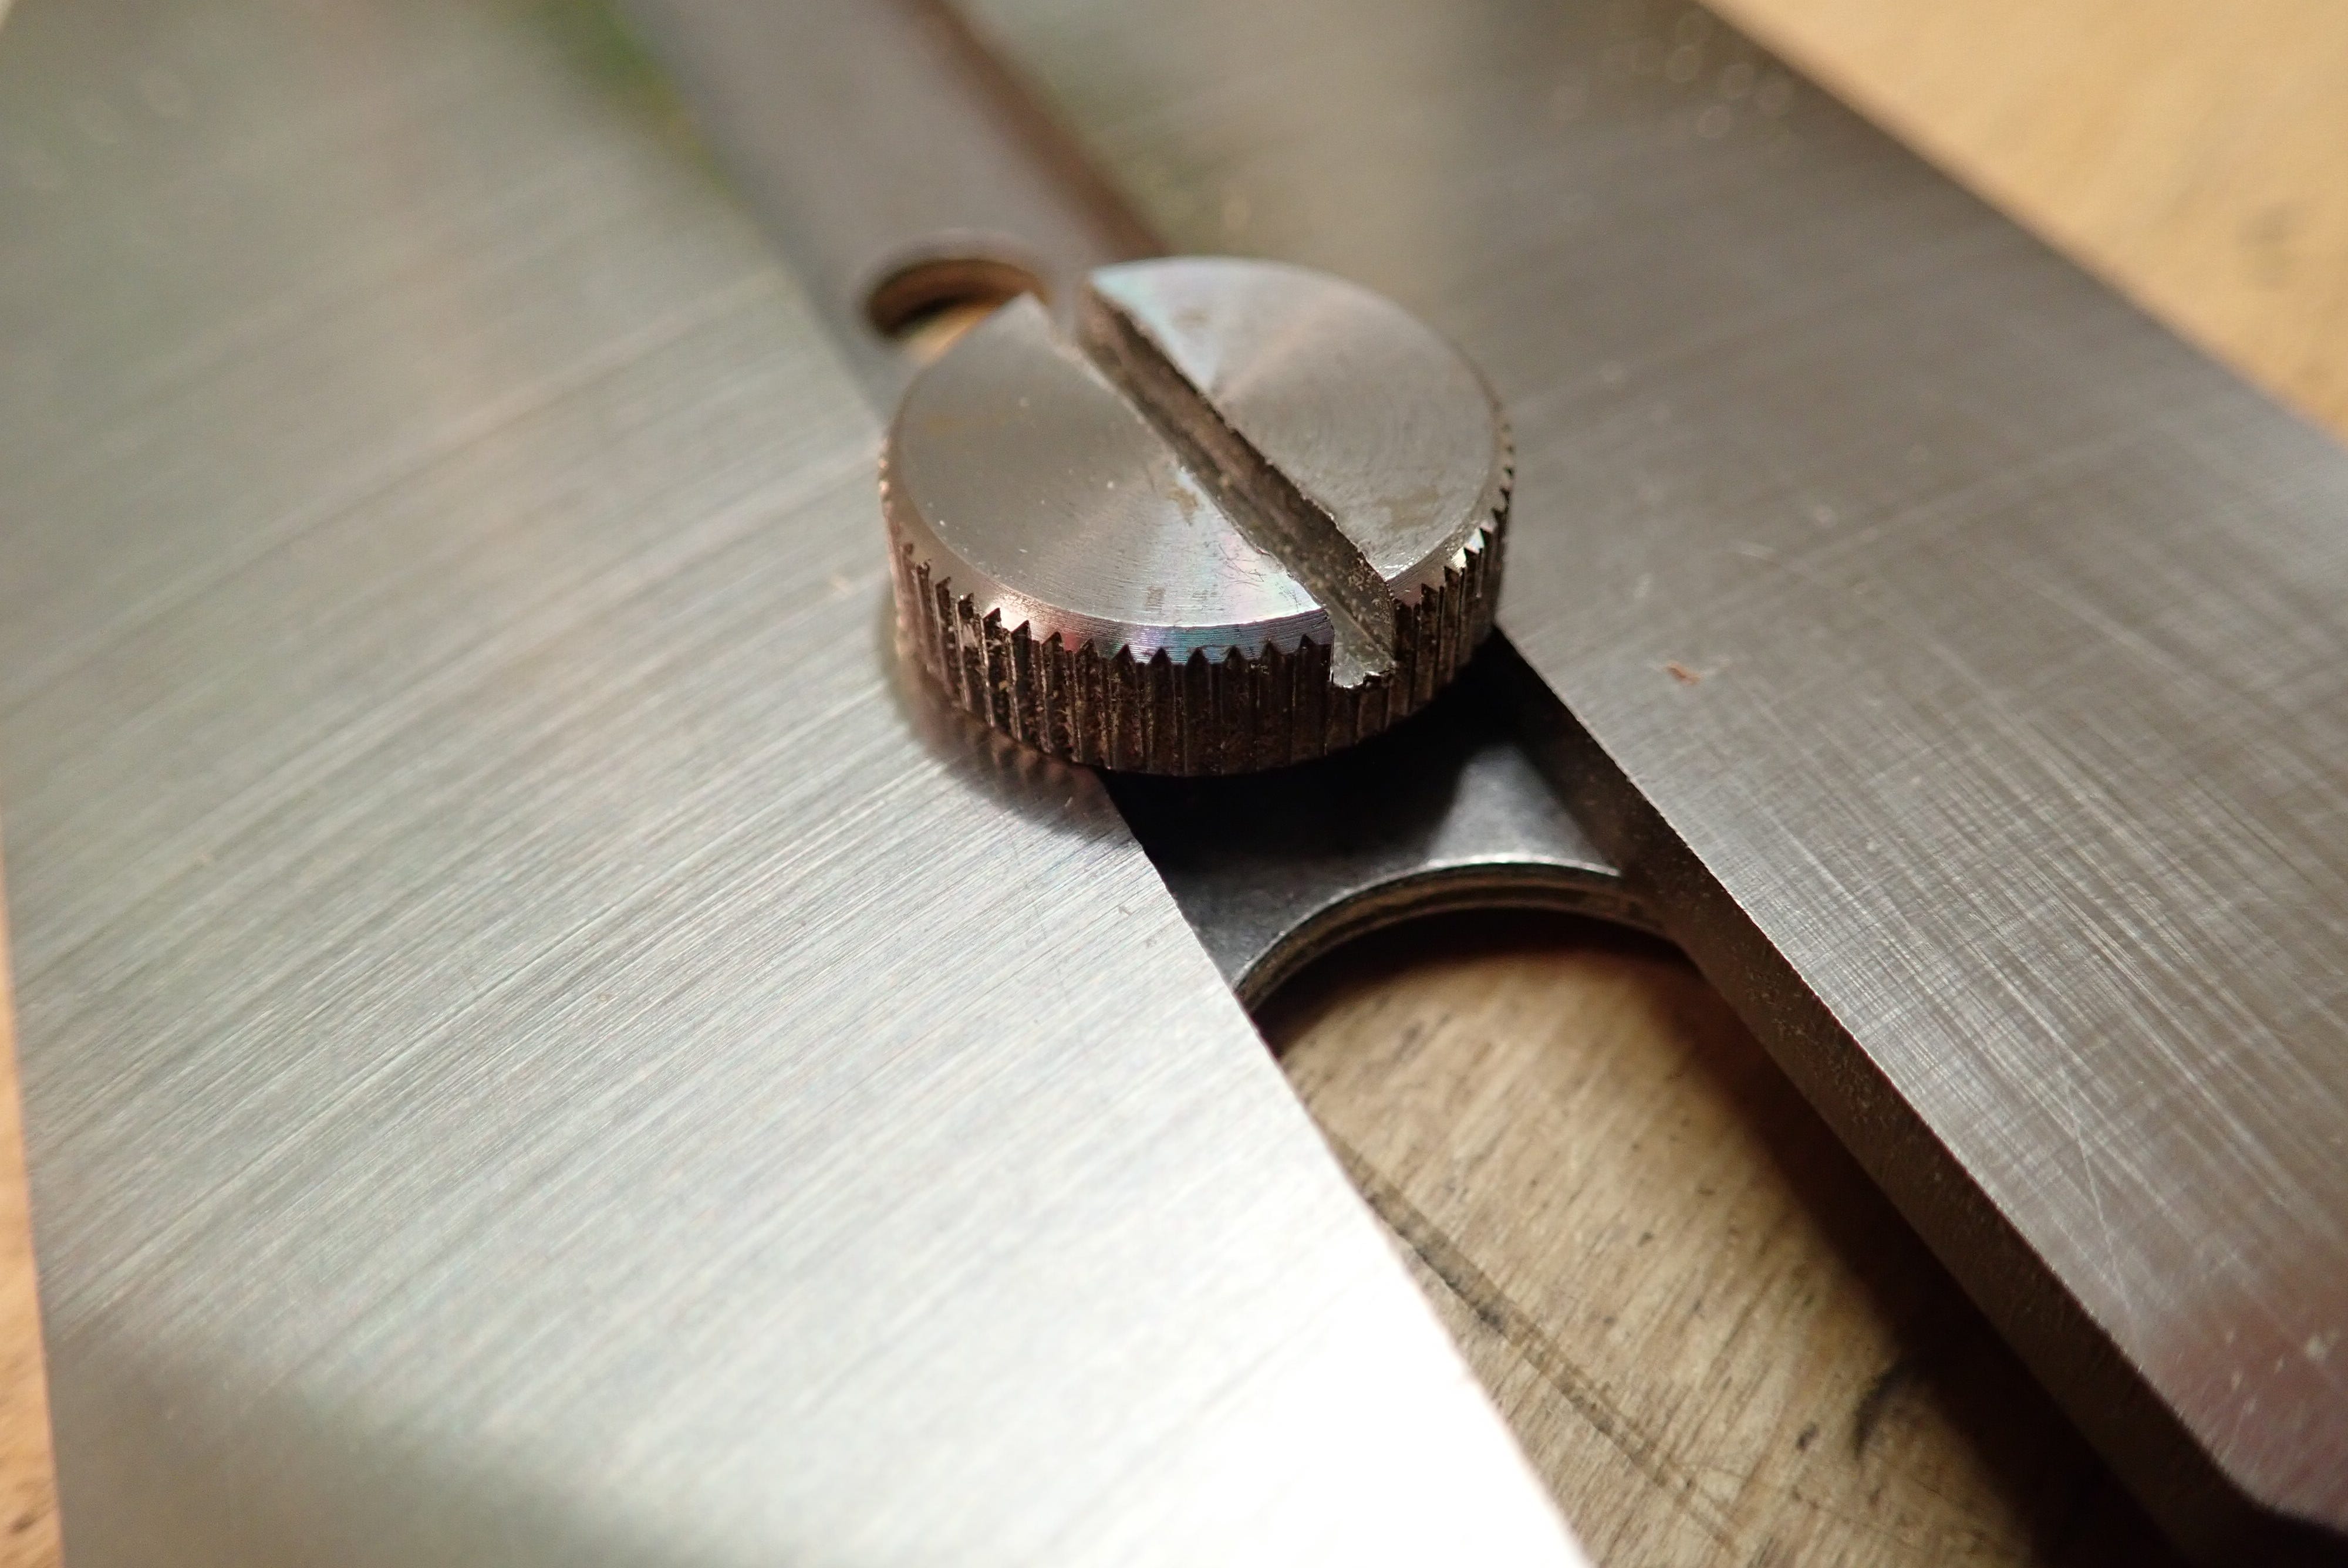
The so-called ‘blade carrier’ with its two miniscule screws is an abomination! So fiddly, complicated and unnecessary! To really cap it off the screws are slotted for 3/32” hexagon, making the rest of the world dependent on bits / tools made to Canadian / US specs. The traditional straight slot screw allowed us to use any flat screwdriver, suitable coin or the plane’s own lever cap to tighten the assembly. What problem did the designers think they were solving with this contraption? Veritas writes in their accompanying .pdf-file:
“The blade carrier is attached to the blade and links the cap iron and the adjuster. This arrangement lets you restore the cap iron without losing its position relative to the cutting edge. Although your plane comes with the blade carrier in the correct location, it will need to be removed and adjusted whenever you sharpen the blade.”
[from Veritas Custom bench plane manual]
WHAT? Was there ever a difficulty positioning the cap iron in relation to the cutting edge of the blade before this ‘improvement’? And you still have to remove it when you sharpen the blade, so the purported benefit is non-existent after all!? Furthermore: What is the “correct location" of the cap iron in relation to the cutting edge? Is that not the decision of the woodworker with regard to the task at hand?
This is what happens when ‘industrial designers’ are indulged. They can easily become infatuated with their own credentialed cleverness and this species of vanity often leads to sub-optimal products. User feedback is essential, if mostly imaginary.
In my opinion this ‘blade carrier’ is a finicky and wholly unnecessary complication added to an otherwise good plane. This particular wheel is already well and truly invented, there’s no need for ‘ingenious’ improvement. Personally I much prefer the solution on Veritas’ older line of planes: a chip-breaker with a springy curve on its lower part.
I prefer this to Lie-Nielsen’s accurately made but ‘dead’ / un-springy cap irons. And the connecting screw should have a knurled circumference, so as to be easy to grip between the fingertips, not smooth and bevelled.

When setting the chip-breaker in relation to the cutting edge on the blade I press the two together in my left hand while tightening the connecting screw just so with the fingers of my right. The springiness in the chip-breaker allows me to move it with the necessary precision before I cinch it tight with a screwdriver. Do other woodworkers do this differently?
The custom planes have an adjustable mouth that is worked by a moveable toe / forefoot. This is tightened by a threaded insert housed in the front knob. I’m in two minds about this … On the one hand I do like an easy way to adjust the mouth according to the type of cut you’re doing — versatility. On the other hand, when I’m working hard and my blood’s up I do grip, twist, pull and push on the poor plane with considerable force and I’ve got the feeling that one day that front knob will come off in my hand. We’ll see. The ‘traditional, medium sized’ rear tote suits my monkeypaws comfortably.
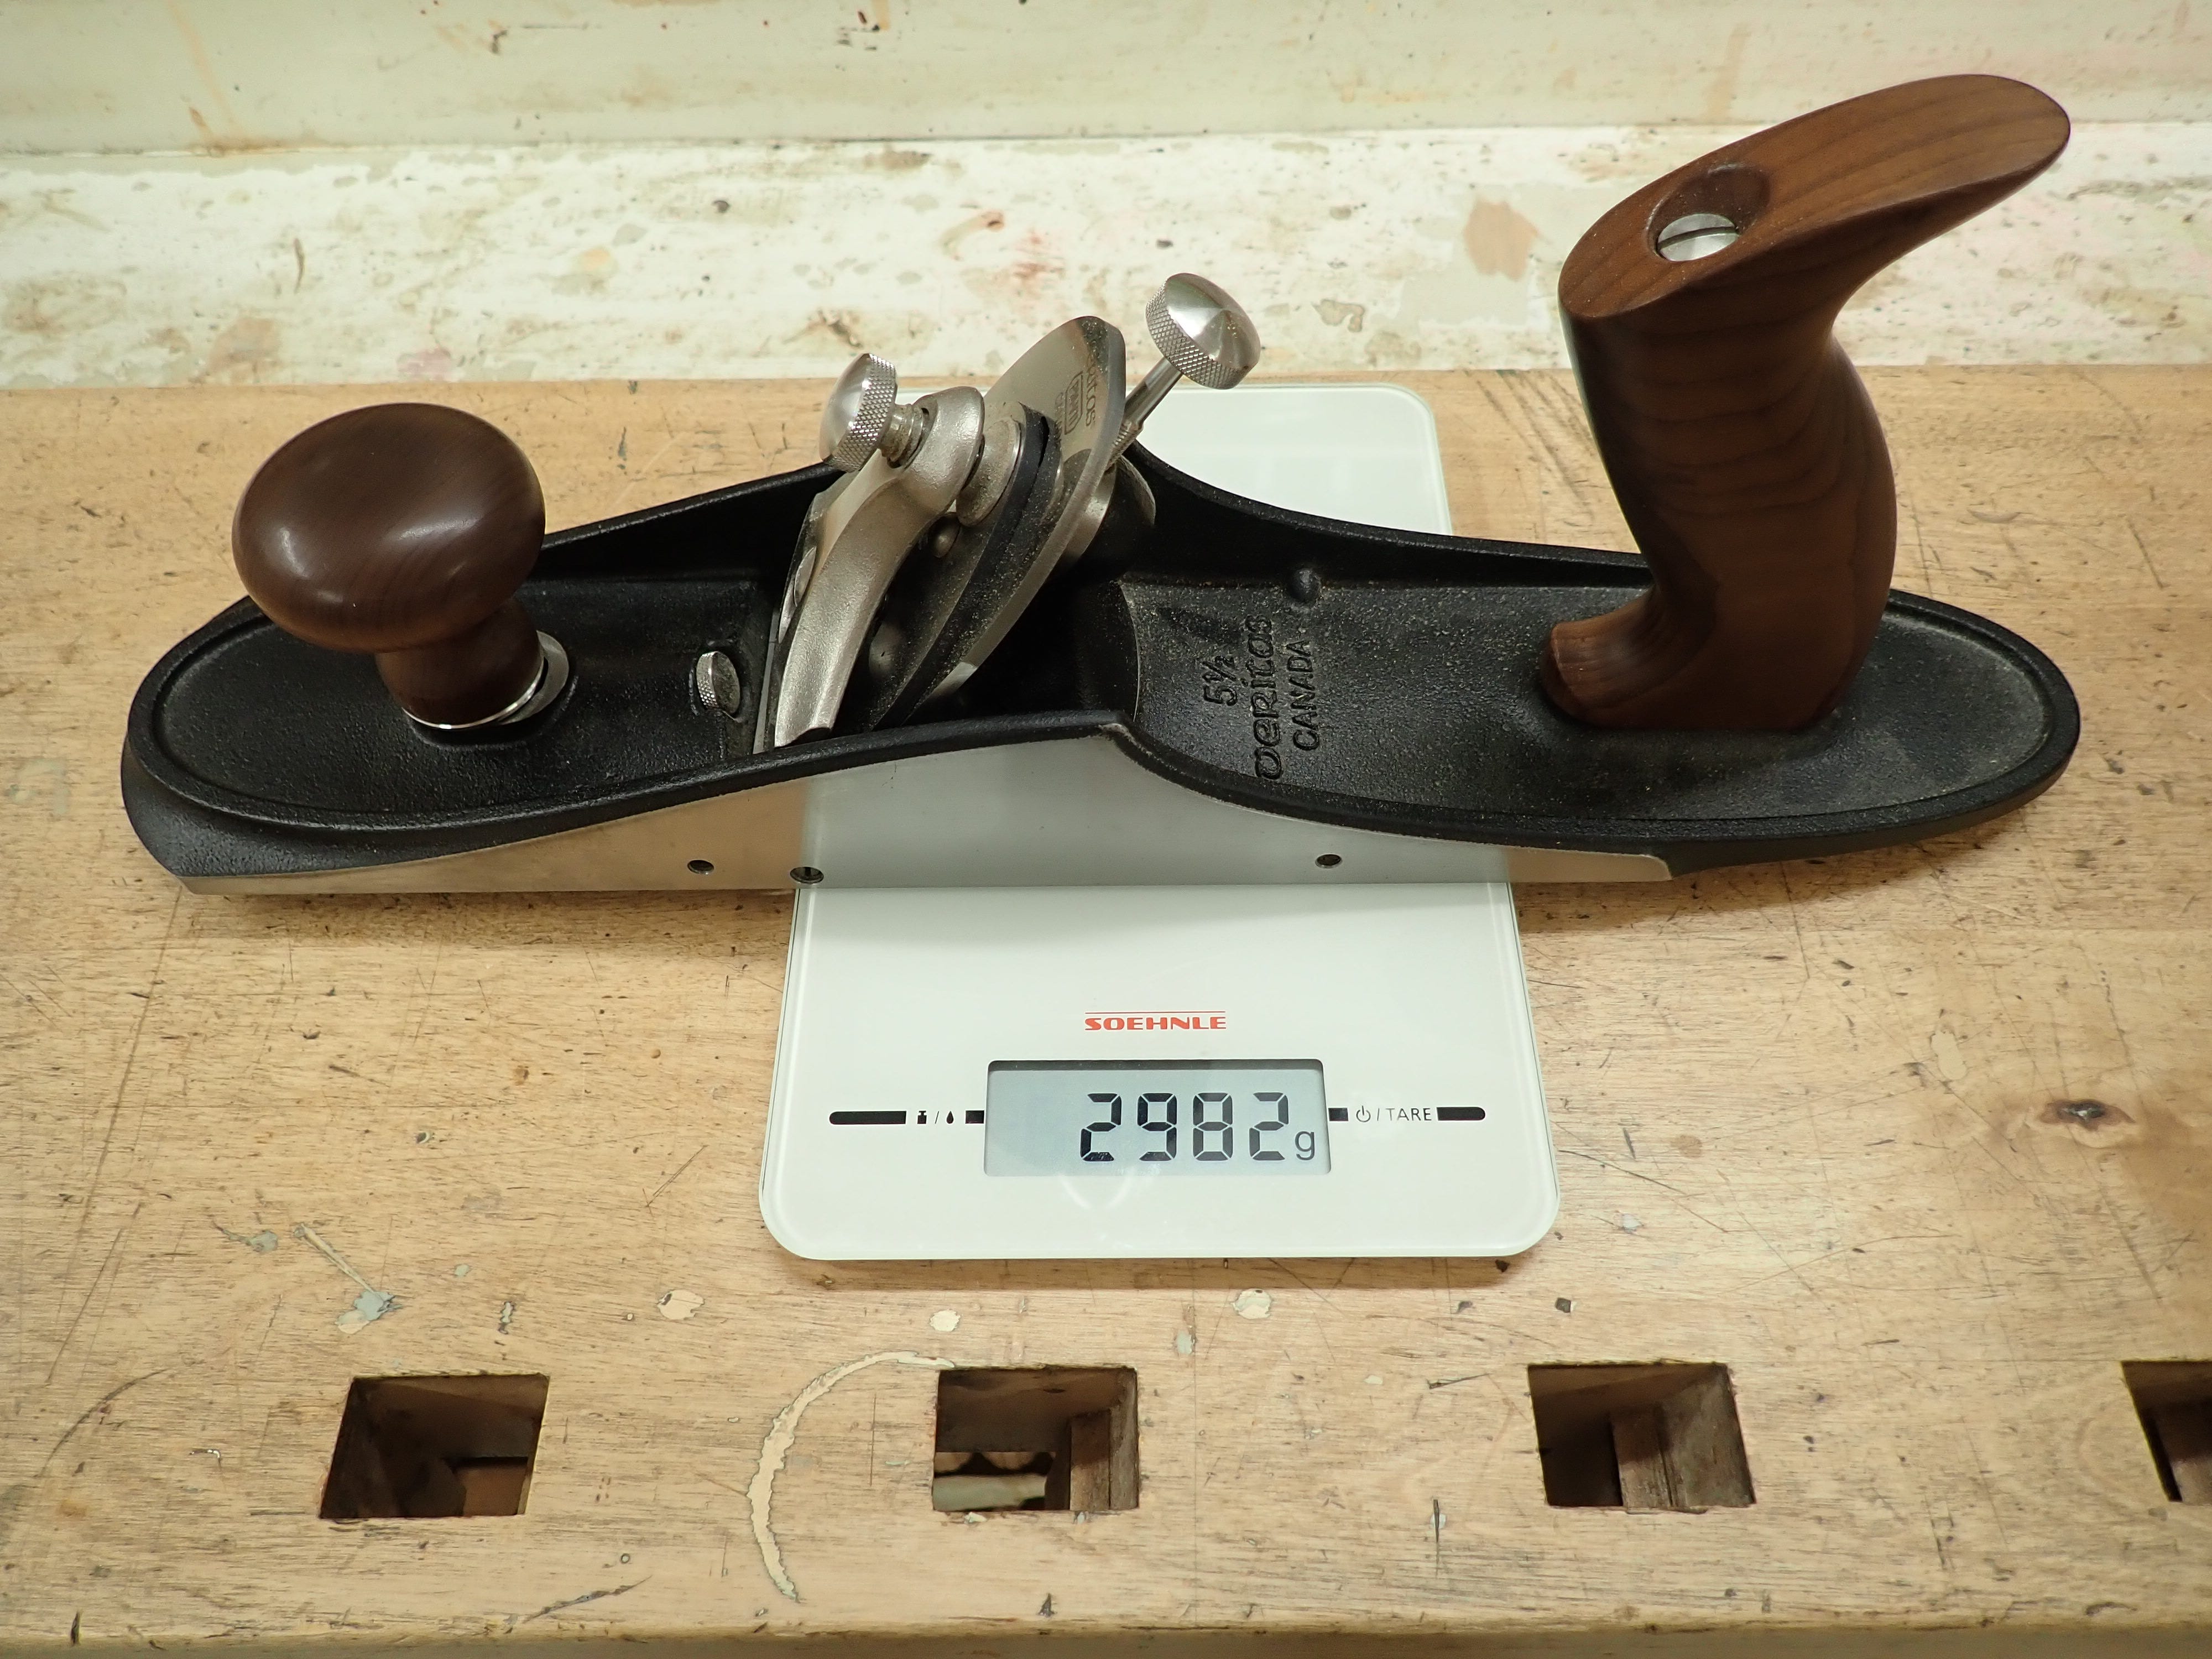
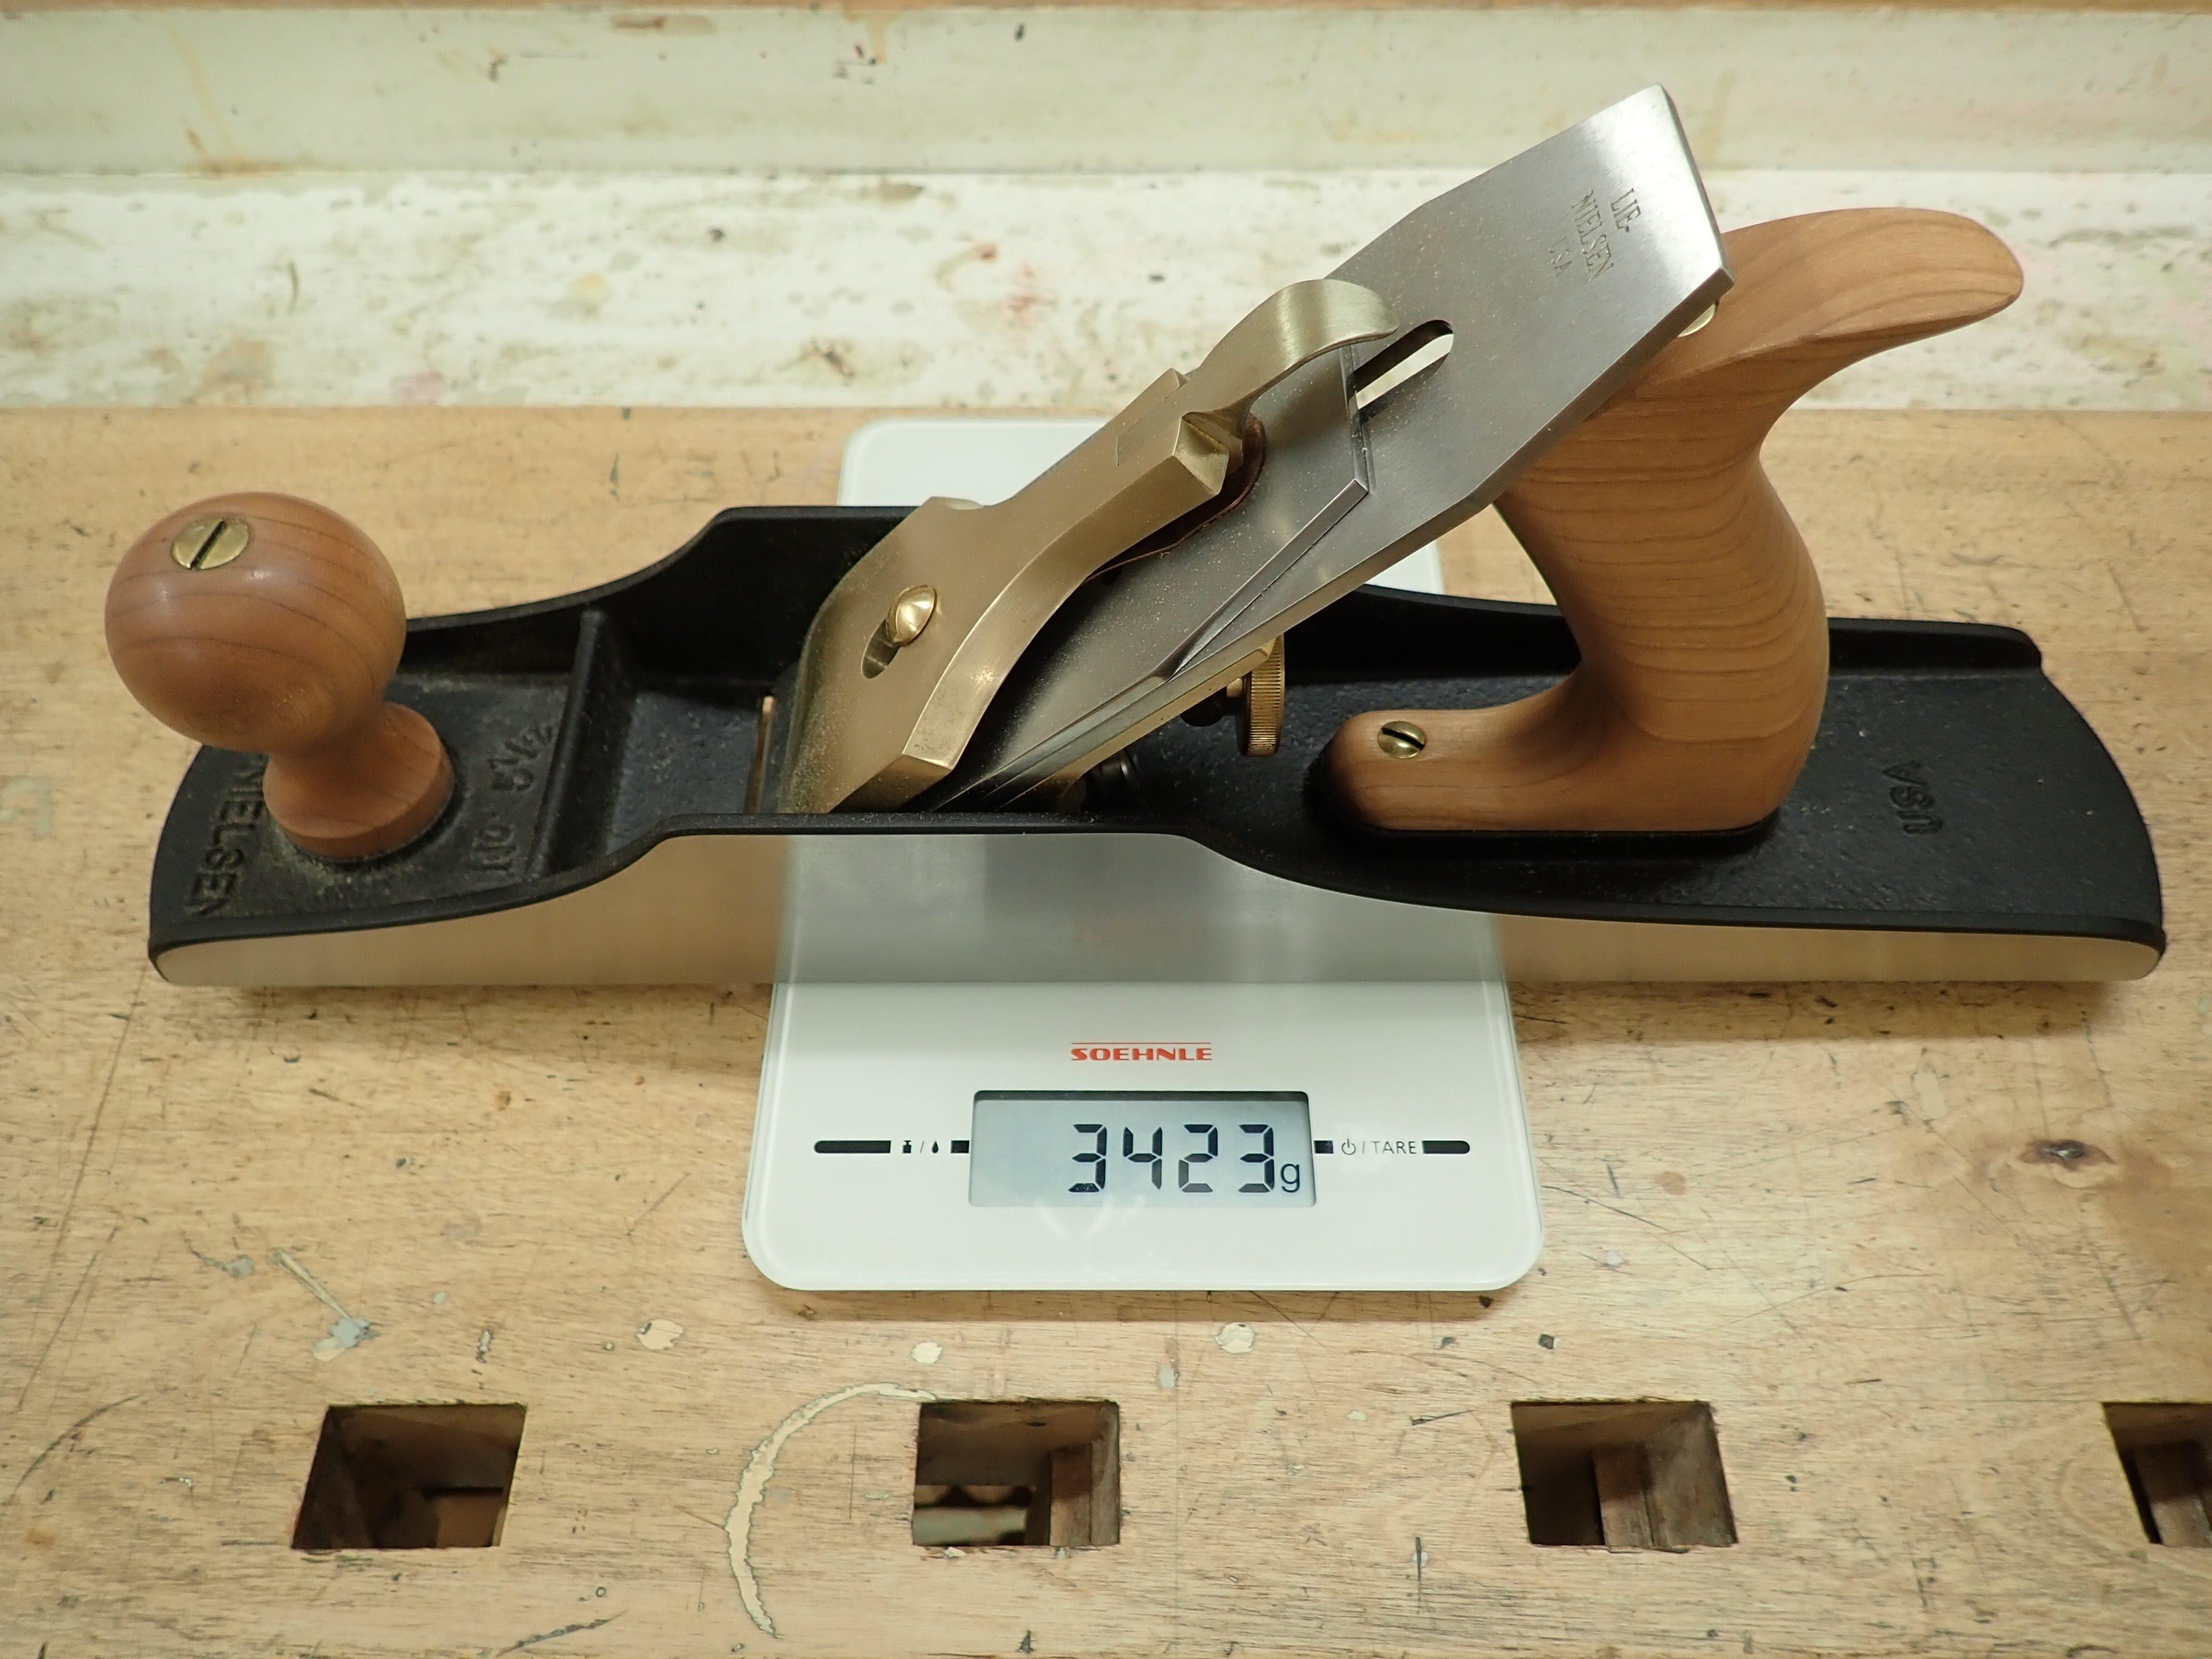
Otherwise I like Veriatas’ Custom planes quite well. They are also a fair bit lighter in weight compared to similarly sized Stanley / Lie-Nielsen Bedrocks:
Conclusion?
Early days yet … I’ll know more in five years time. But that blade carrier is a huge mistake — or perhaps I am too stupid to grasp the brilliance of it?
I have a Veritas spokeshave, and I love it though I’m still learning how to use it (I don’t know as much as I’d like about hand tools and how to use them). I have a couple old planes I scrounged from my dad’s shop. I only use the little block plane because I haven’t been able to figure out what kind of planes the others are or how to use them. Maybe I’ll go on a research quest.