


[ soundtrack : Passacaglia - Heinrich Biber - arr. & guitar Edith Pageaud ]
***
It’s not that often I work with sheet goods; a handful of times or so per year. I quite like sheet materials, it somehow feels like I’m cheating or getting something for free … those big, effortlessly flat surfaces :-)
That said, many contemporary production shops pay their bills by cutting MDF into smaller rectangles and using lamello-biscuits to join them into depressingly boring minimalist cabinetry and shelves. Drill a bunch of holes for Blum-hinges, fancy drawer slides and whatever style of handles & knobs are in vogue this year, before alternating between the spray booth and sanding station (biscuit-slots carefully masked); back and forth until the finish is satisfactory. Then you remove the masking tape and glue the carcasses together before mounting the hardware. Finally: packaging, transport and installation on site. Nothing wrong with this, I was once employed to do this myself — but my God it’s dull work! And what’s more: minimalism is the refuge of the cowed and timid — there is a reason why everything ‘trendy’ has been gray or beige these last couple of decades; it’s fear’s camouflage. *rant off*
The best way to reduce sheet goods - if you’ve got the space and money - is by using a vertical panel saw.
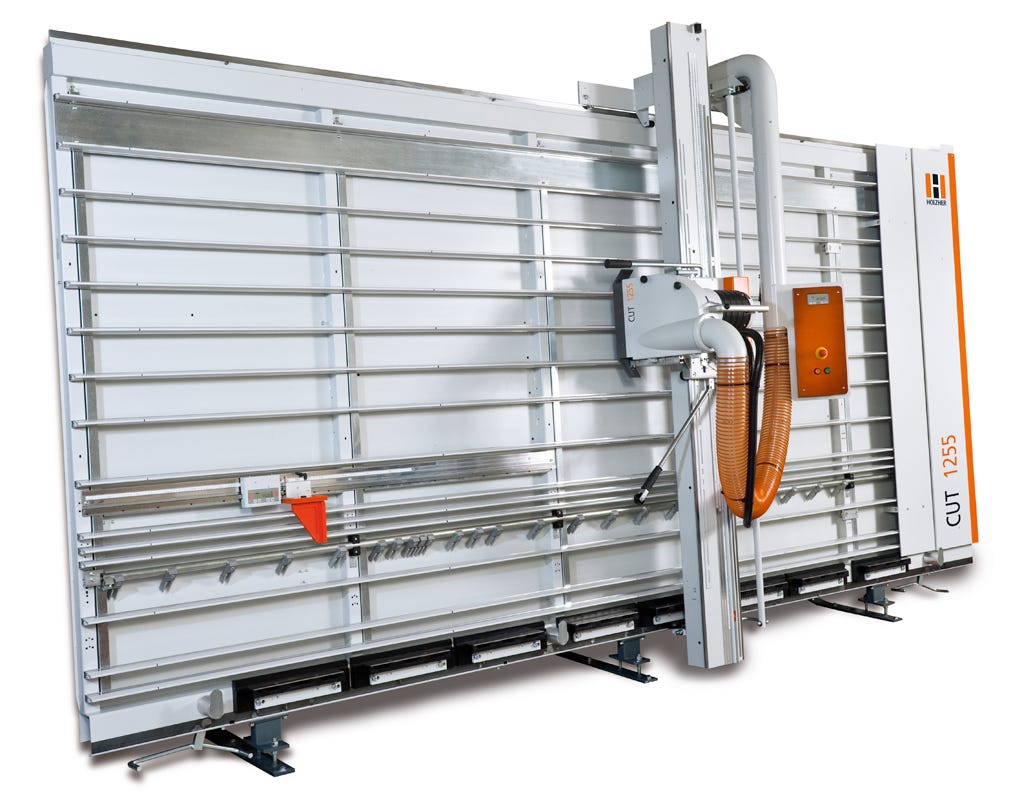
Full-size sheets (4’ x 8’ / 122 x 244 cm) can be handled by one man if they are upright, resting on their long edge. There are tilting table-trolleys/carts for trundling them around in this orientation — very practical.
Many medium-sized workshops make do with a big sliding table saw:
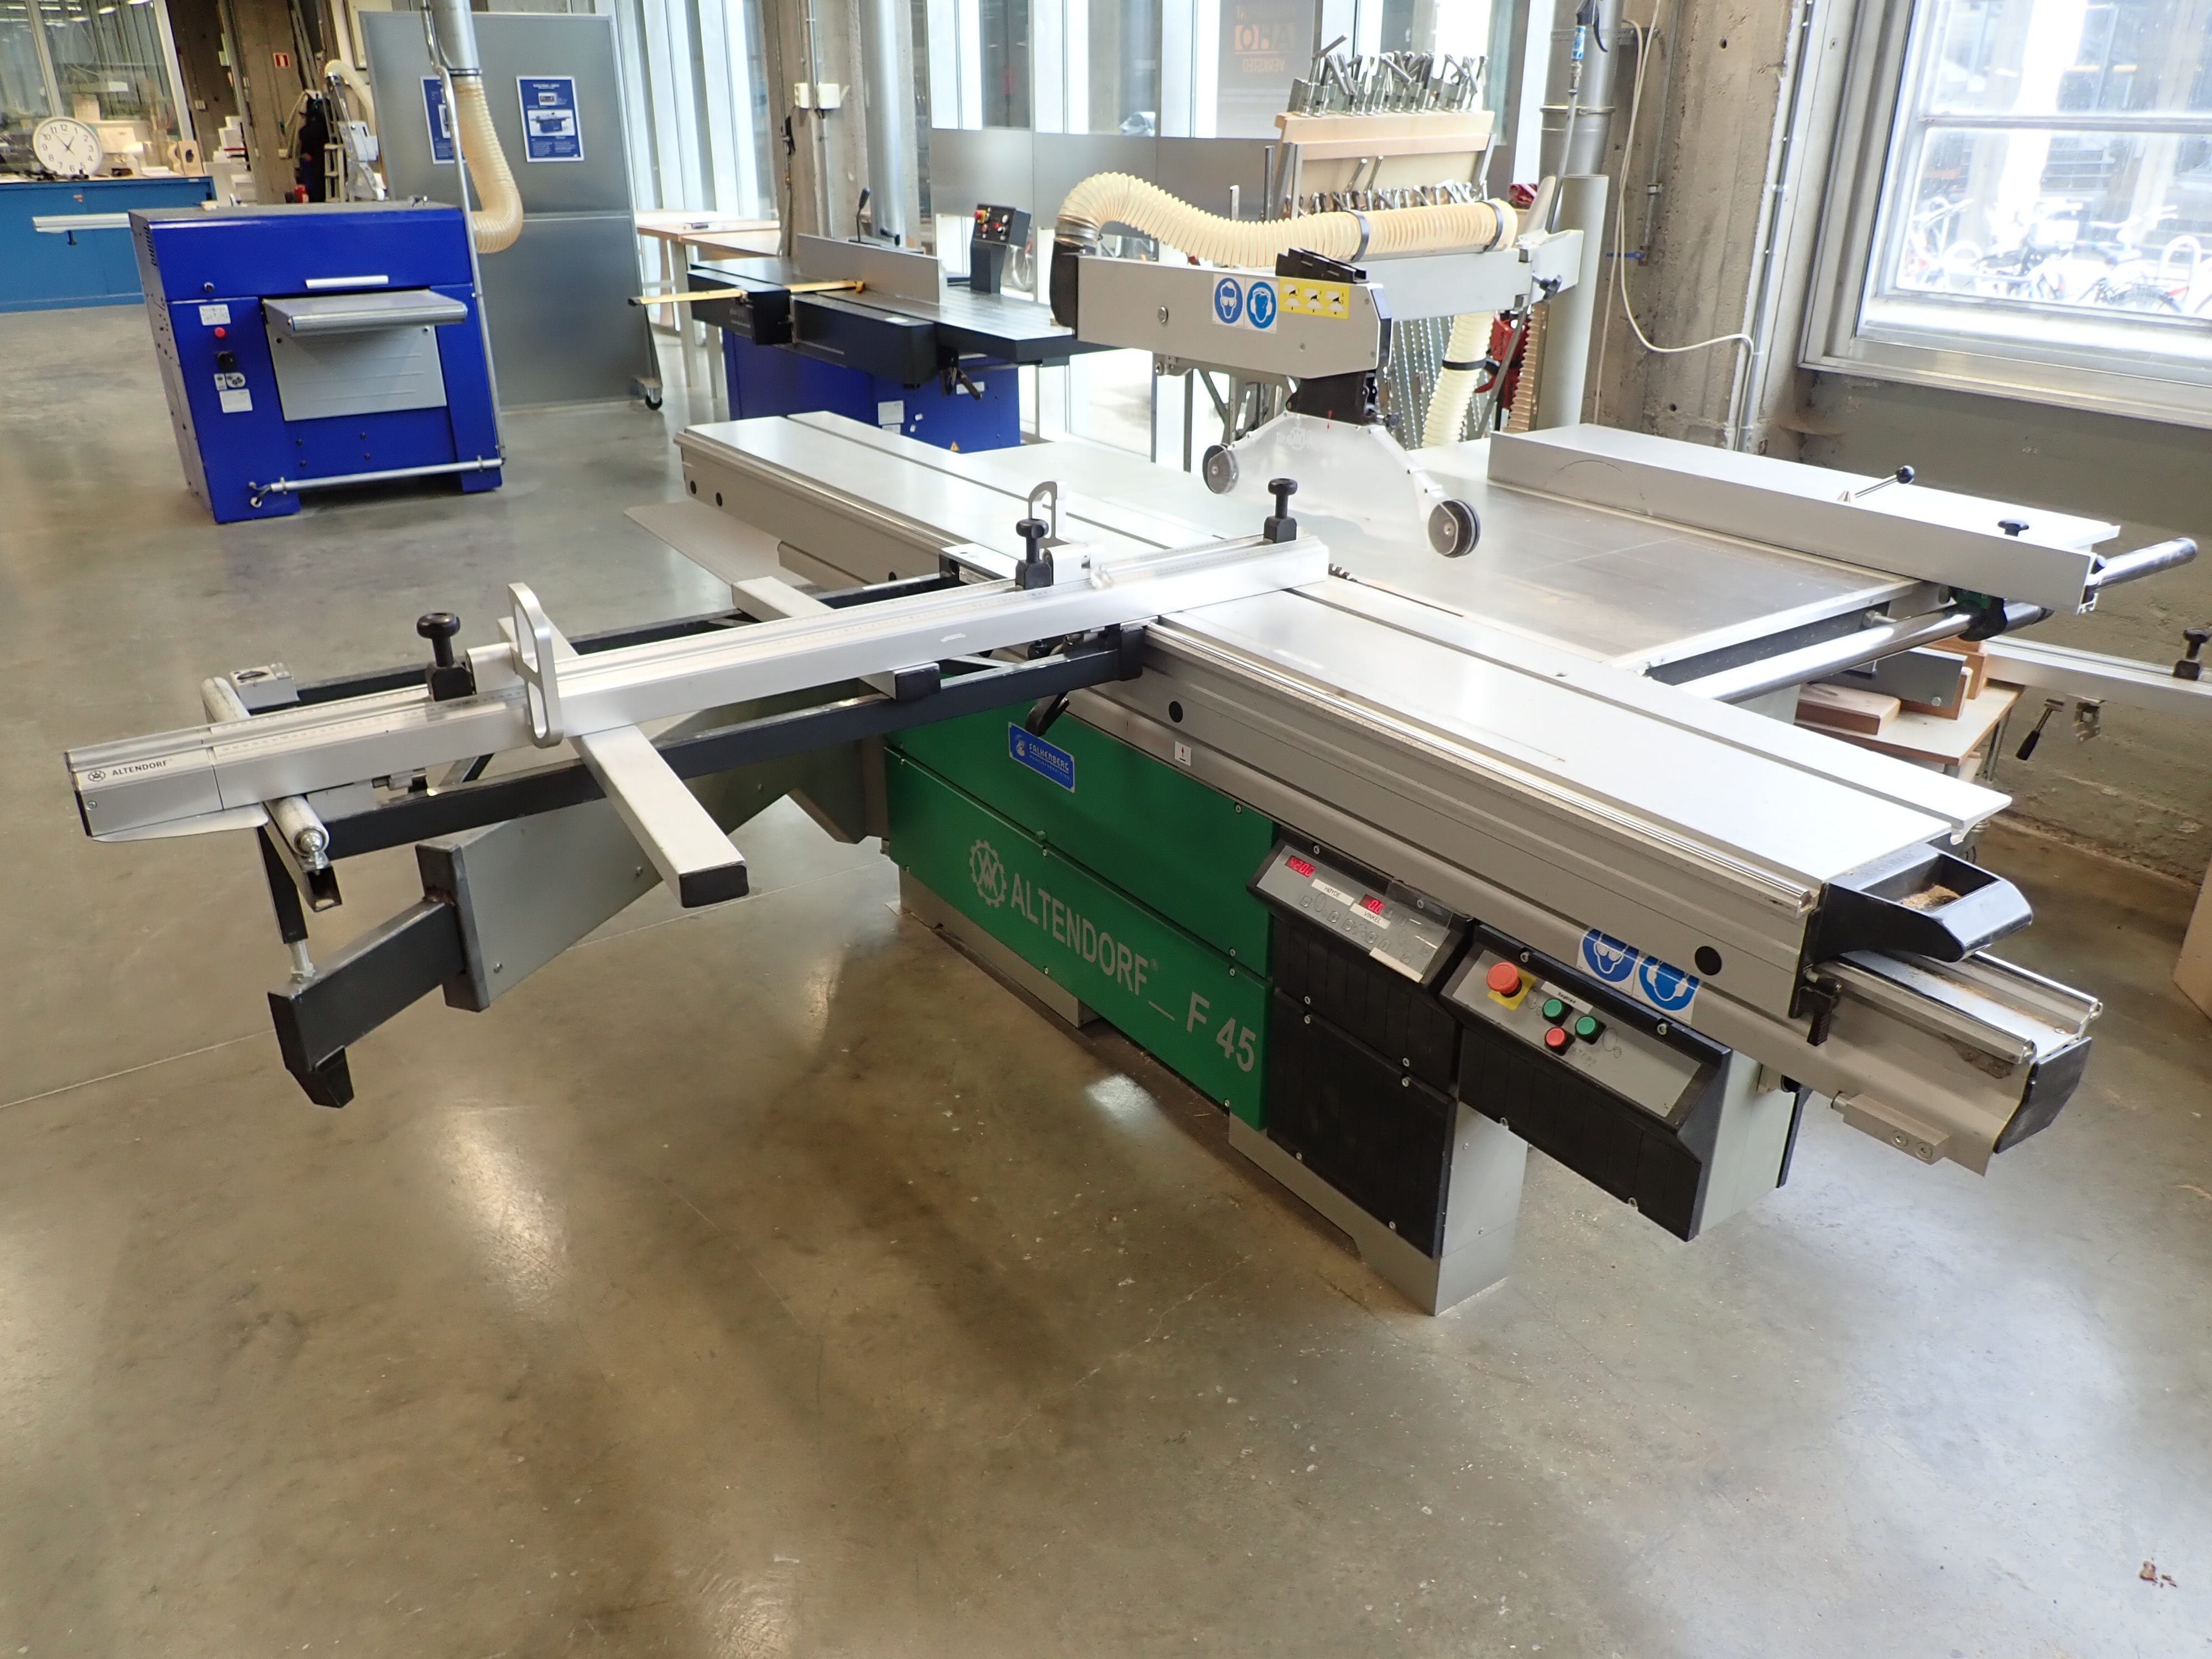
It’s easiest if you have a mate to help you wrestle the sheet in place; A standard full-size sheet of 19mm MDF weighs approximately 40 kg / 88 lbs and is quite unwieldy before it’s reduced to smaller formats.
In my tiny workshop I have none of the above: Not a big table saw nor a mate to help me with the heavy lifting. To make up for it I have to be resourceful and invent small workarounds — I have to be careful to avoid hurting my back or pulling a muscle.
Here’s how I do it: I manoeuvre the sheetgoods around the shop balanced on its long edge on a skateboard-sized, shopmade trolley with castor wheels before I tilt and ‘aikido’ it flat onto my building table.
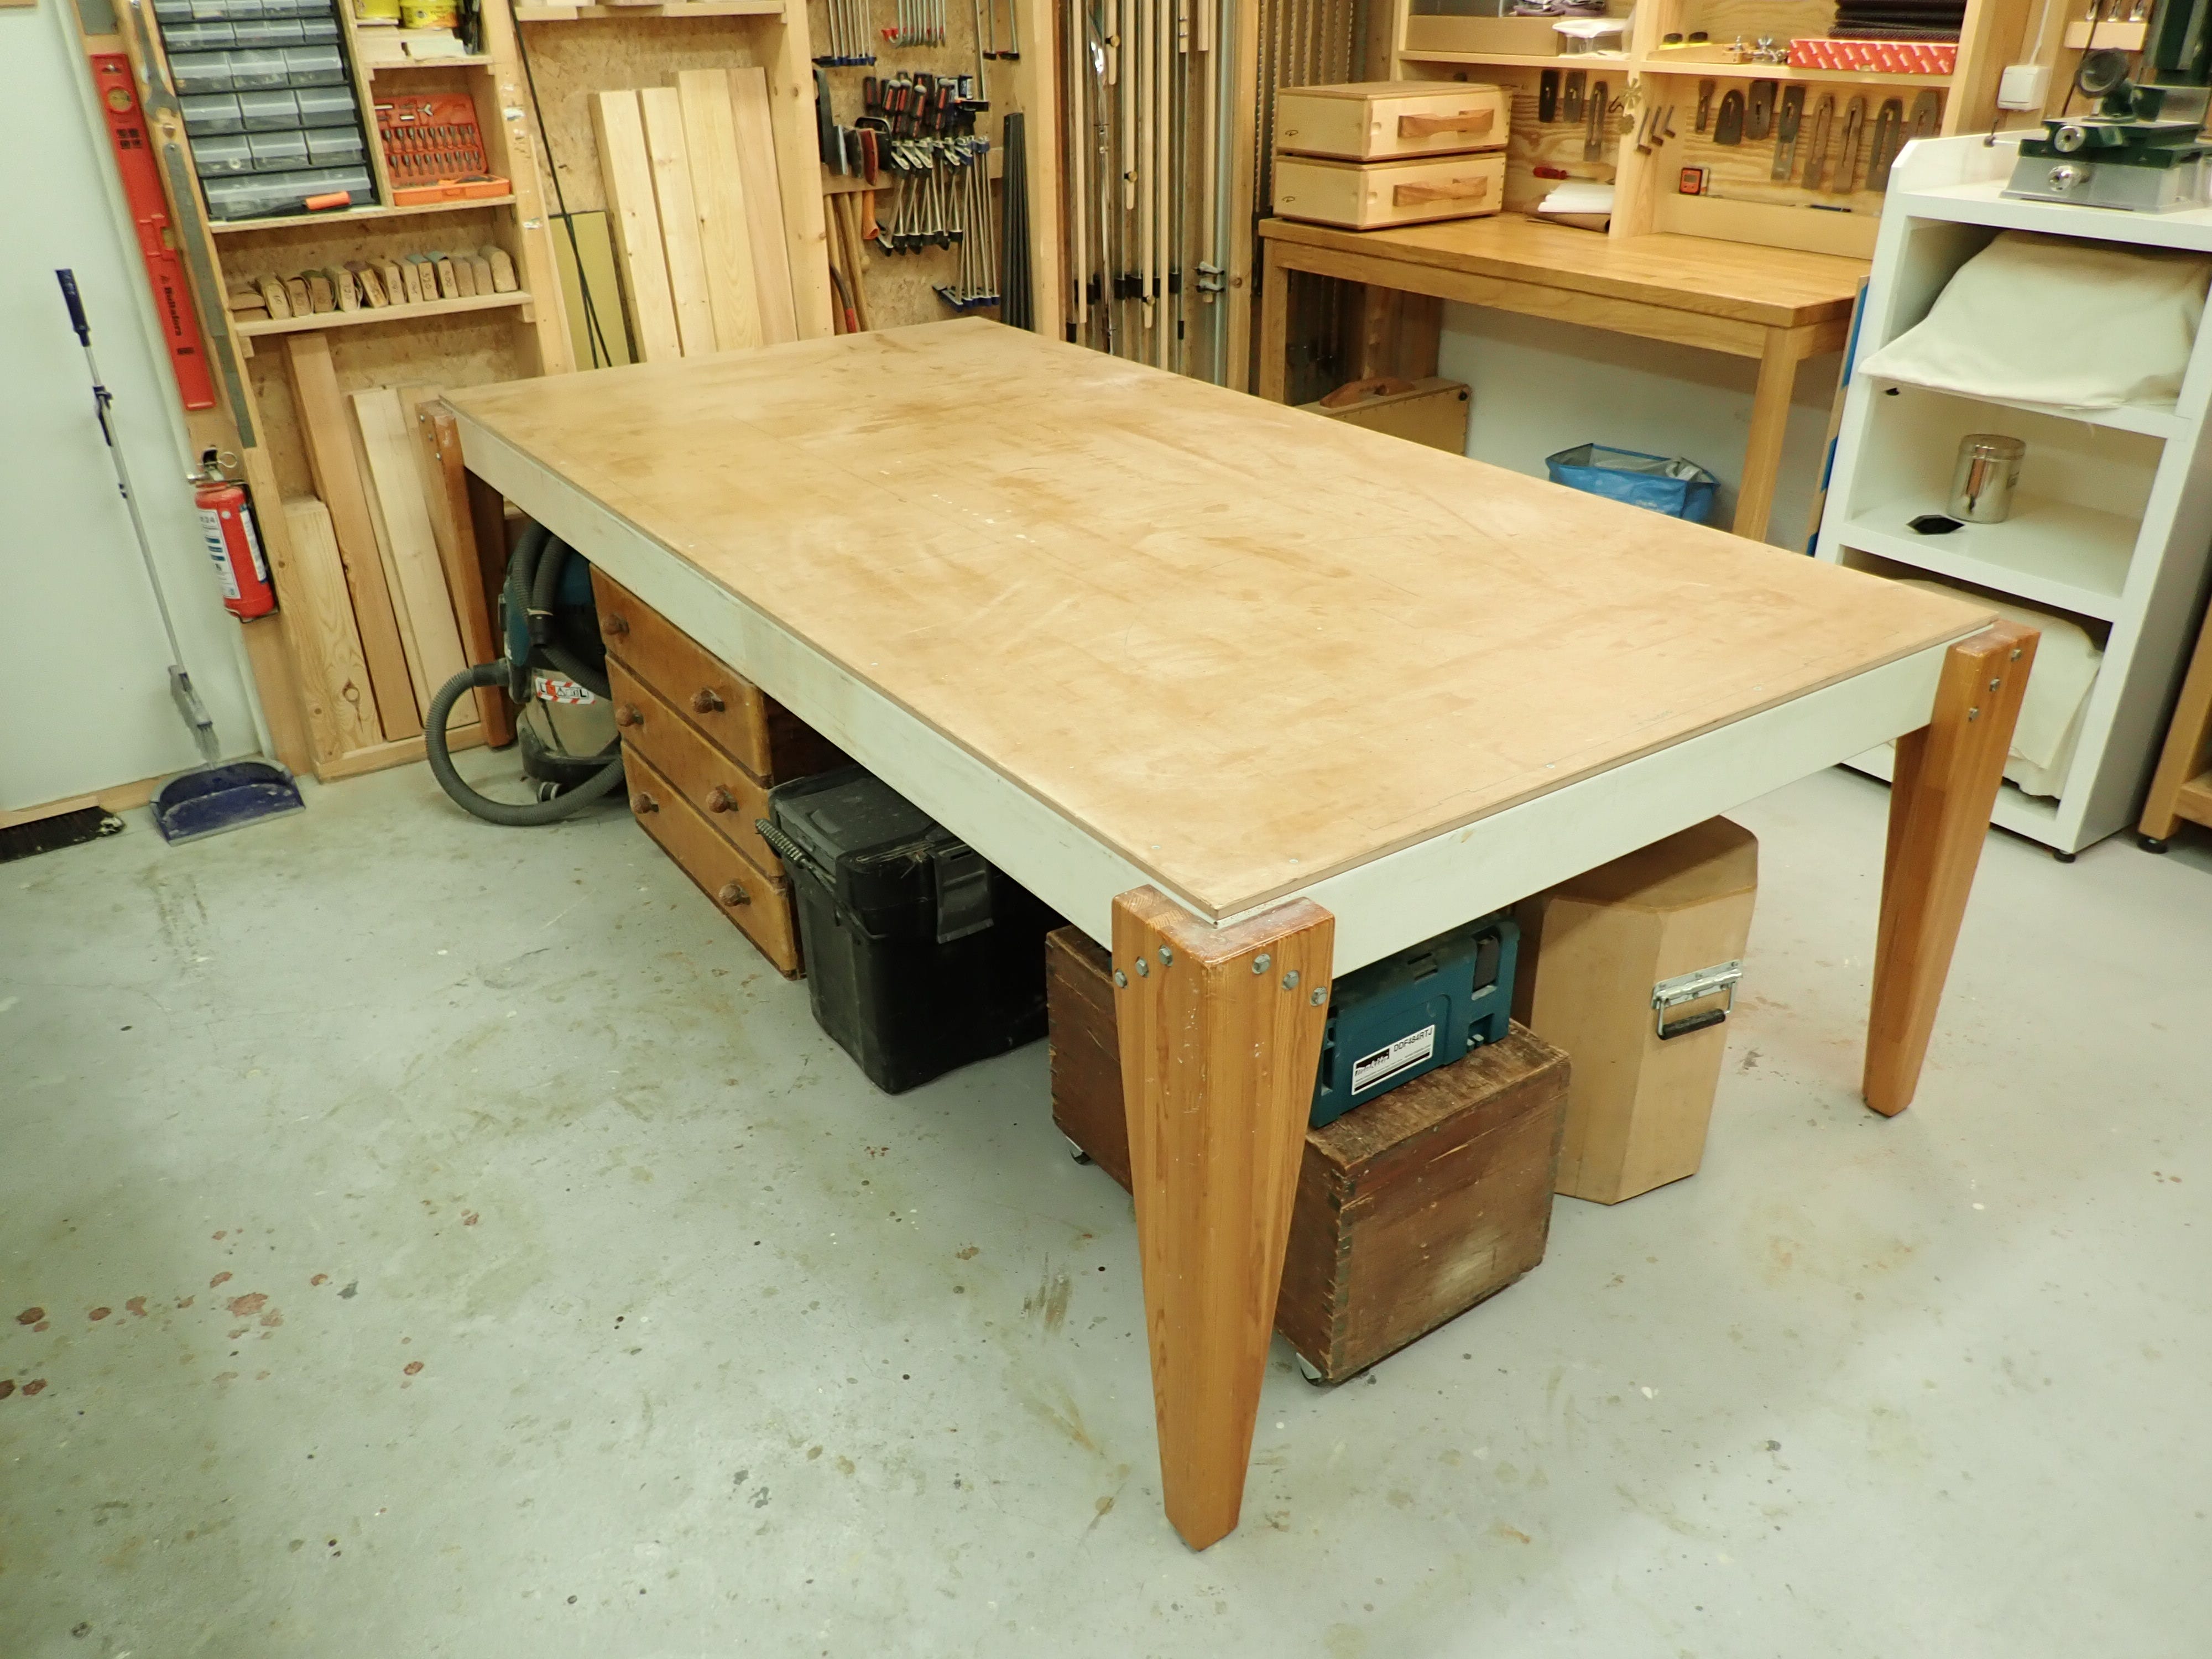
I mark my rough, over-sized cuts with a sharpie before I elevate the sheet off of the table with some scrap battens. Now I am ready to rough-cut the sheet into smaller parts using a cordless track saw or just following the inked lines by hand and eye.
If you’ve got a good track saw you might choose to trust the straightness of its cut, but I cut these pieces freehand, so I take the oversized pieces to the jointer for a little edge-straightening session.
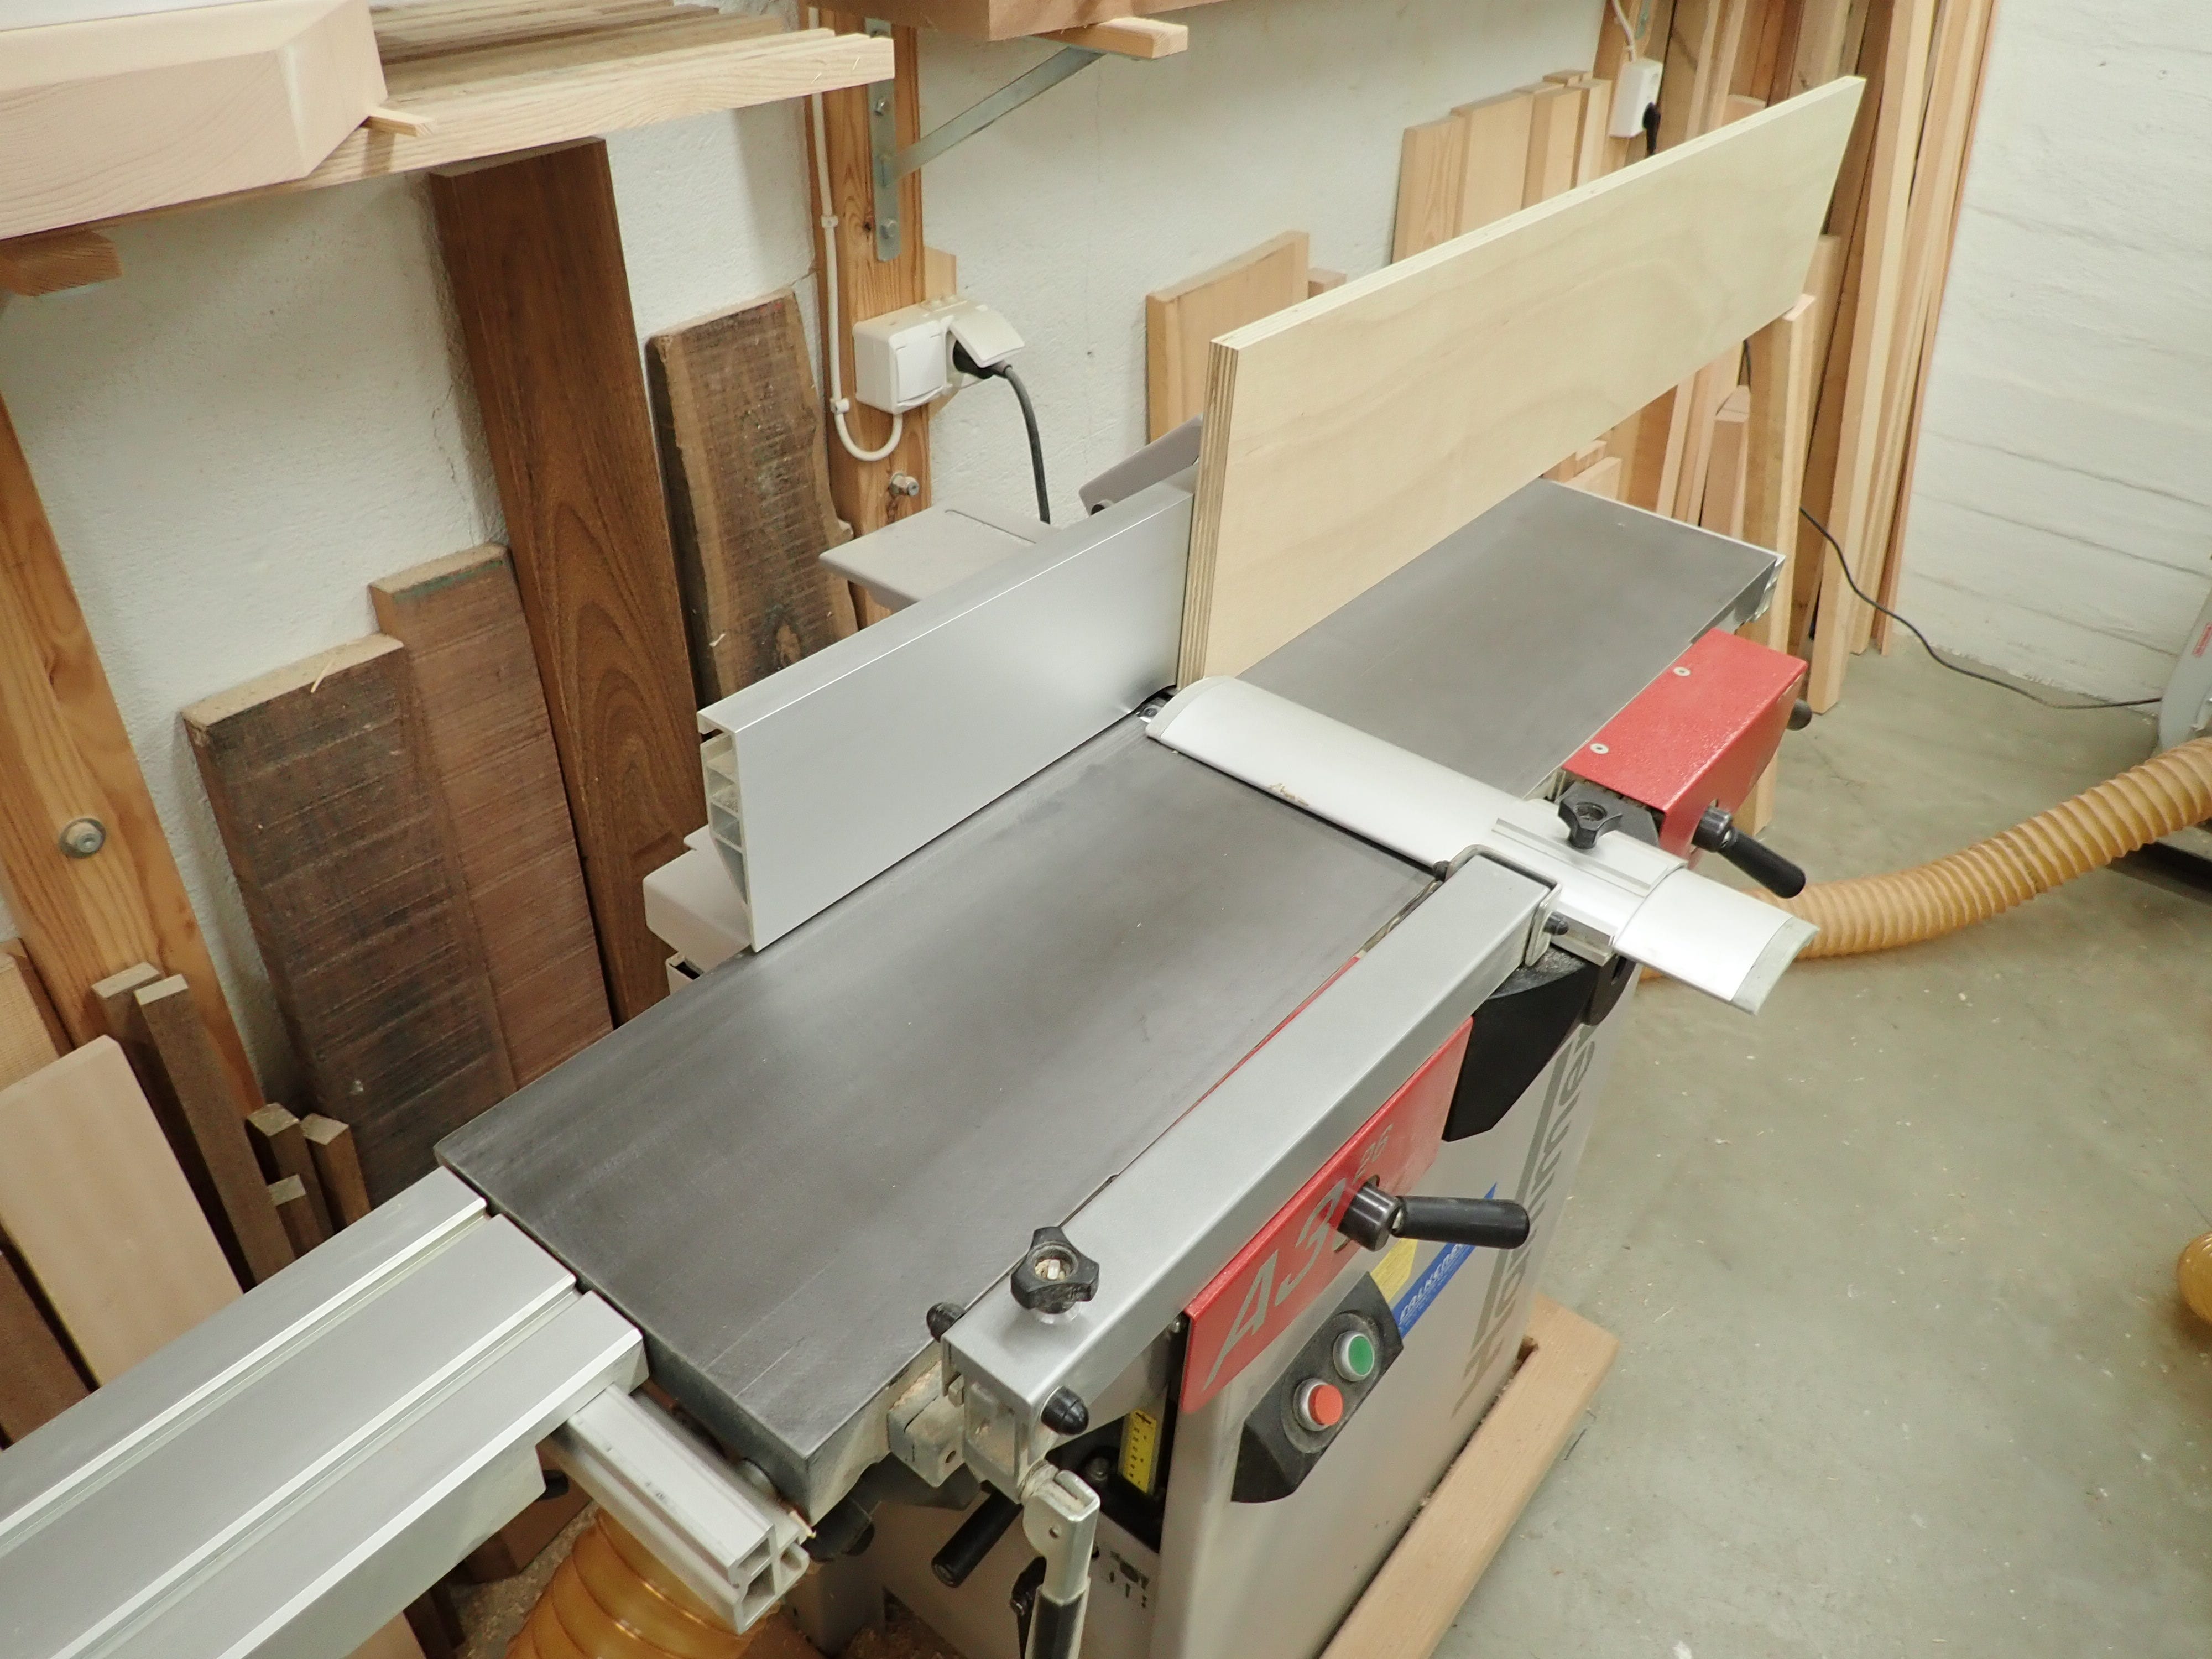
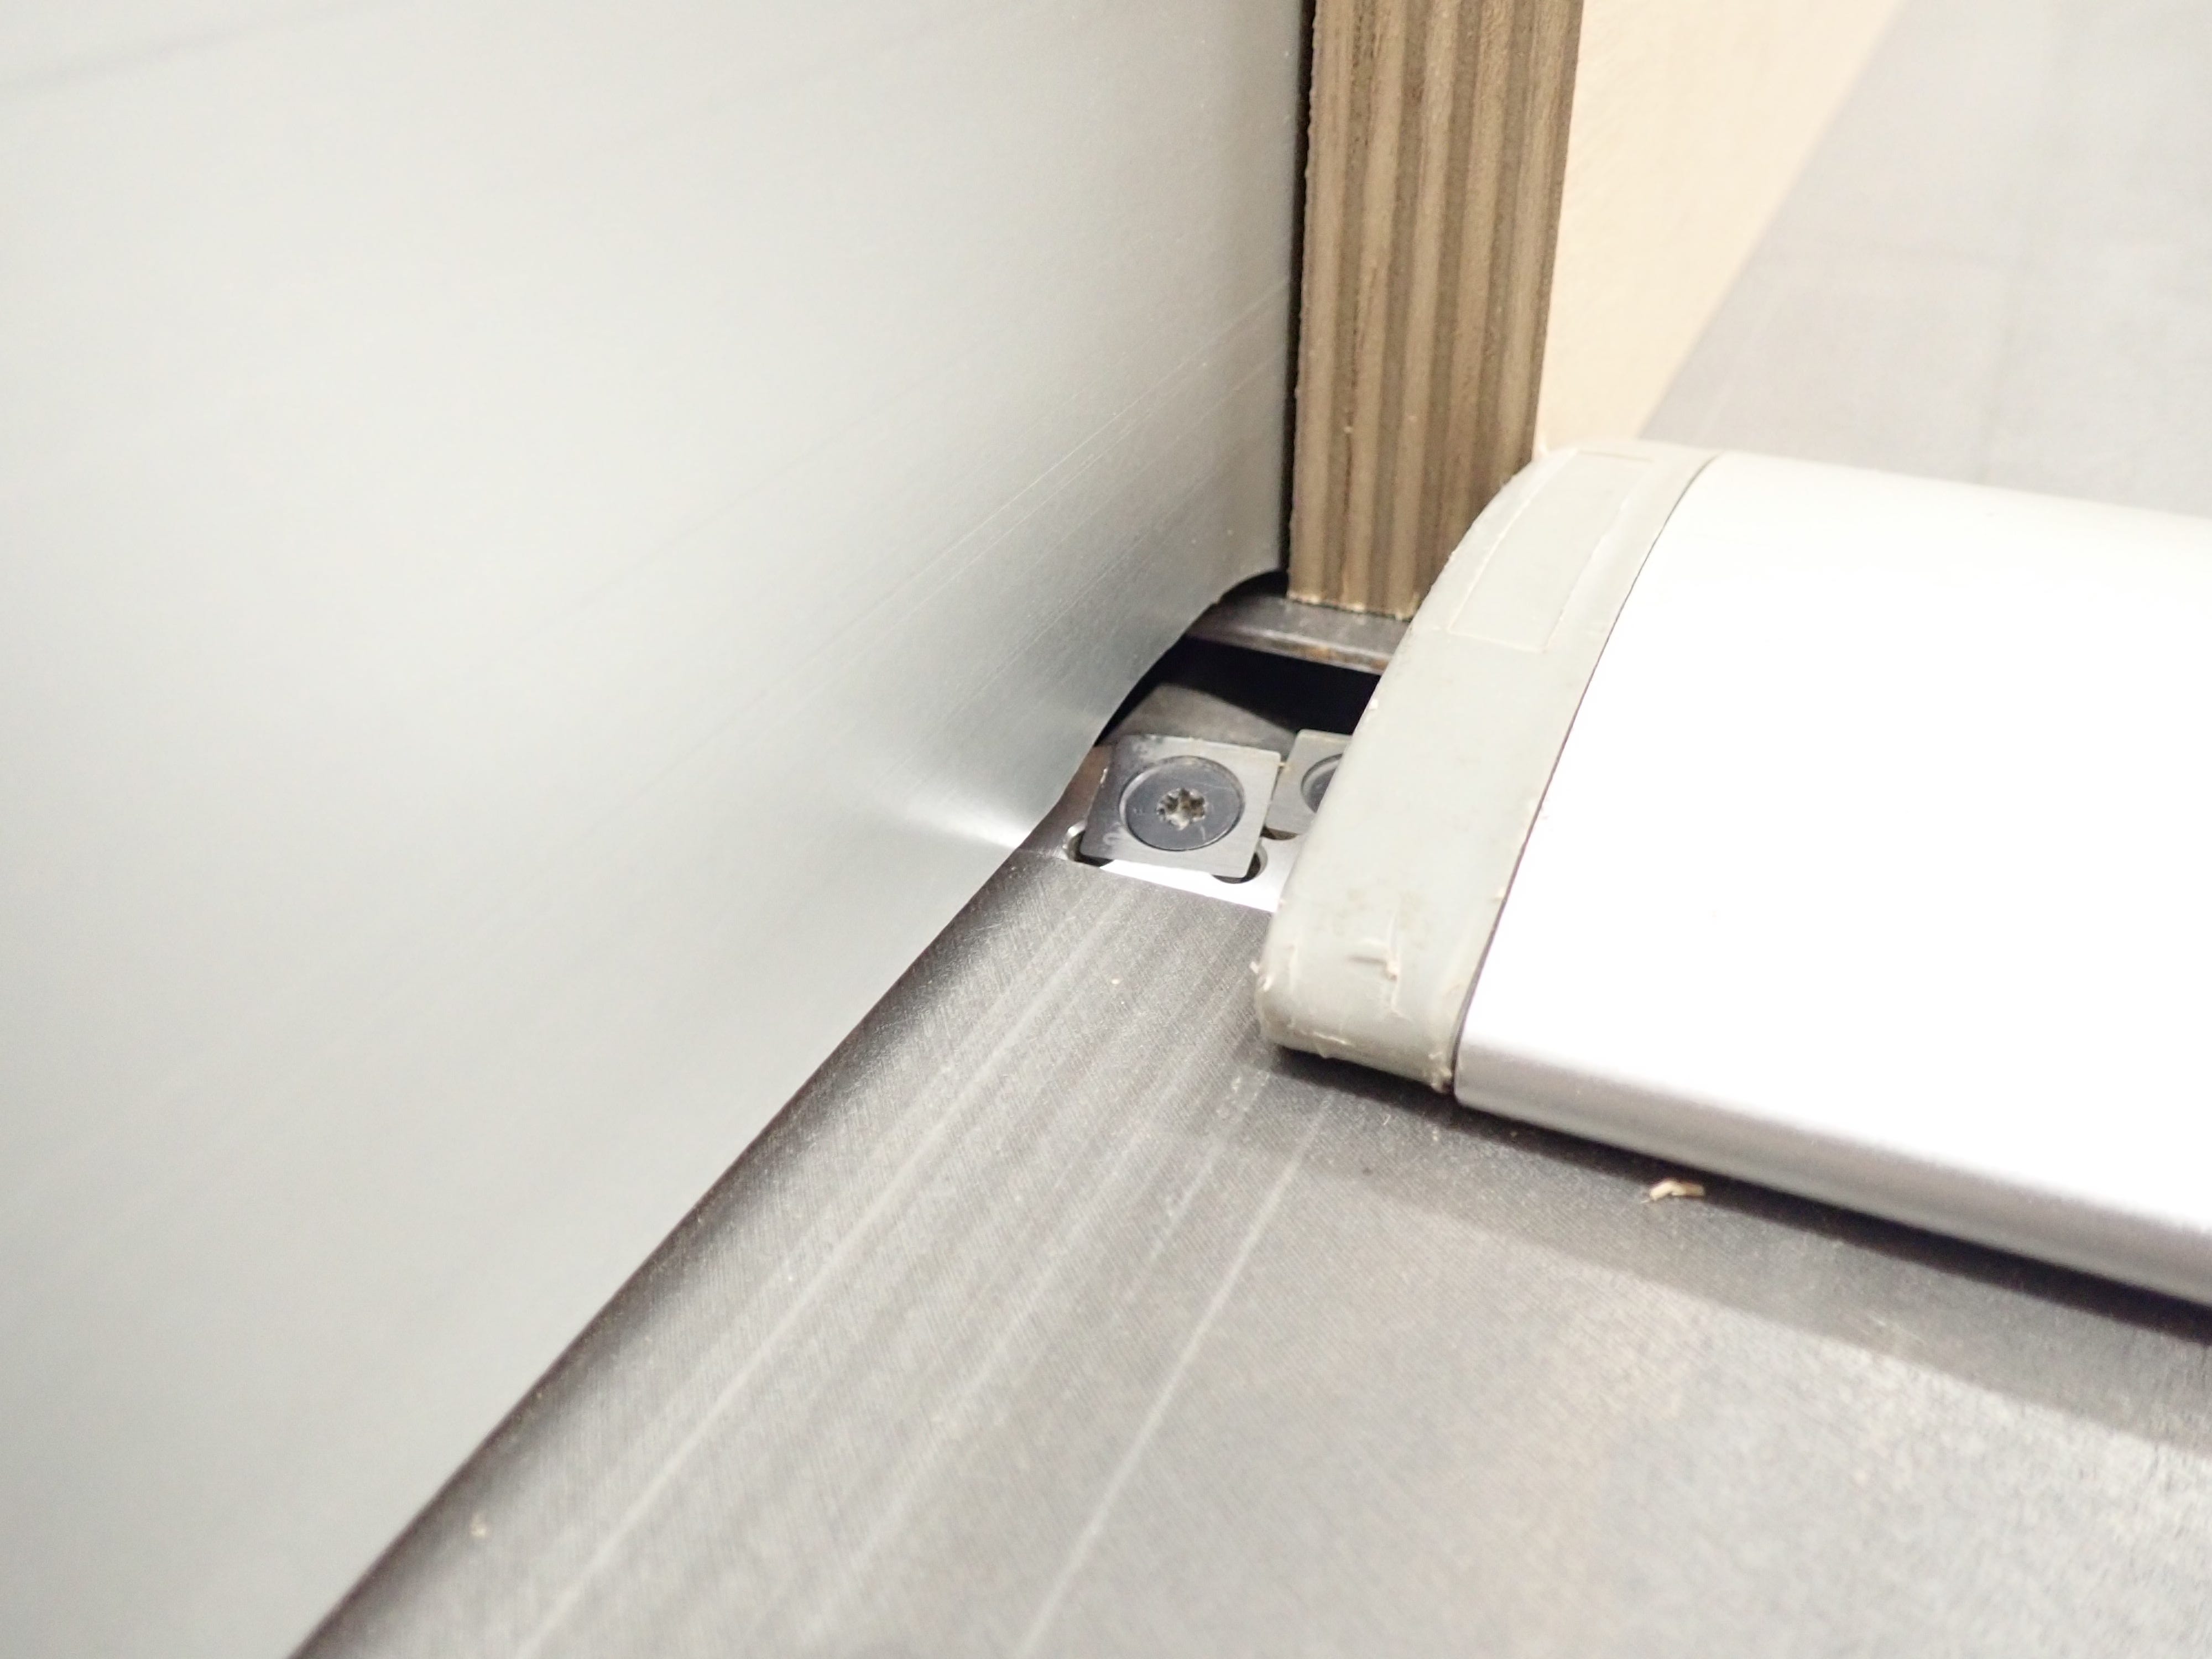
Oh! and by the way - this is the Quick Tip promised in the title: jointing plywood edges can take a toll on your cutter knives, especially if they are of the old-school HSS variety (modern HardMetal inserts less so). The glue between the laminations/plys can be very hard and wear distinct notches in your cutter knives, so that every subsequent piece of wood you plane will be imprinted with a characteristic ‘plywood-pattern’ set of ridges. To avoid this the solution is to reserve the furthest 2”/5 cm of the cutter for plywood jointing and/or other hard-wearing uses (teak, ipe or other woods with a high mineral content) by simply keeping that last portion of the cutter covered by the fence under all normal circumstances; kept sharp and only revealed in order to be abused.
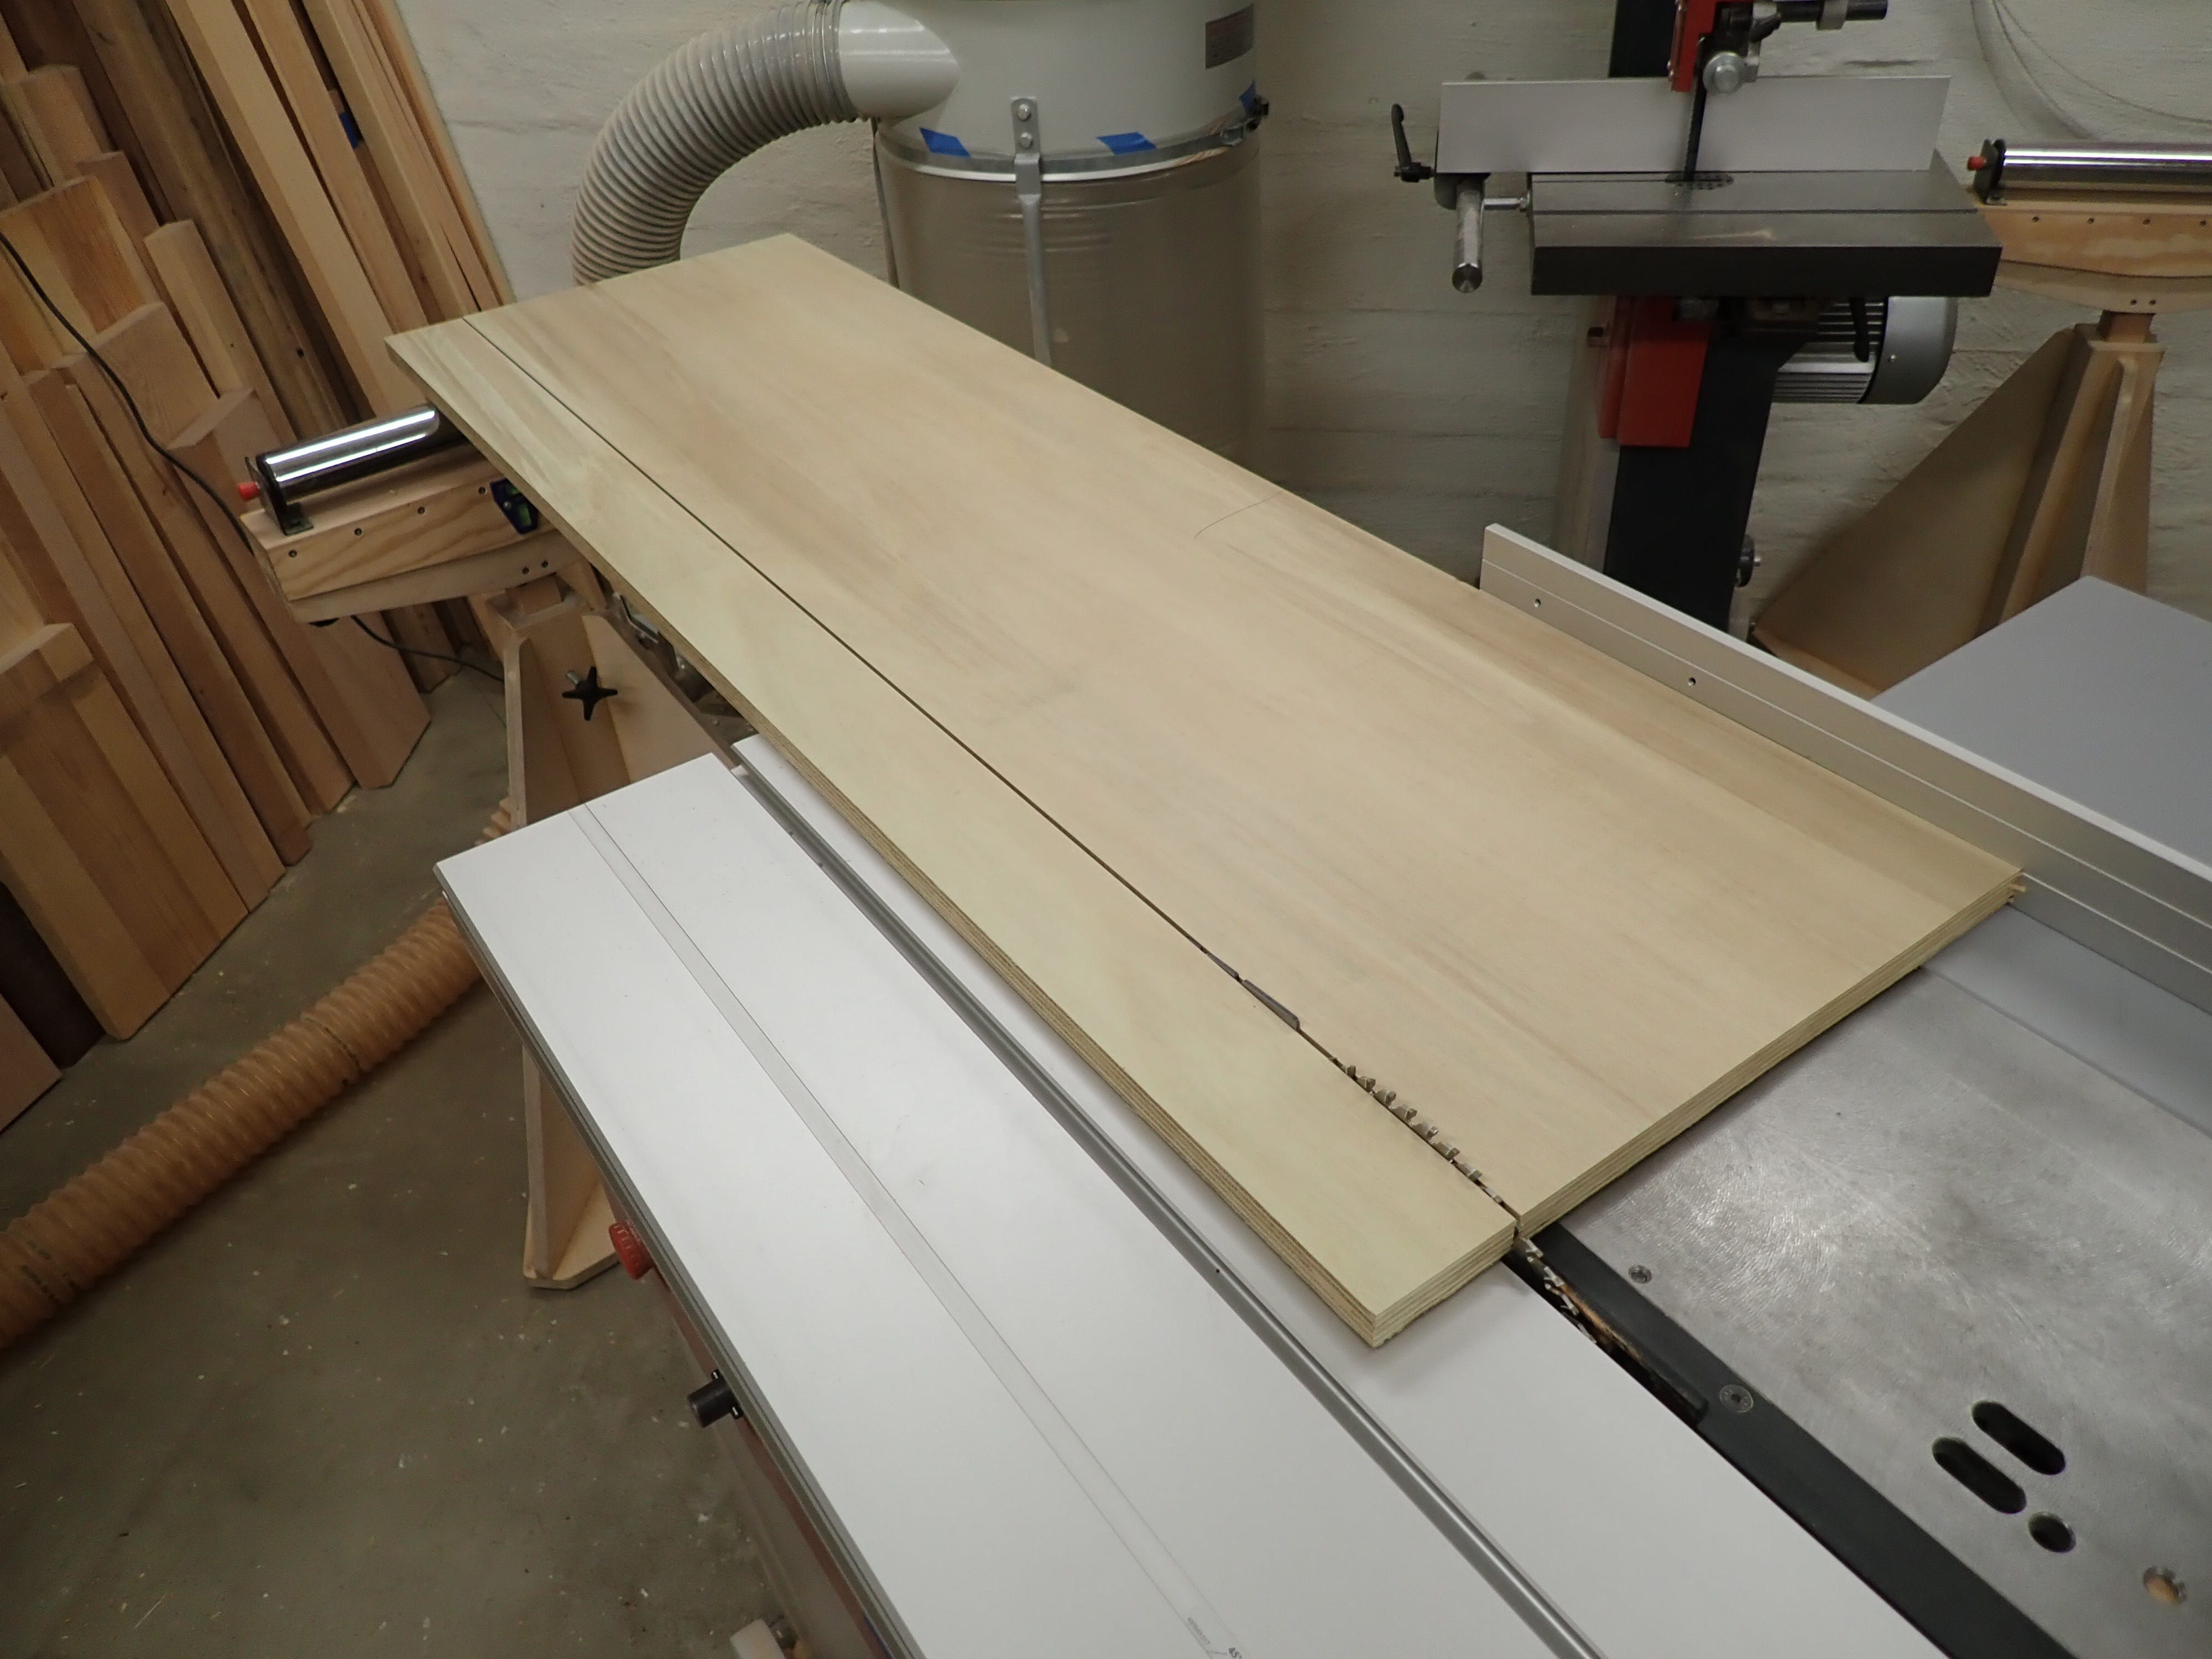
The jointer will make the edge straight and true, but the surface quality will be poor because half of the wood will be endgrain, and rotating cutters do not make a nice job of endgrain. You’ll get a much better surface finish by cutting the plywood to size using a fine-toothed circular saw. The machine-jointed edge is used as reference against the table saw’s fence …
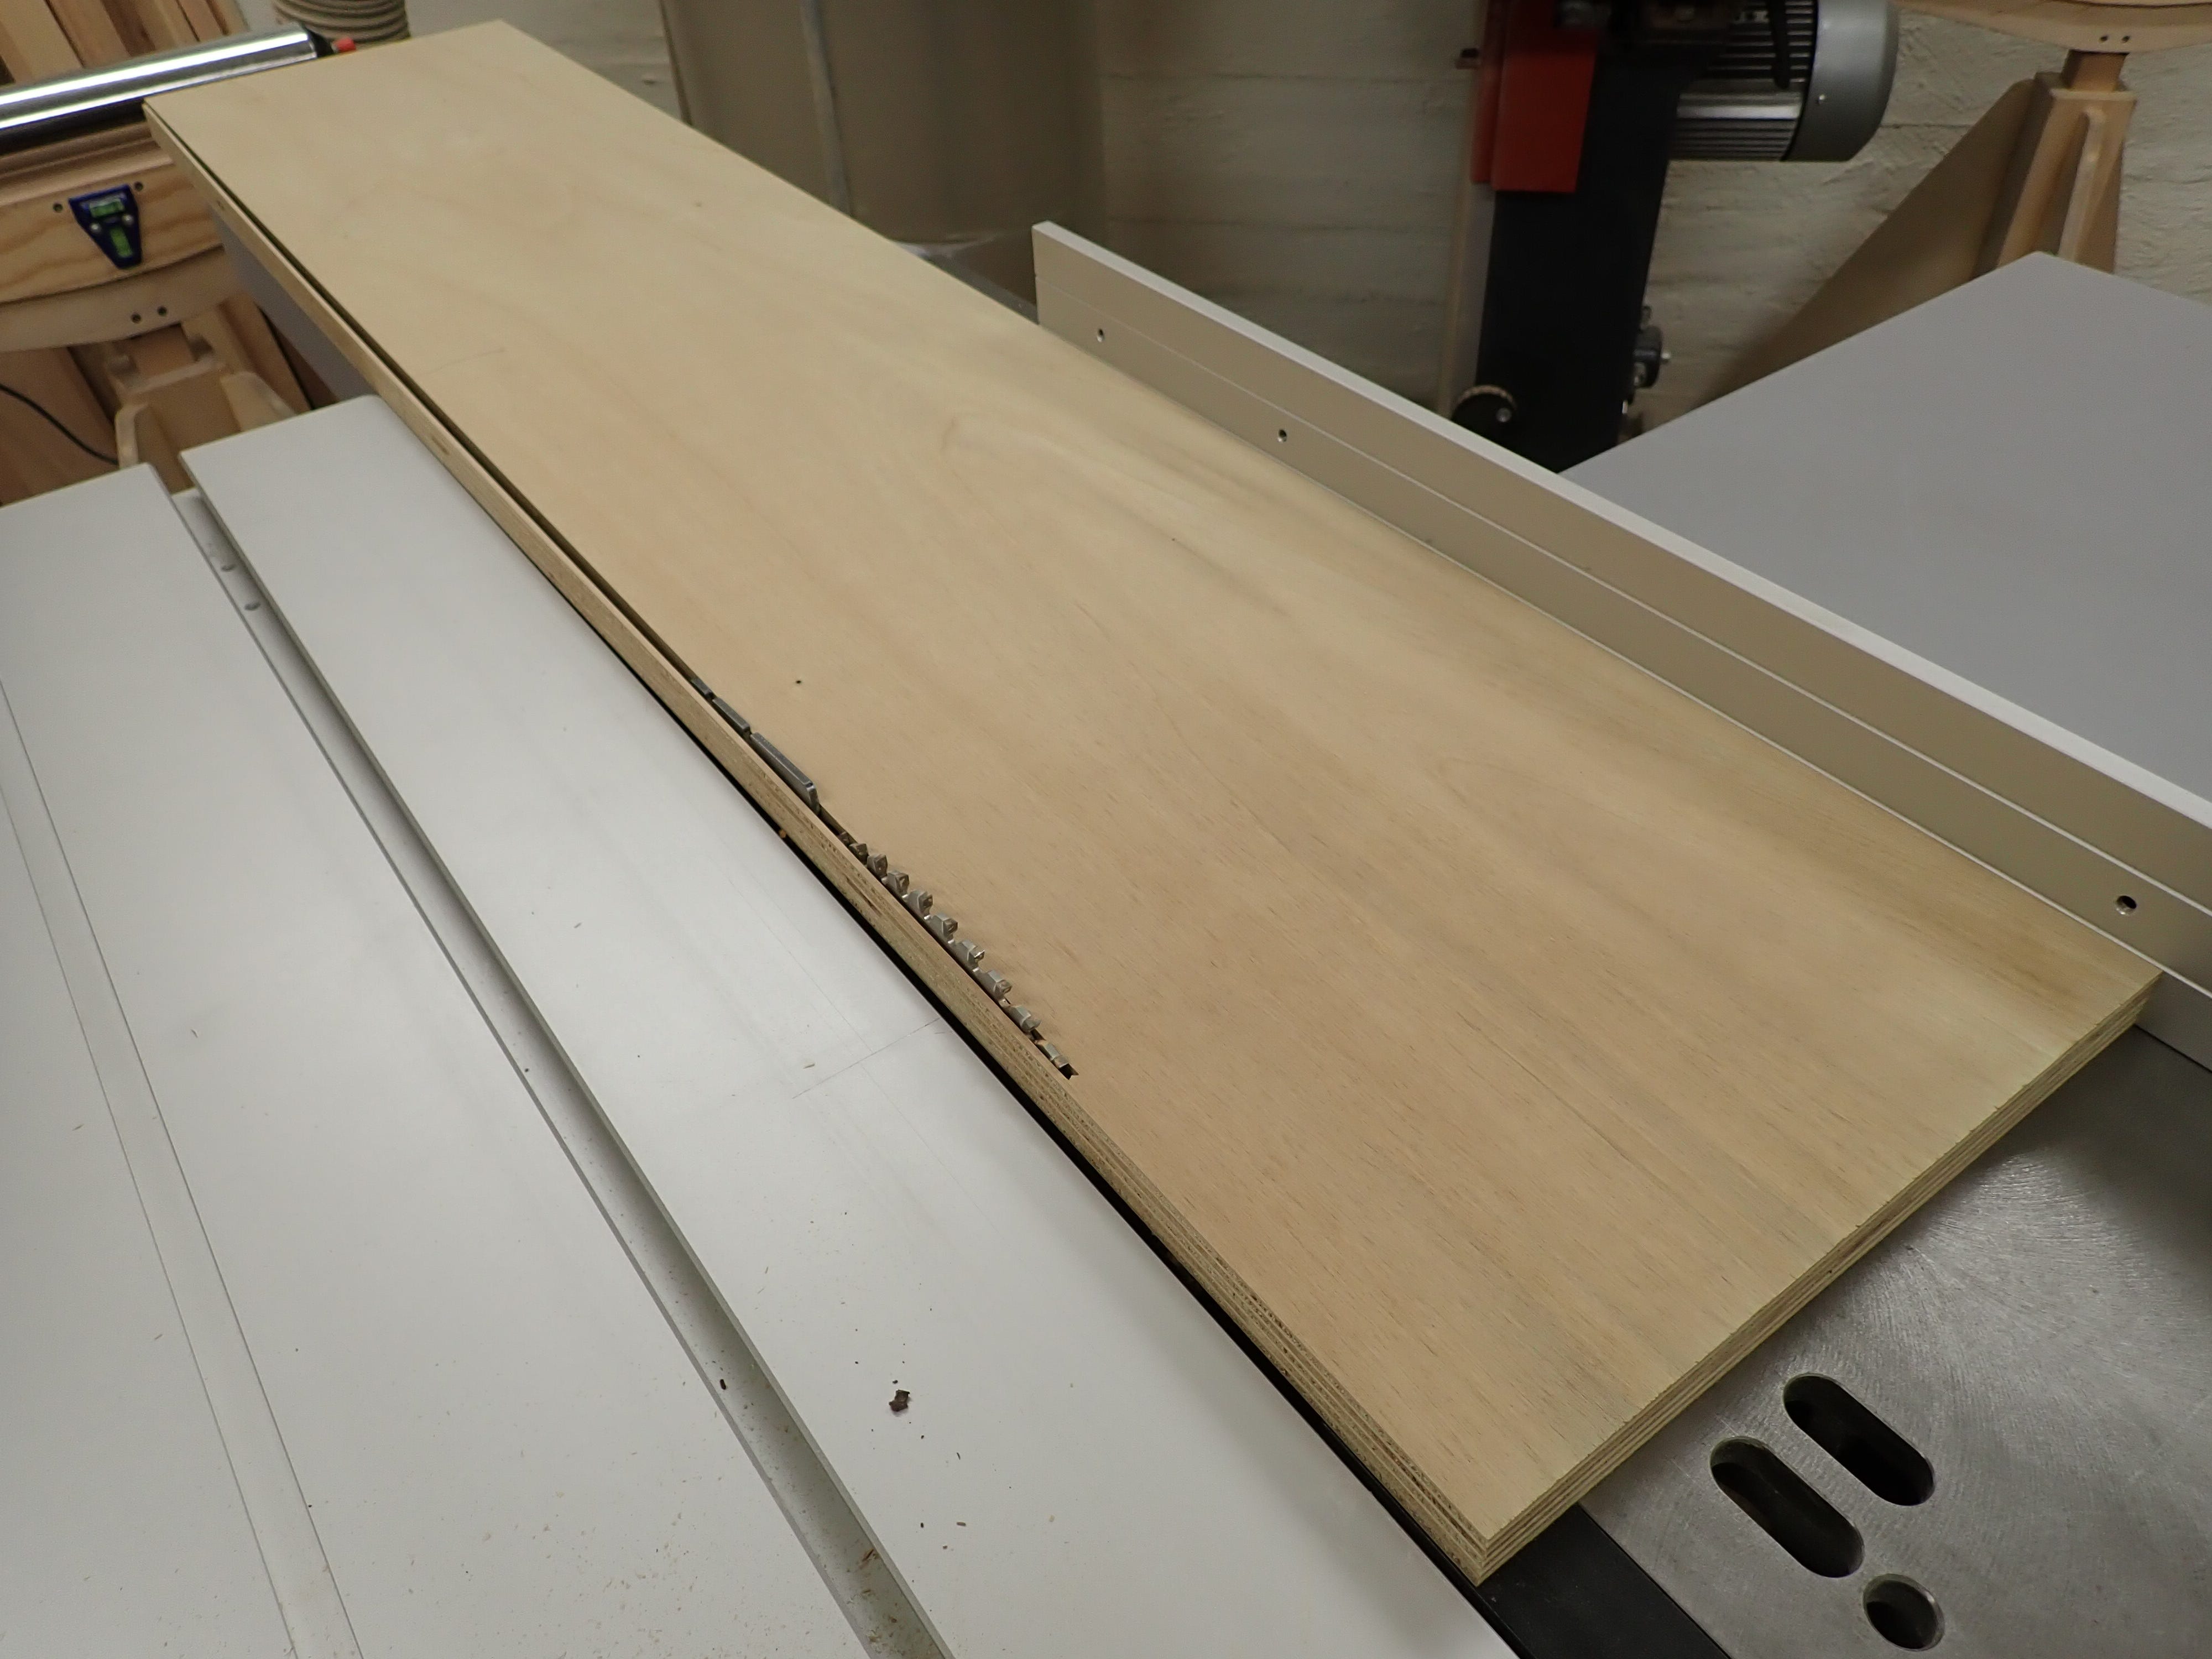
… before you flip it over and reduce the plywood to its final width:
Here’s a comparison of surface qualities - machine-jointed versus sawn:
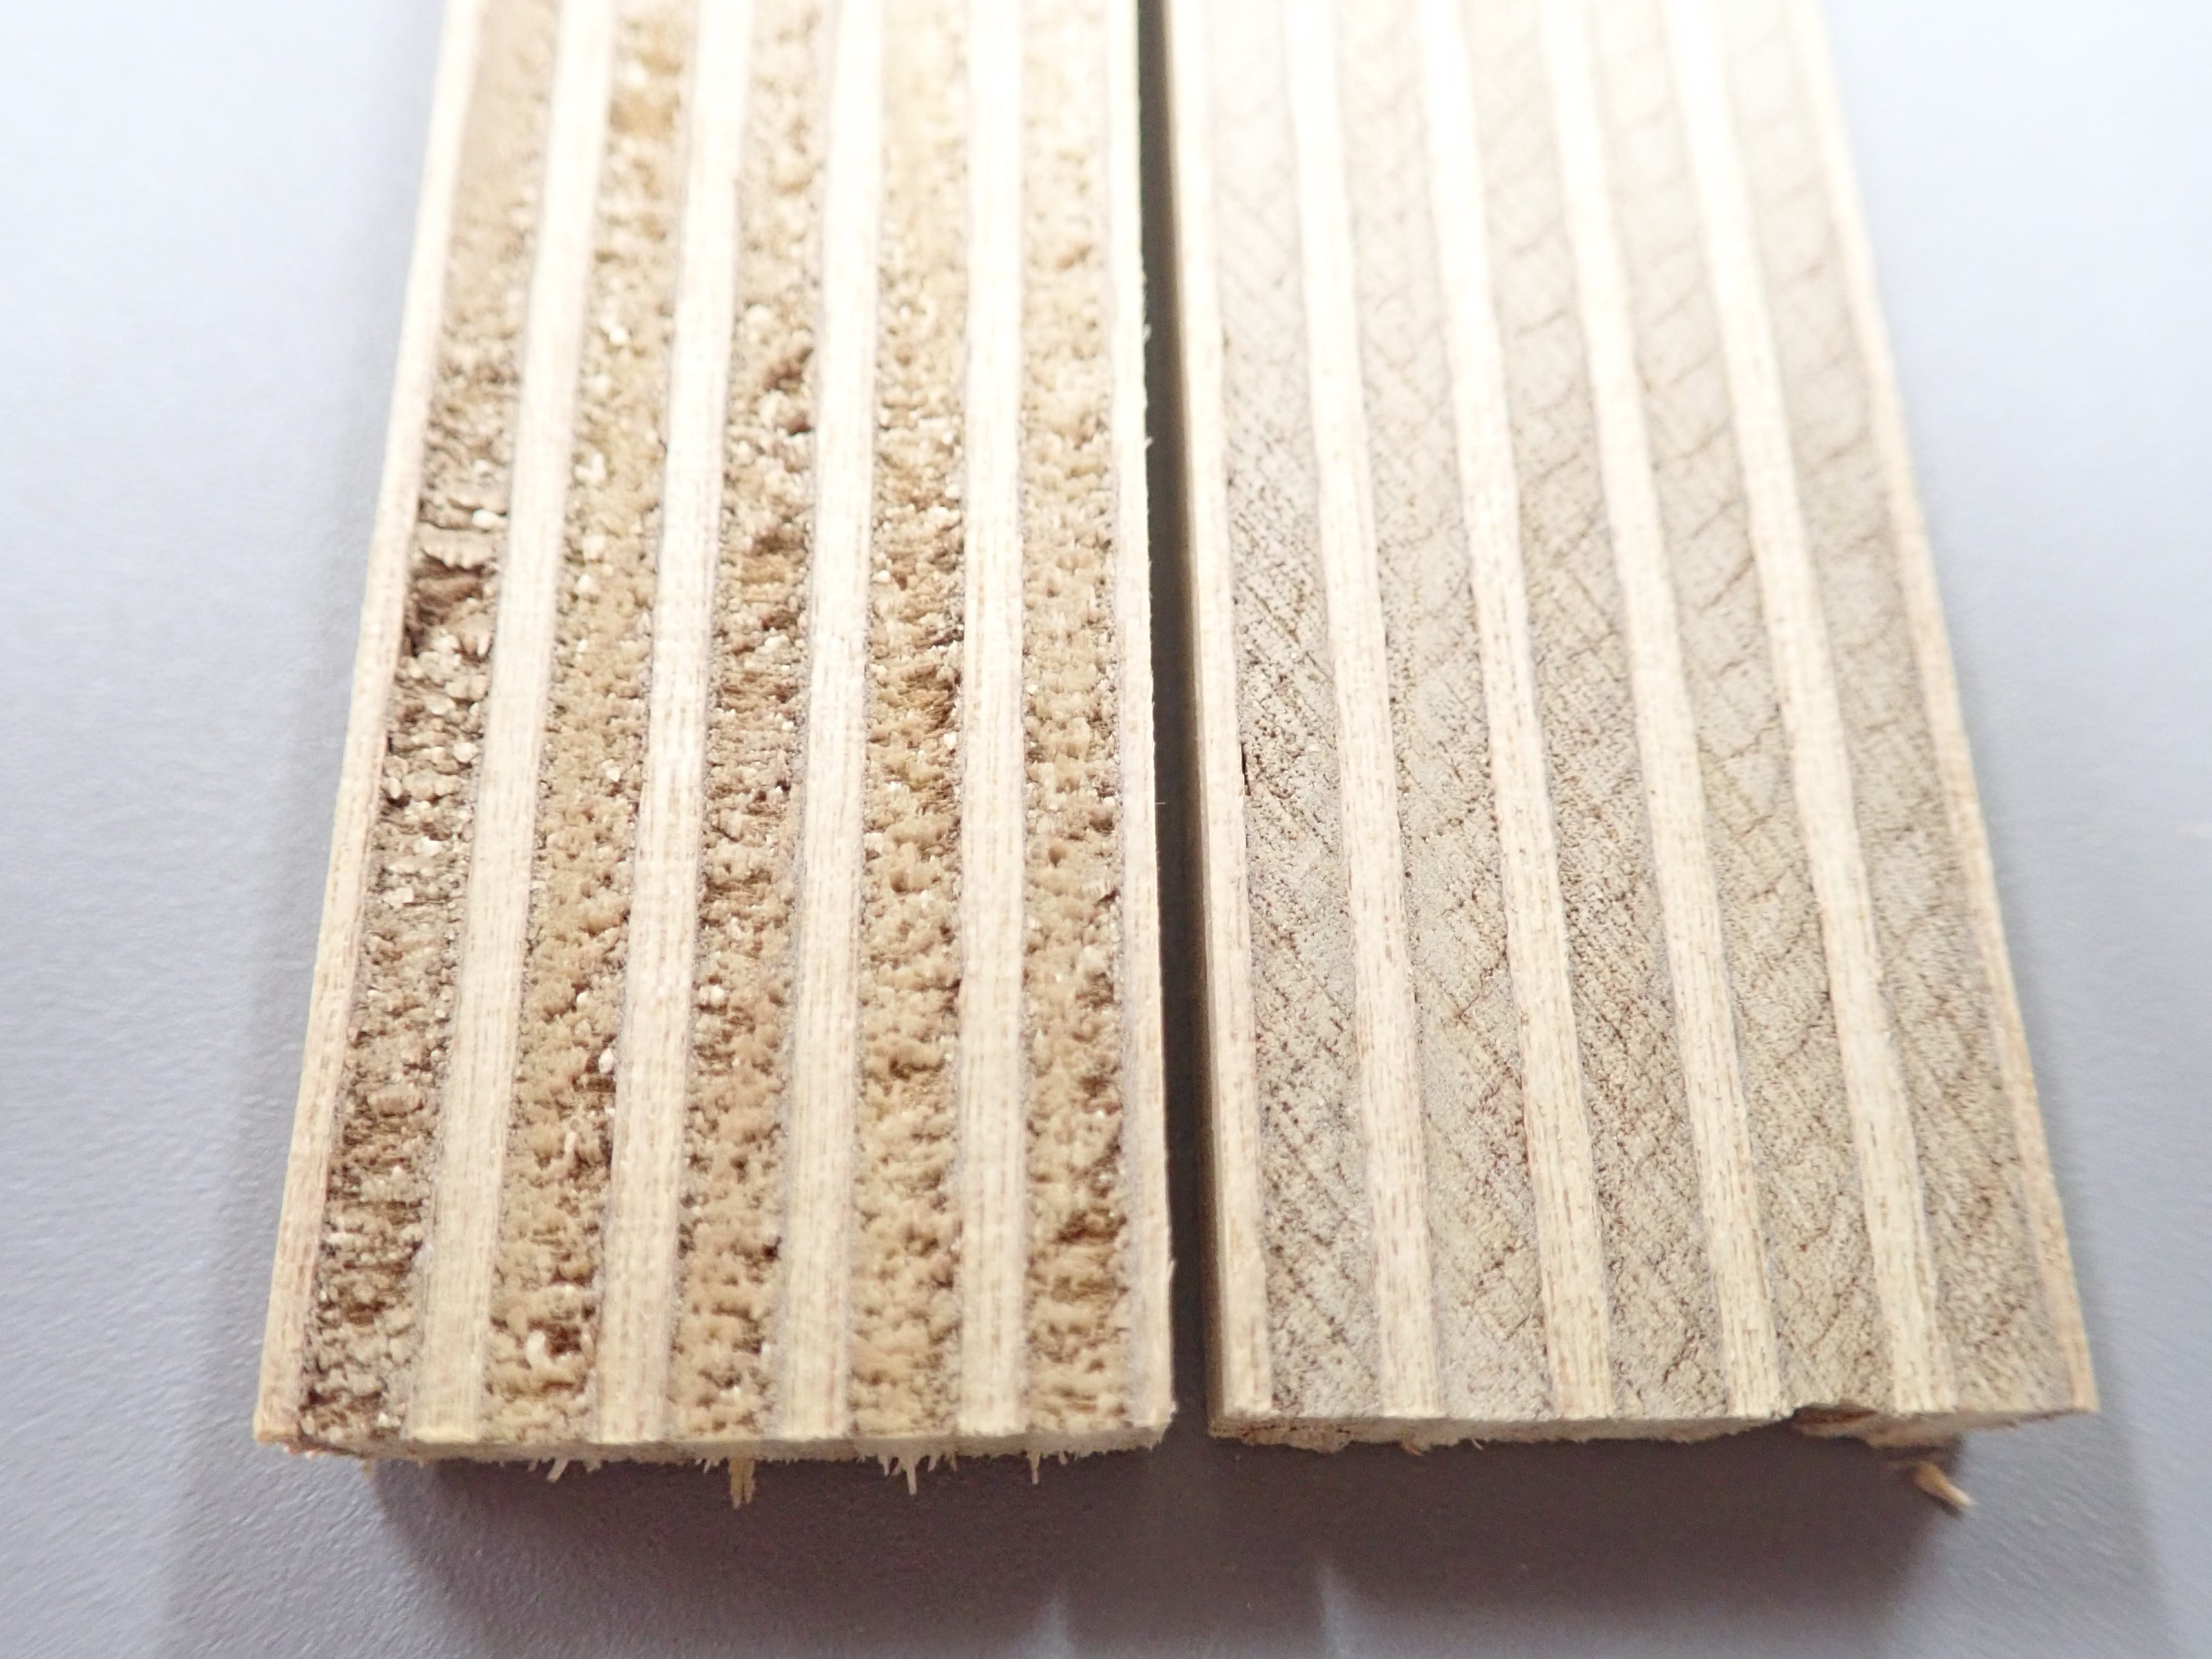
You can of course handsaw your plywood to size and joint its edges with a sharp handplane - bevel up or down makes little difference, but its sharpness will :-) The plywood I’ve shown you here is made from soft poplar-wood and is a bastard to plane regardless of how keen you handplane is, but good-quality birch plywood (or similar) yields nice, clean edges — it slices instead of crumpling.
I might not be a huge fan of ‘cardboard cabinetry’ (MDF carcasses), but a consummate woodworker should be able to use any kind of sheet material well when that is the best choice for the job at hand.
“The job at hand“ … Heh! I should have that tattooed above my arsecrack, in German Fraktur, as some kind of obscure yet sordid tradie’s tramp stamp :-)
***
I, for one, would appreciate a few more rants. Maybe it’s the misanthrope in me. I’d be interested if you feel this safe approach of the masses is the same in Norway or the Scandinavian counties versus North America.
I think the lack of design education or at least design literacy in North America would have some effect on the average consumer’s approach to… consuming. But maybe I’m full of shit.