

Glueing frames
Glueing frames
Spread, assemble, clamp and wait ... repeat

[ soundtrack : from ‘BABYLON BERLIN’ - ‘Ein Tag wie Gold’ - Meret Becker ]
***
This post is too long for email — open in browser for full length.
***
It often strikes me, when skipping through the online woodworking world, how some topics — dovetails springs to mind! — are often covered while most other aspects of woodworking (and there are many) less often get a mention.
My guess would be that this is mostly a result of two factors: 1) The content is produced with a hobbyist audience in mind, and 2) the online attention economy selects for the conspicuous, the visually comprehensible and the ‘showy’ — and also, increasingly the ‘virtually virtuous’.
It seems like everyone (including me) wants to be a chairmaker which is as close as woodworking gets to sculpture and boasts that you’ve ‘broken free of 90’. Not for you the trite, square ploddings of the pedestrian cabinet makers, you free spirit, you!
There is of course nothing at all wrong with making a chair or a nicely dovetailed box with contrasting woods to bring out the pleasing geometry of the joint. Your friends and family will rightly praise you for your woodworking skills and consider you a clever craftsman. Whether someone will pay you for it is another question.
But there is so much more to woodworking. Most of it unglamorous — and that’s what you’ll find here.
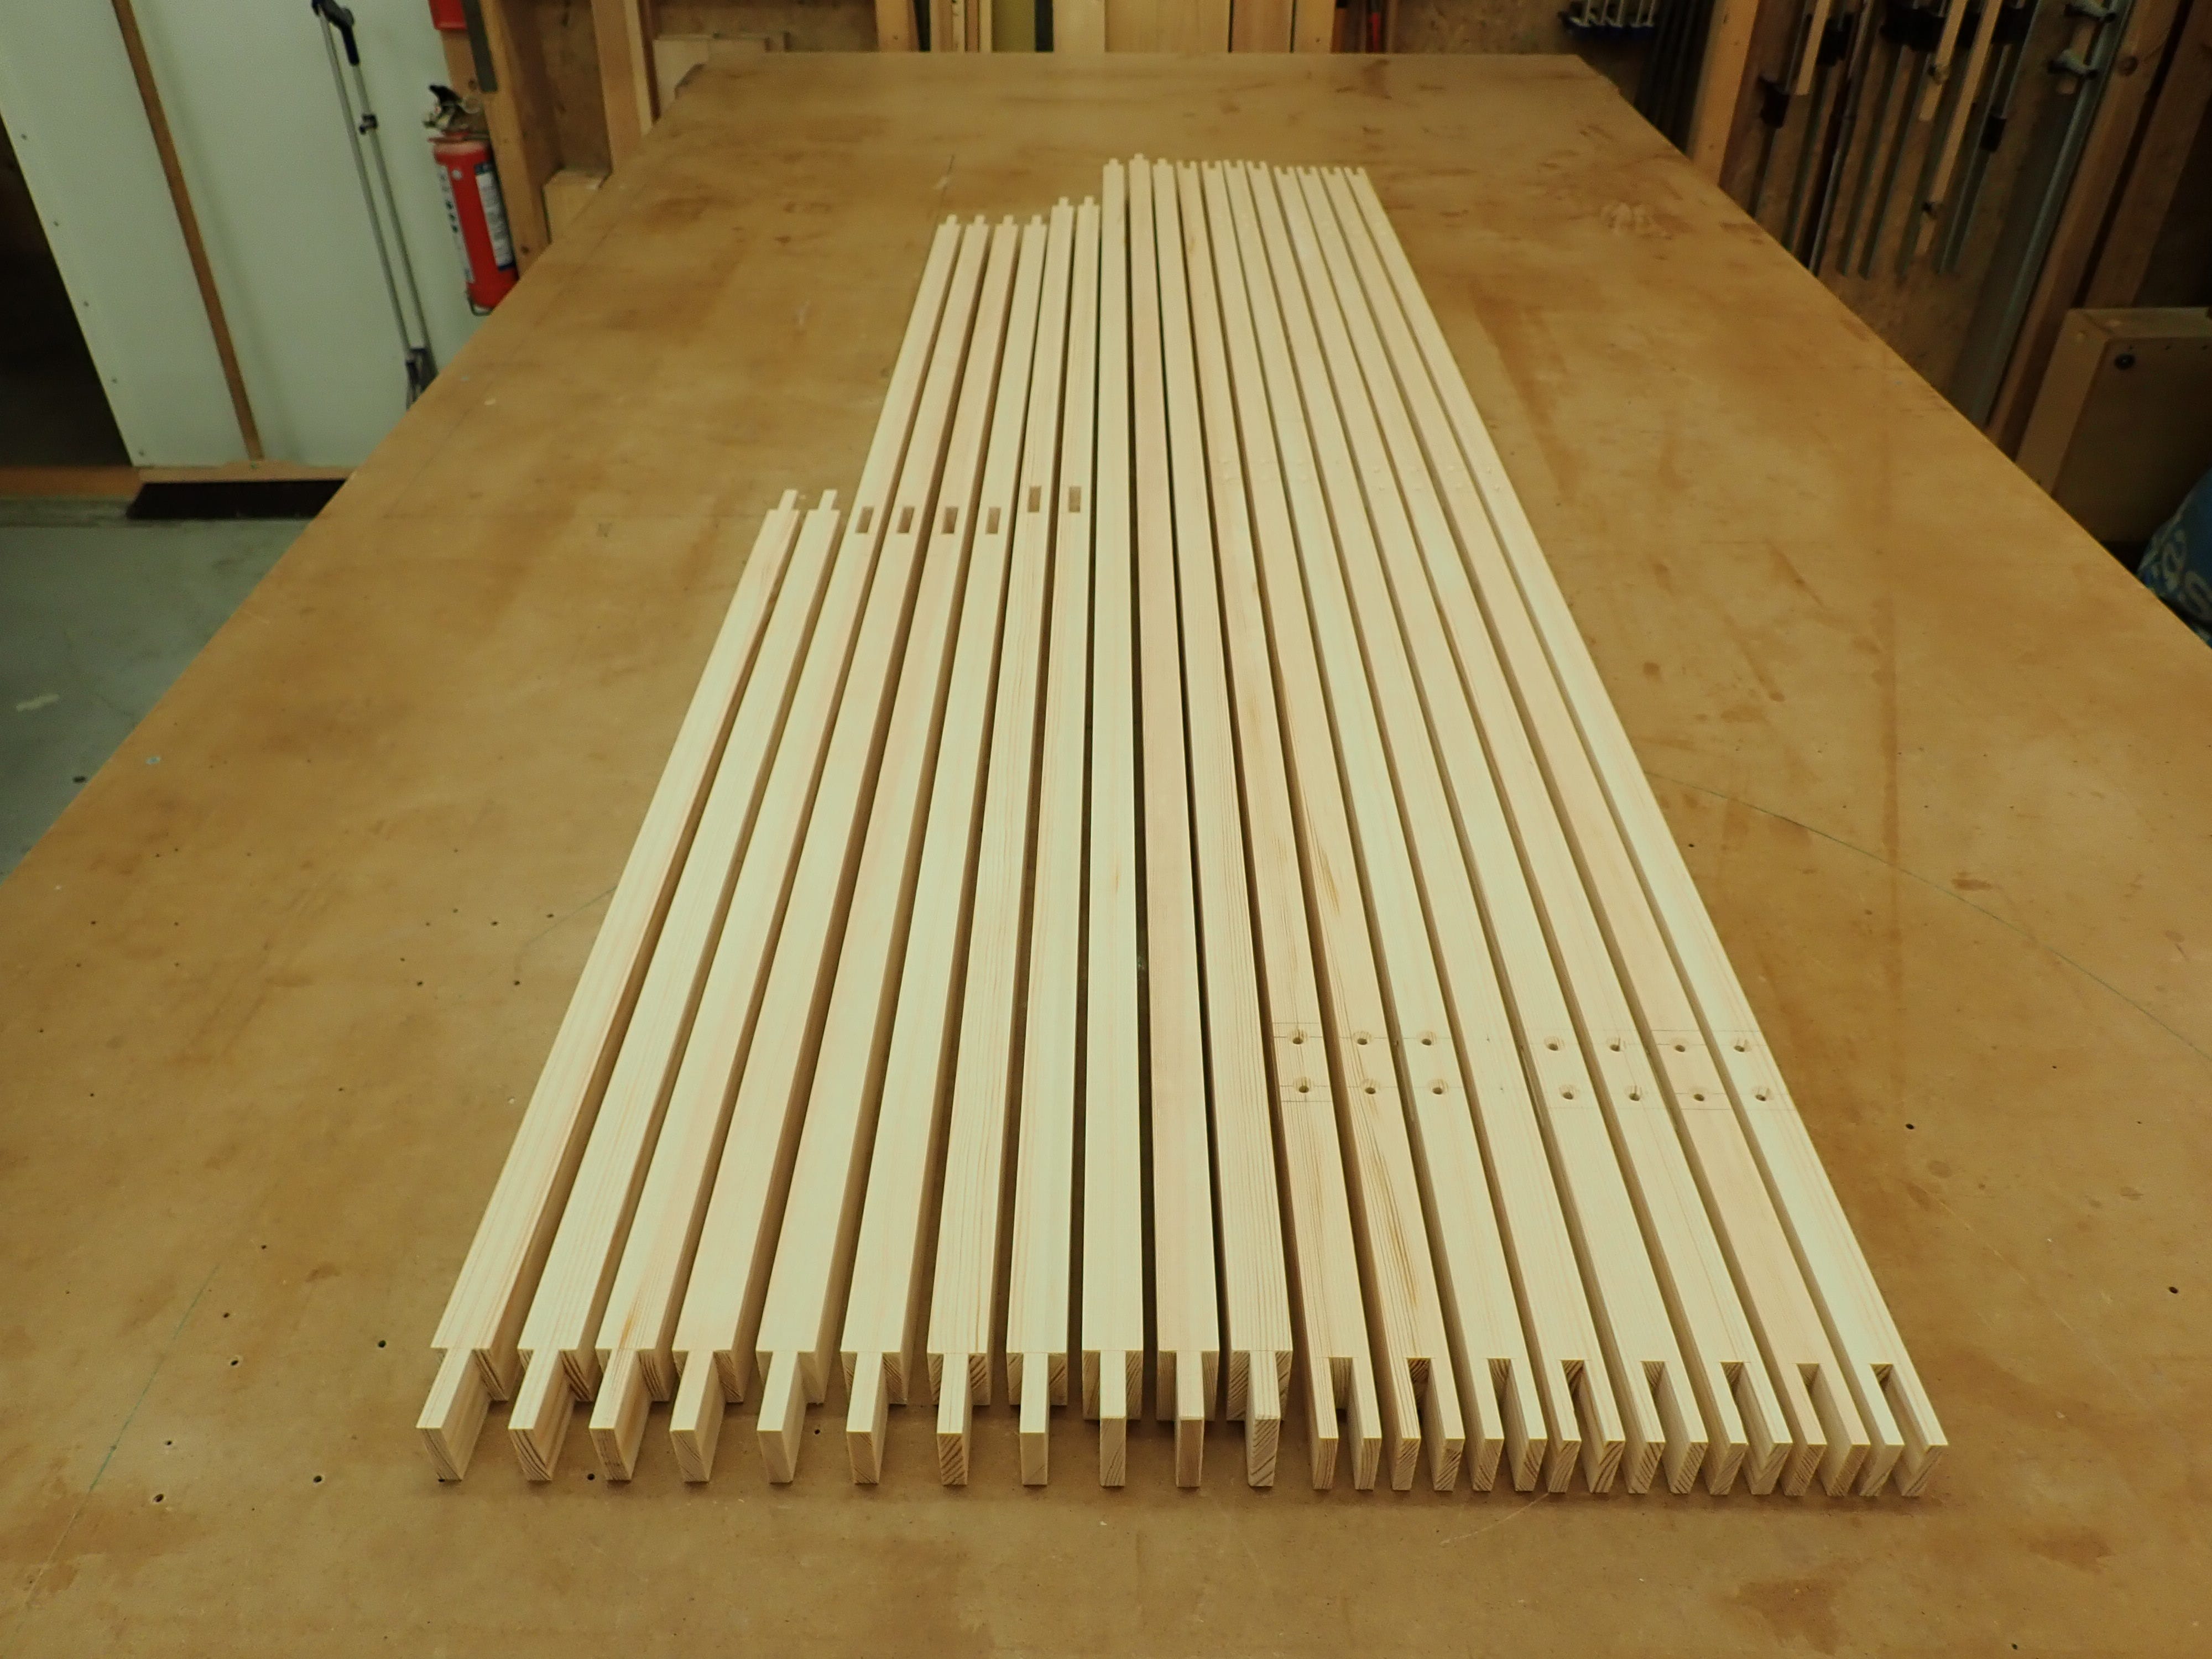
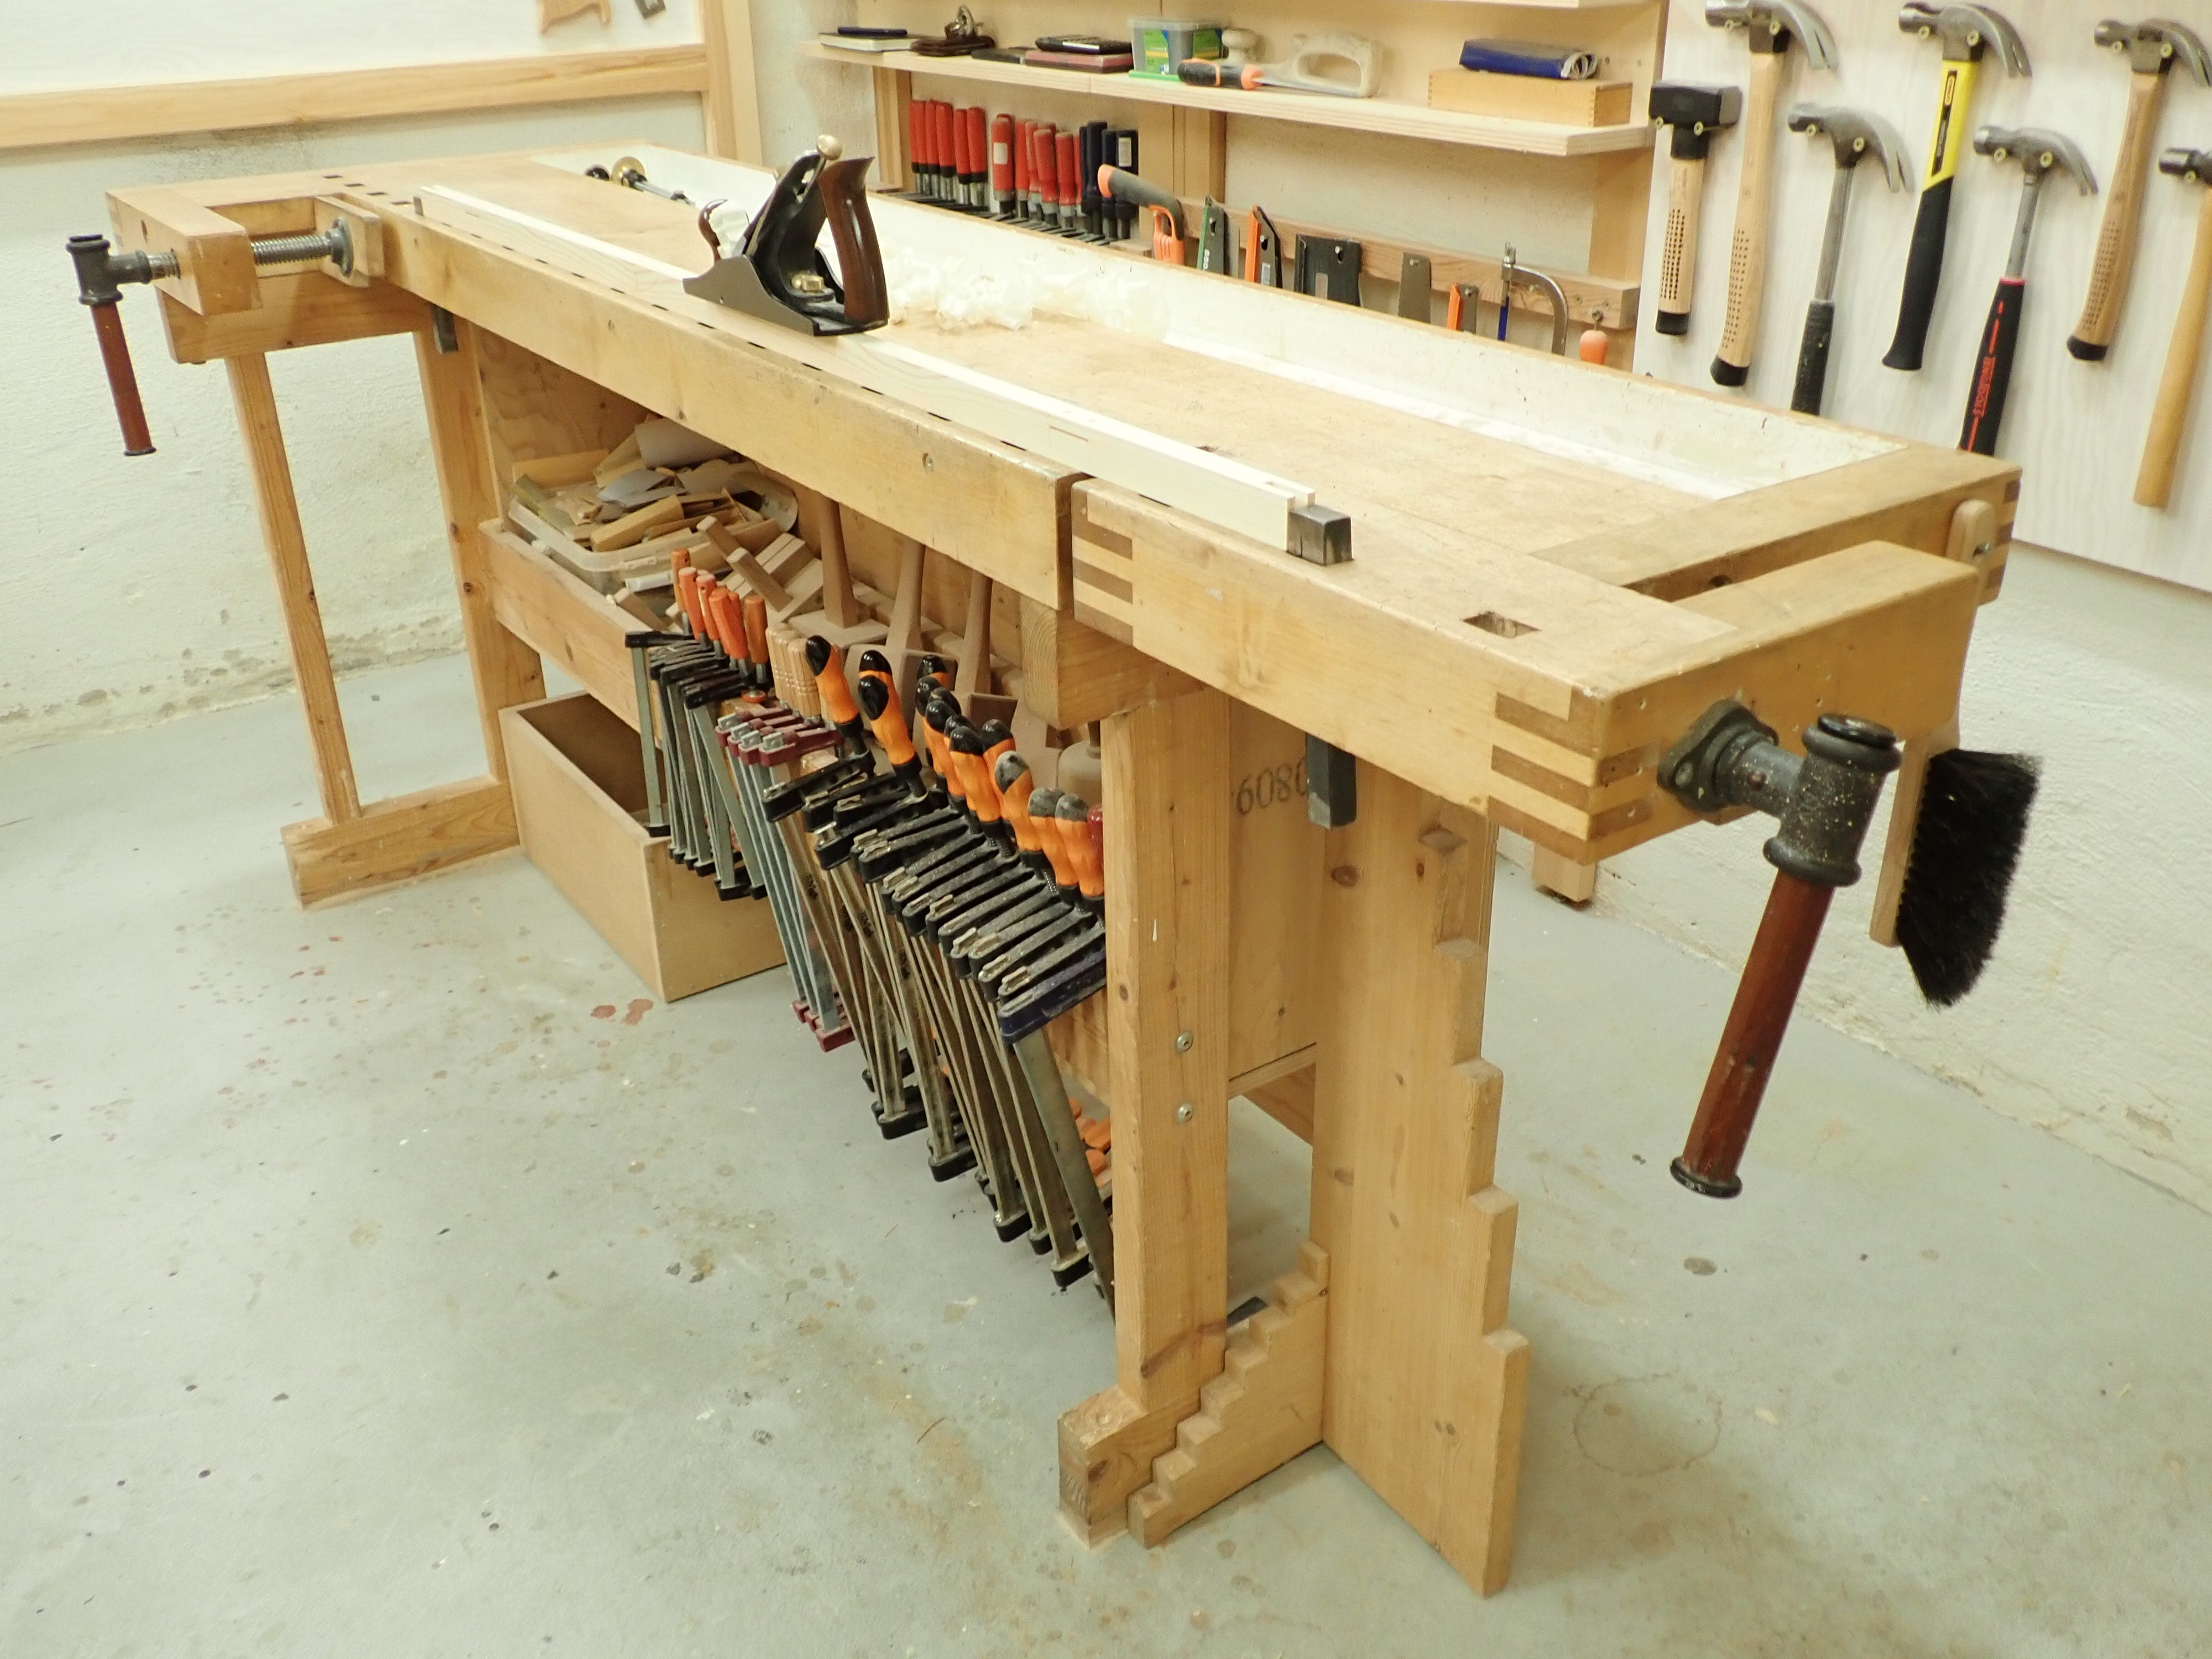
I’m making historical copies of ‘winter-windows’ for the attic of an old building that I’ve made several things for previously.
So far I’ve made the parts for the slender (20 x 30 mm) casement / ‘hinge-frame’ that will be mounted in the reveal on the inside of the original window.

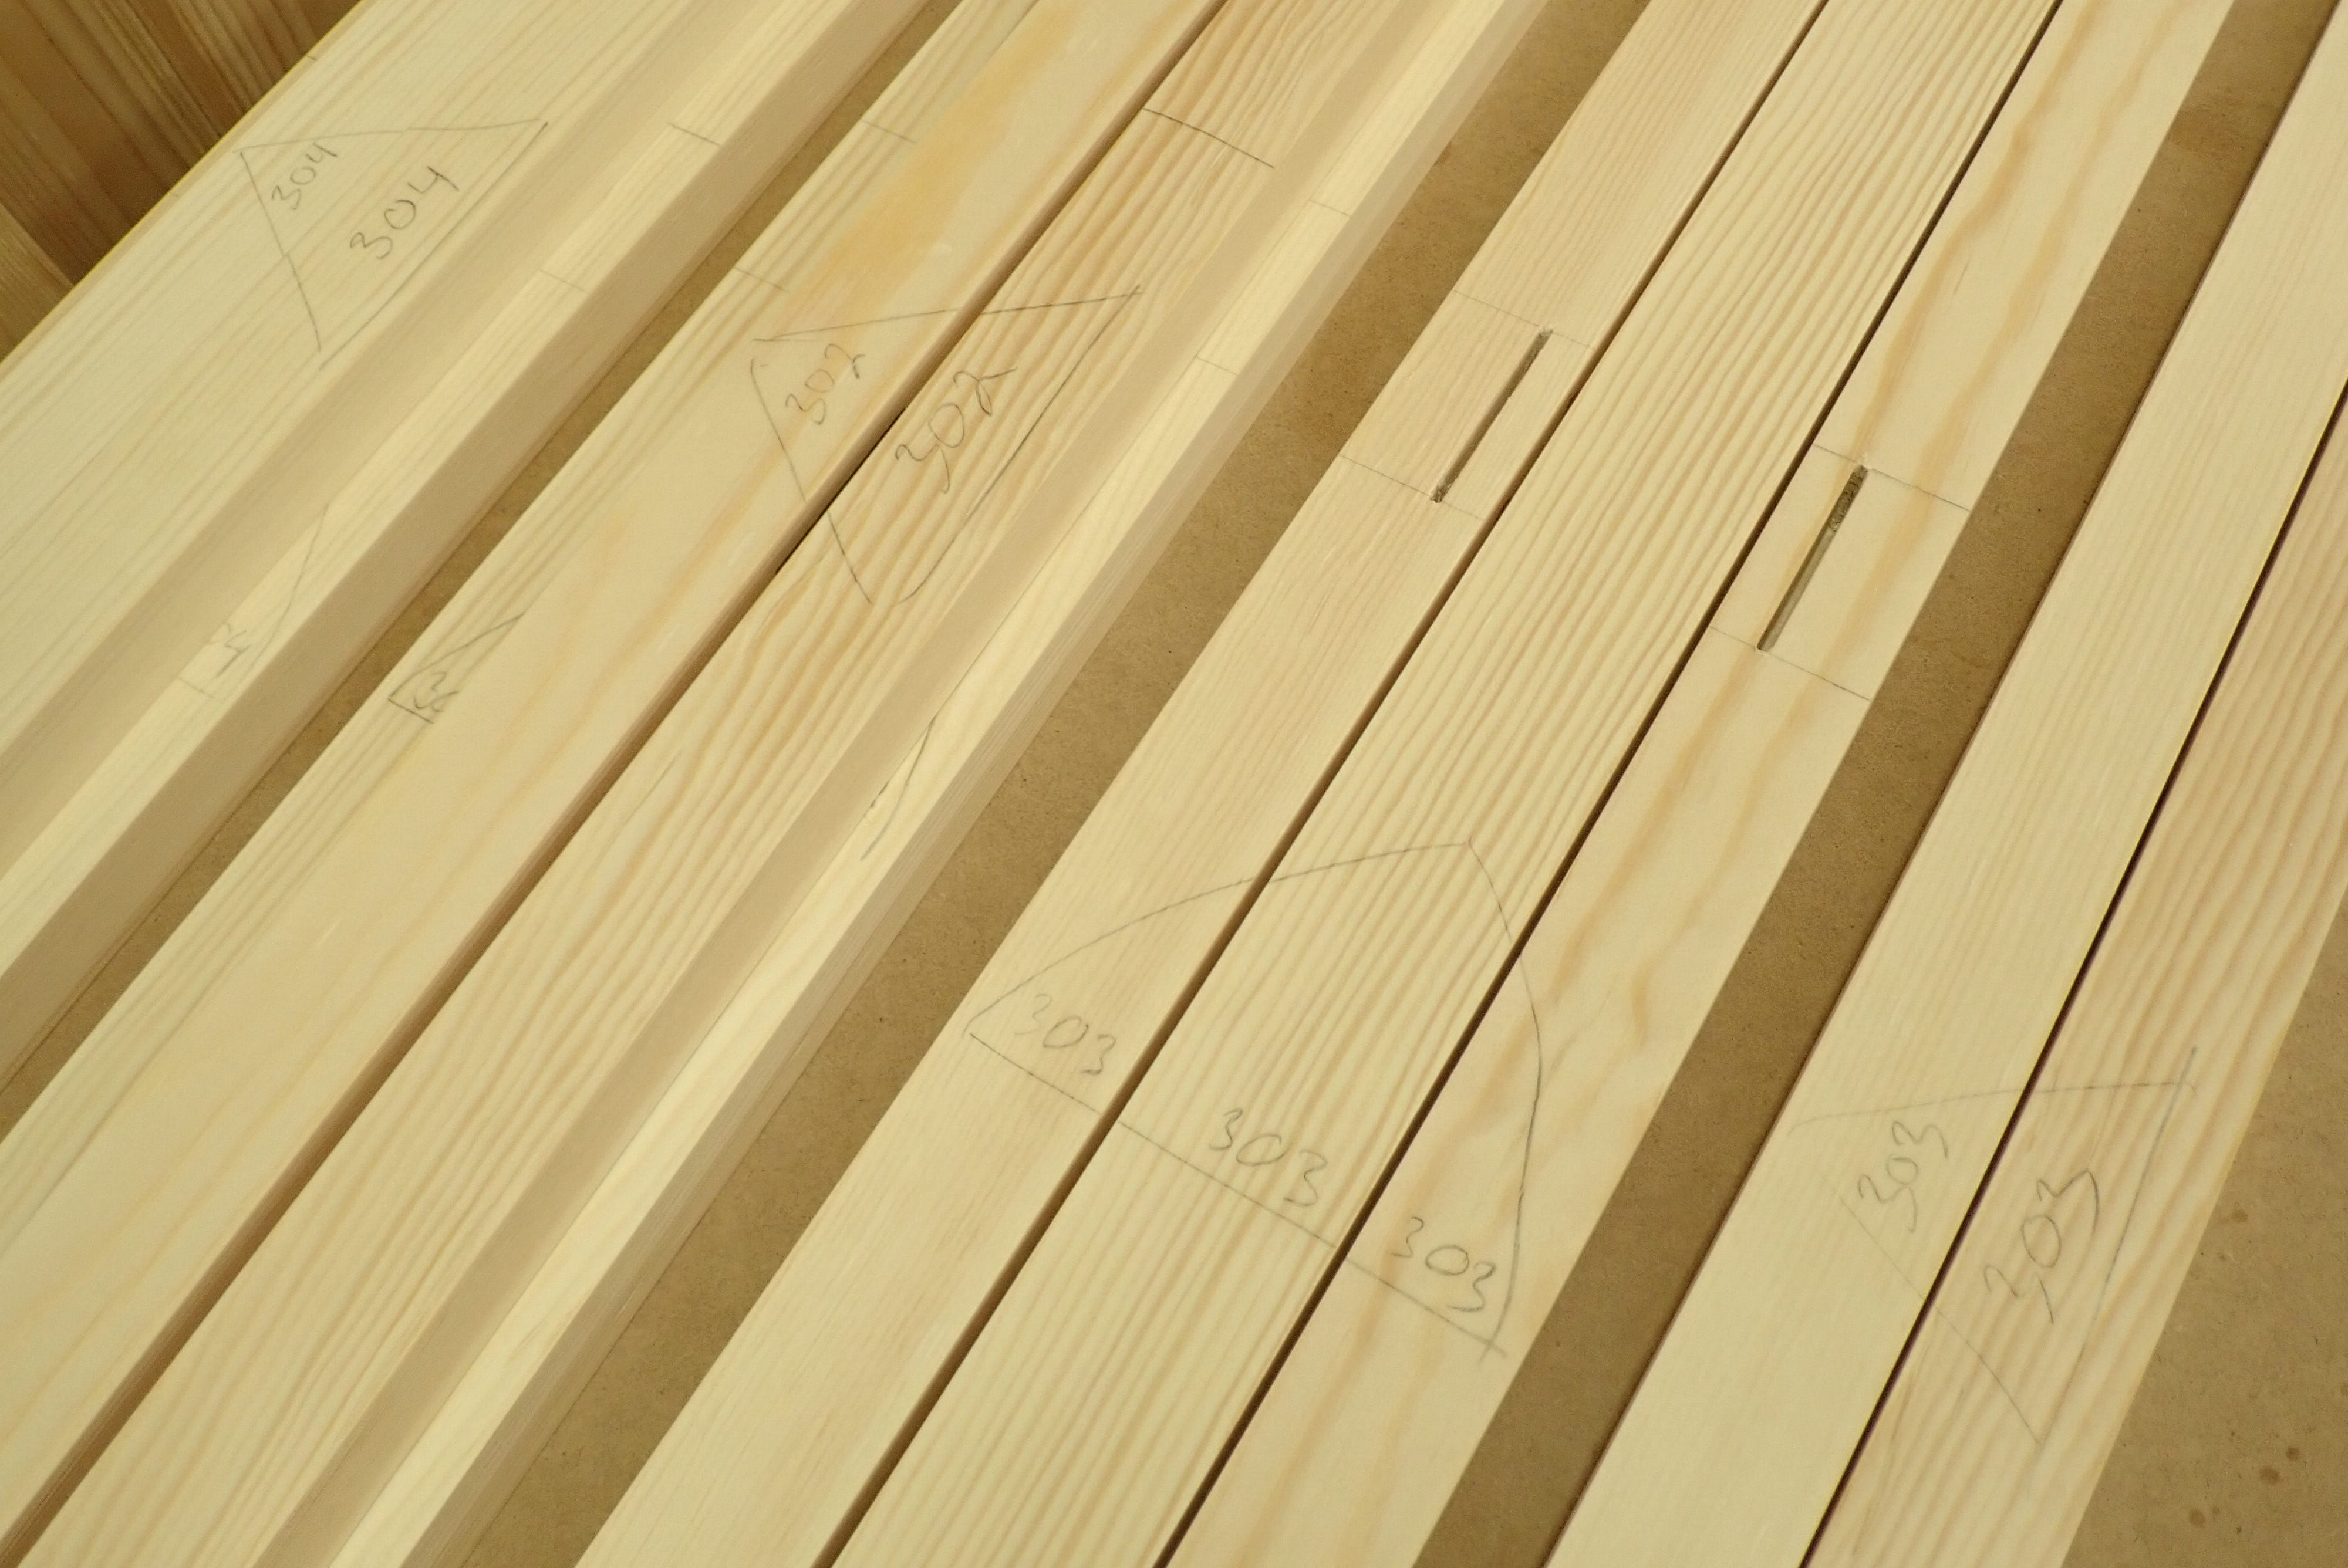
As is so often the case when making things for old buildings, the sizes are similar but not exactly the same. In this case: 4 windows, 3 different sizes. Therefore I have to keep my sticks in good order so the correct parts go together with the right orientation. The solution is numbered parts and ‘pyramid-markings’.
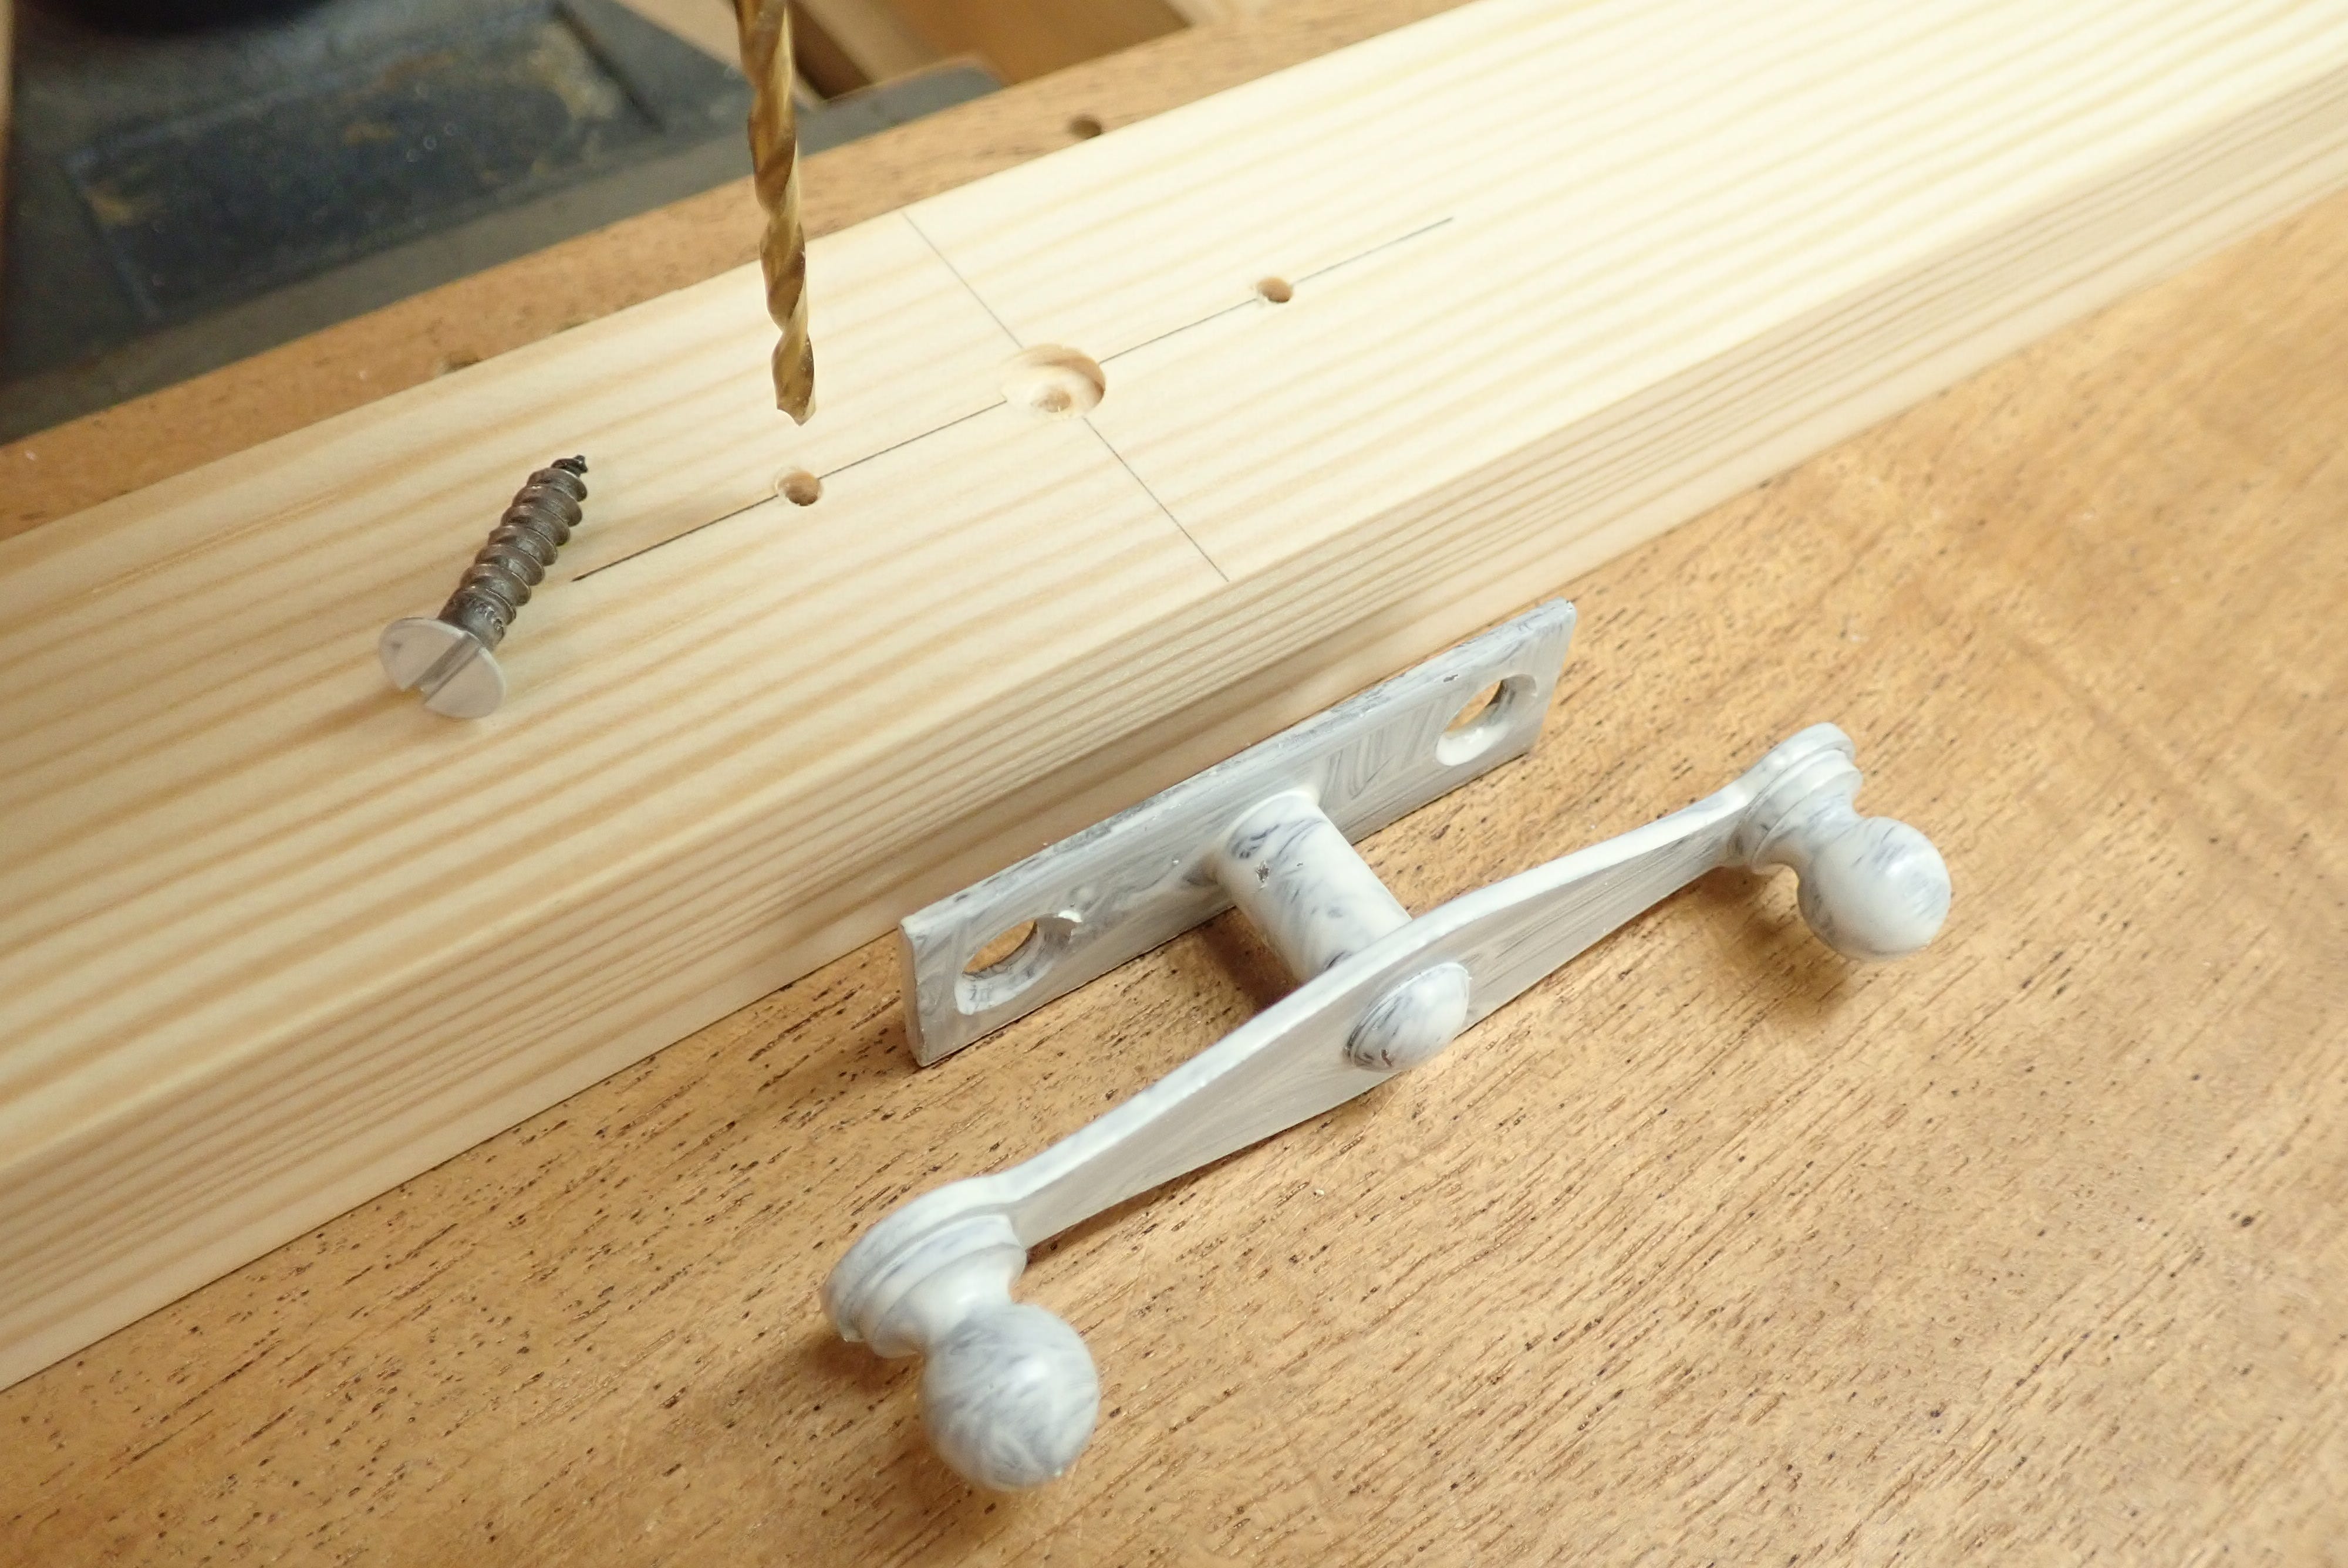
It is convenient to hinge and pre-drill for hardware before the parts are glued into huge, unwieldy squares.
Everything is easier to do while they are still single sticks :-)
Almost ready for glueing, but before I do that I like to give the inside edges a lick-over.
By giving them a kiss with a smoothing plane you get rid of your old markings and are left with a clean and fresh surface.

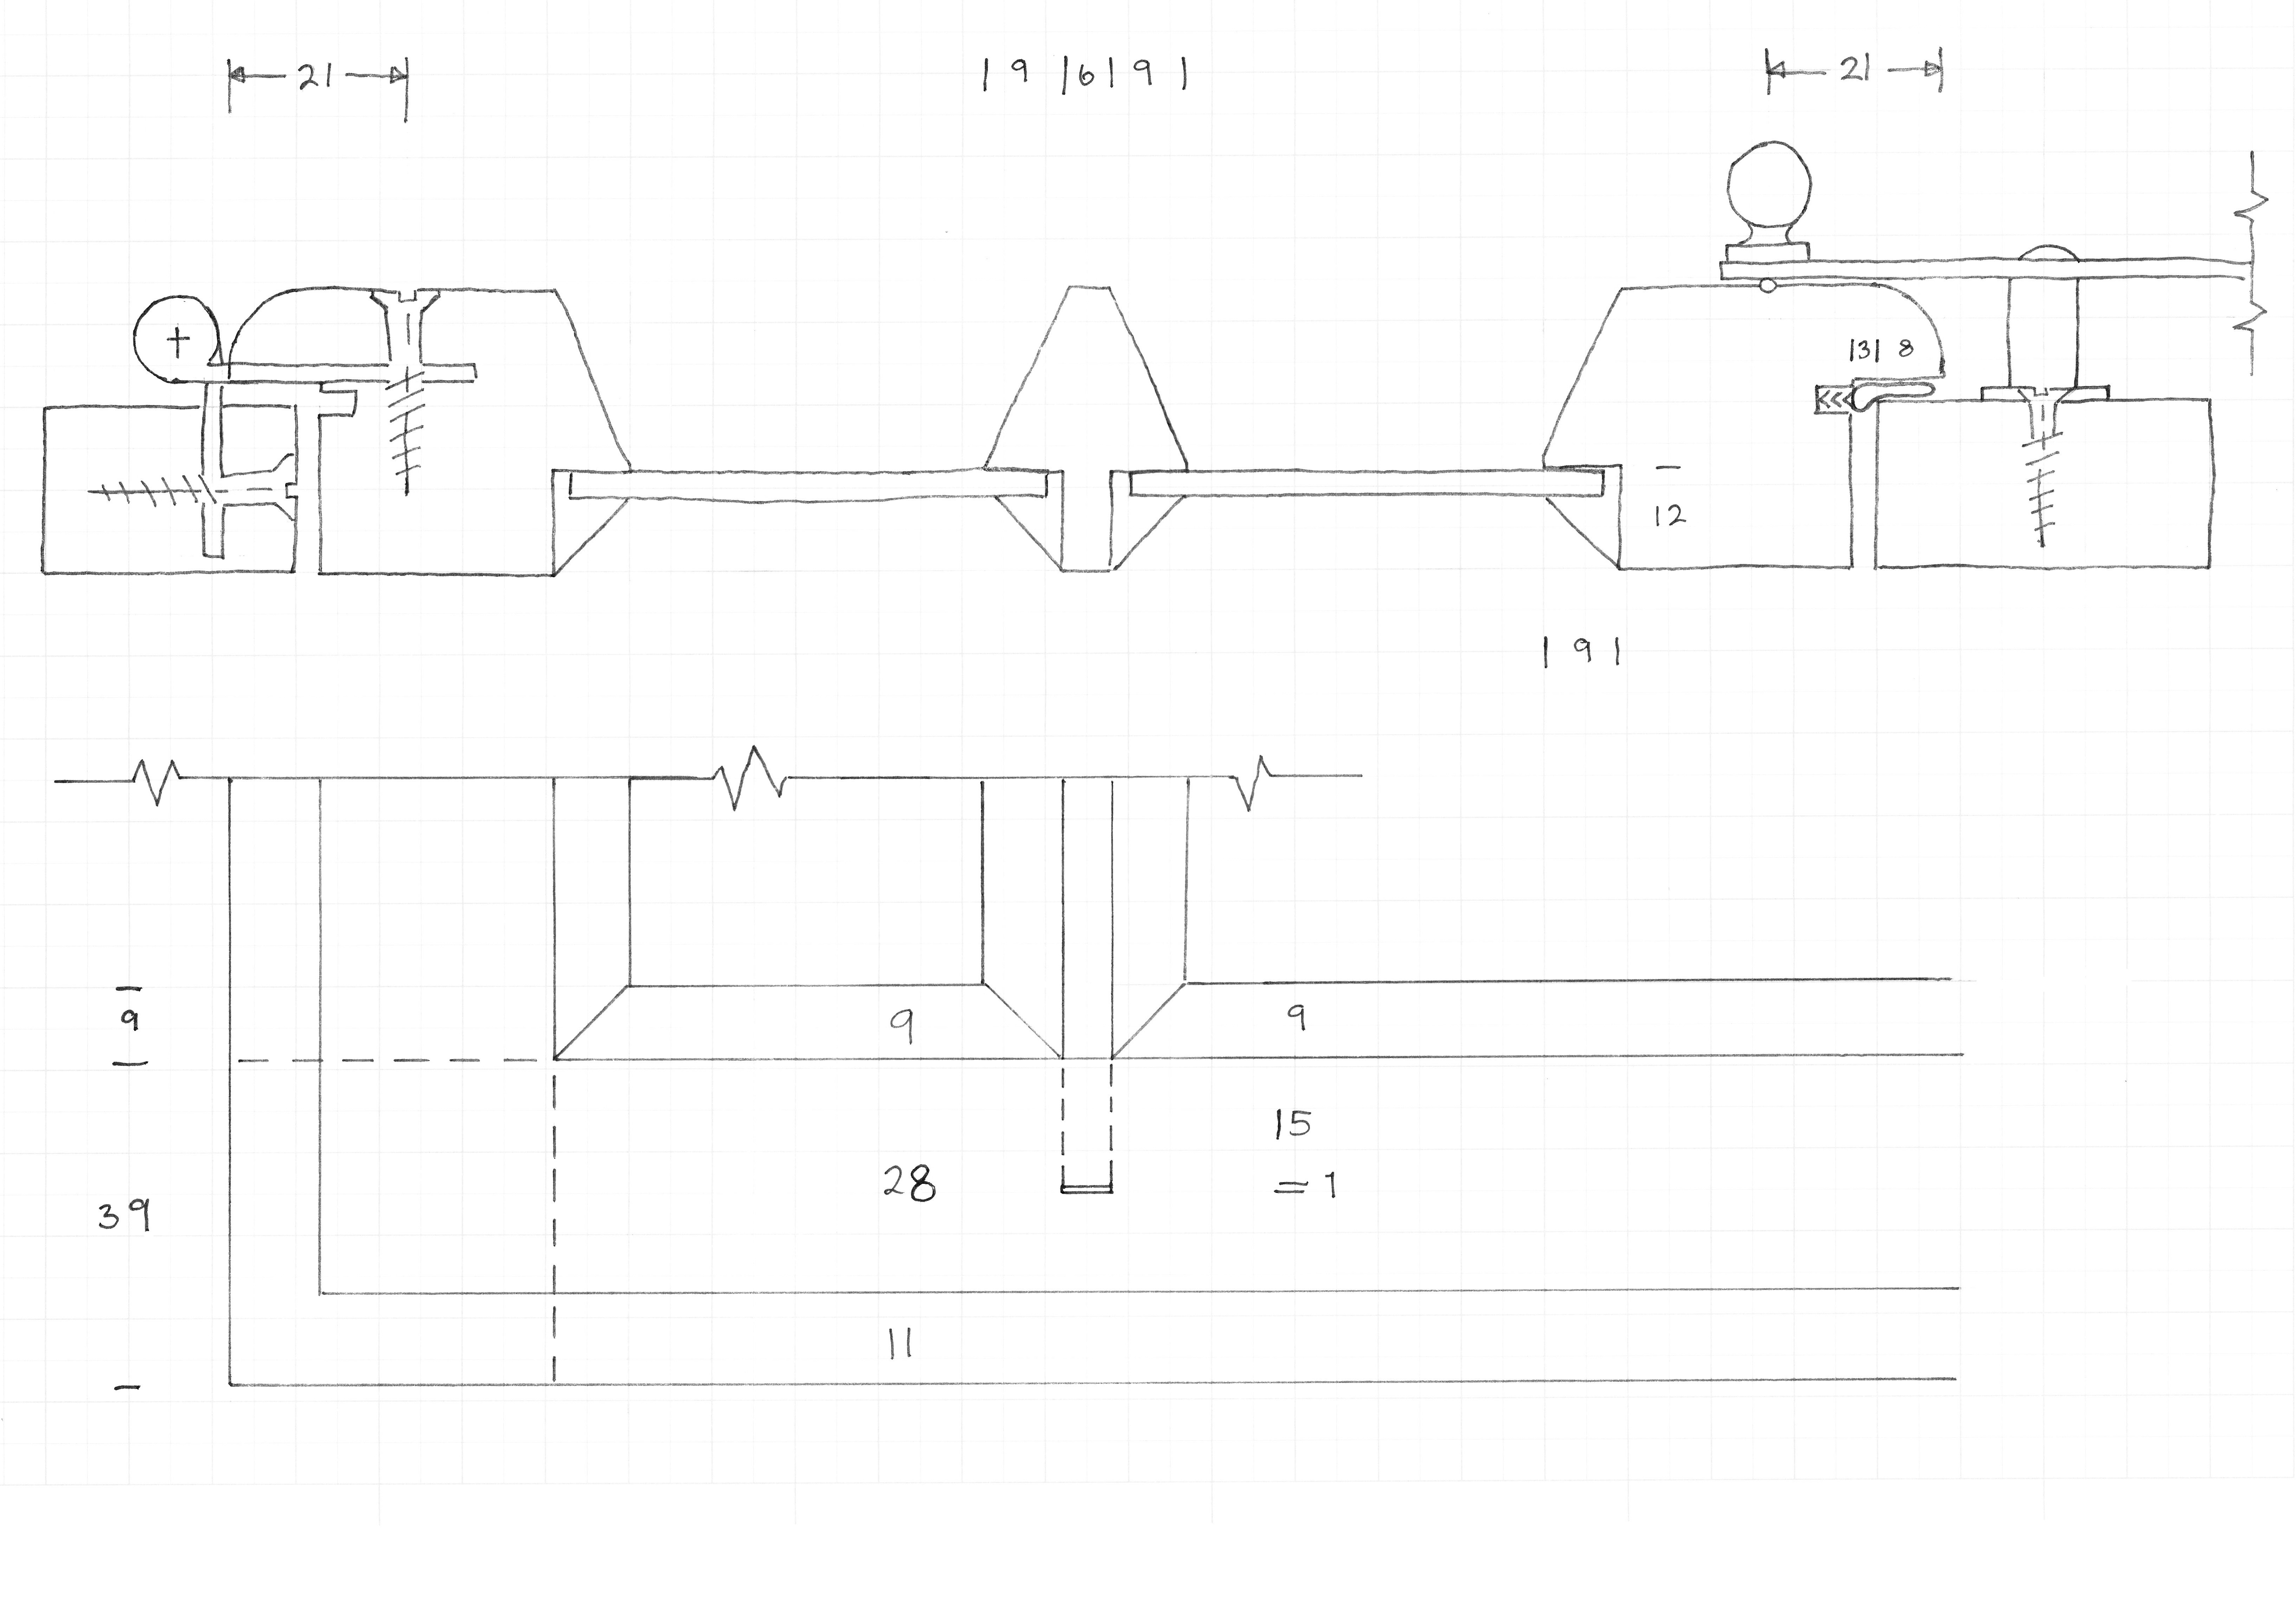
Before we do the deed there is a final, finer point worth making: Take a close look at this picture:
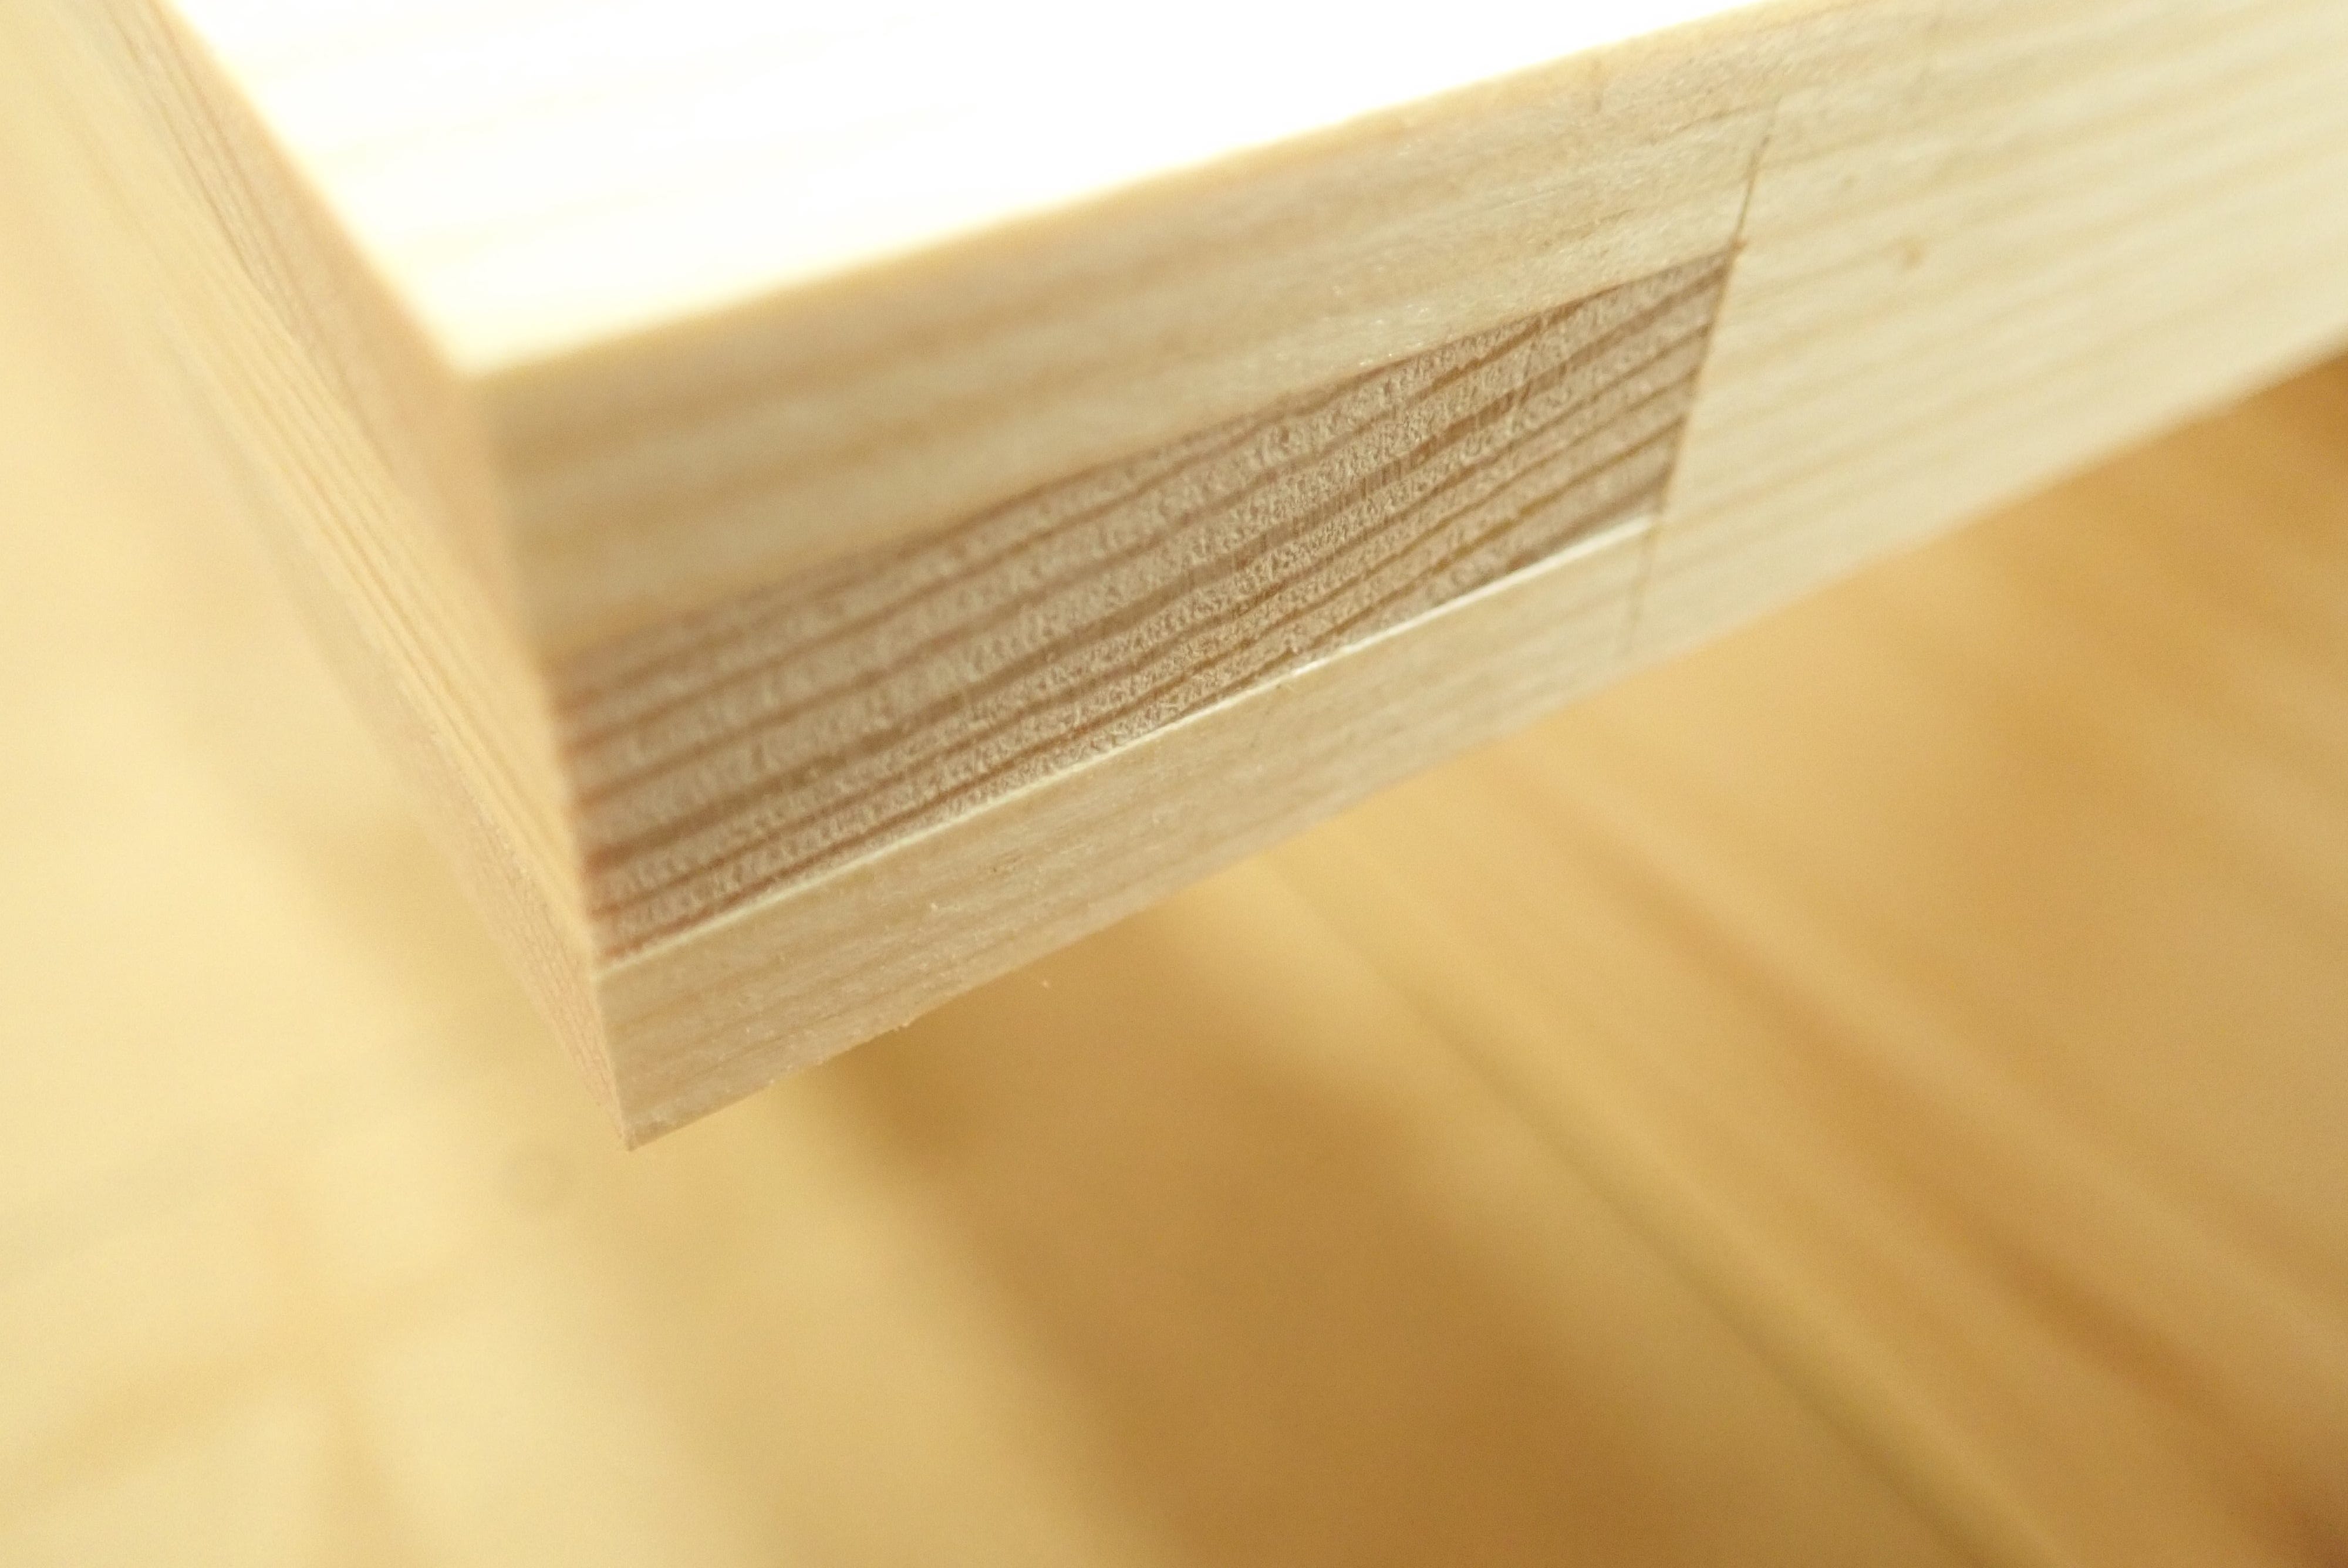
Notice that the end-grain surface of the tenon is slightly shy of the surrounding open mortise. A coincidence? Hardly!
The reason is this: The two parts of the joint will be pressed together (‘sideways’) by clamps. If the tenon were to protrude, the clamp would bear on it instead of pressing the mortise-part home against the tenon’s shoulders. Hard to explain well with words — easy to understand when it’s in front of your eyes.
I mentioned earlier that these frames measure 20 x 30 mm (in cross-section, obviously!). That’s their nominal, finished size. I actually machined them to 20,3 x 30,3 mm or thereabouts. I think of it as ‘planing surplus’ (‘høvlings-monn’ in Norwegian). The lengths are cut spot on, the extra thickness is what gives the clamps the right place of purchase and can be removed later with a pass or two of a plane if necessary.
But I’m getting ahead of myself, distracted by details …
All the things you must remember to do, before you can even start spreading the glue! Woodworking in a nutshell.
I won’t make this into a dissertation about all the different types of glue and their various properties, interesting topic though it may be. I’ll stick to the practical use of the stuff as done by yours truly in the peaceful confines of his own shop. Perhaps in a future post … but it quickly gets very technical and theoretical … and chemistry is not one of my interests.
It’s been a long time since I used anything other than PVAC-glue (‘white glue’) or epoxy. I have mixed casein-based glue by the bucketful for veneering when I worked for a big shop, and have spread my fair amount of messy PolyUrethane glue. A small bottle of cyanoacrylate is useful for sticking down splinters and spelching. I’ve even fooled around with traditional hide-glue and its modern versions, but I always return to PVAC and ‘poxy.
PVAC is cheap, quite non-toxic, water-based (easy to clean brushes, rollers and everything else) and can be water-resistant enough for use in exterior doors and windows (D-3 class durability). It’s my first choice unless I need longer open time, gap-filling properties or 100% water-proof — in which case I switch to Epoxy.
When glueing up these frames I needed time to spread the glue on both surfaces (mortise and tenon), to assemble the frames, get the clamps in the right places and the diagonals squared off. So epoxy, then.
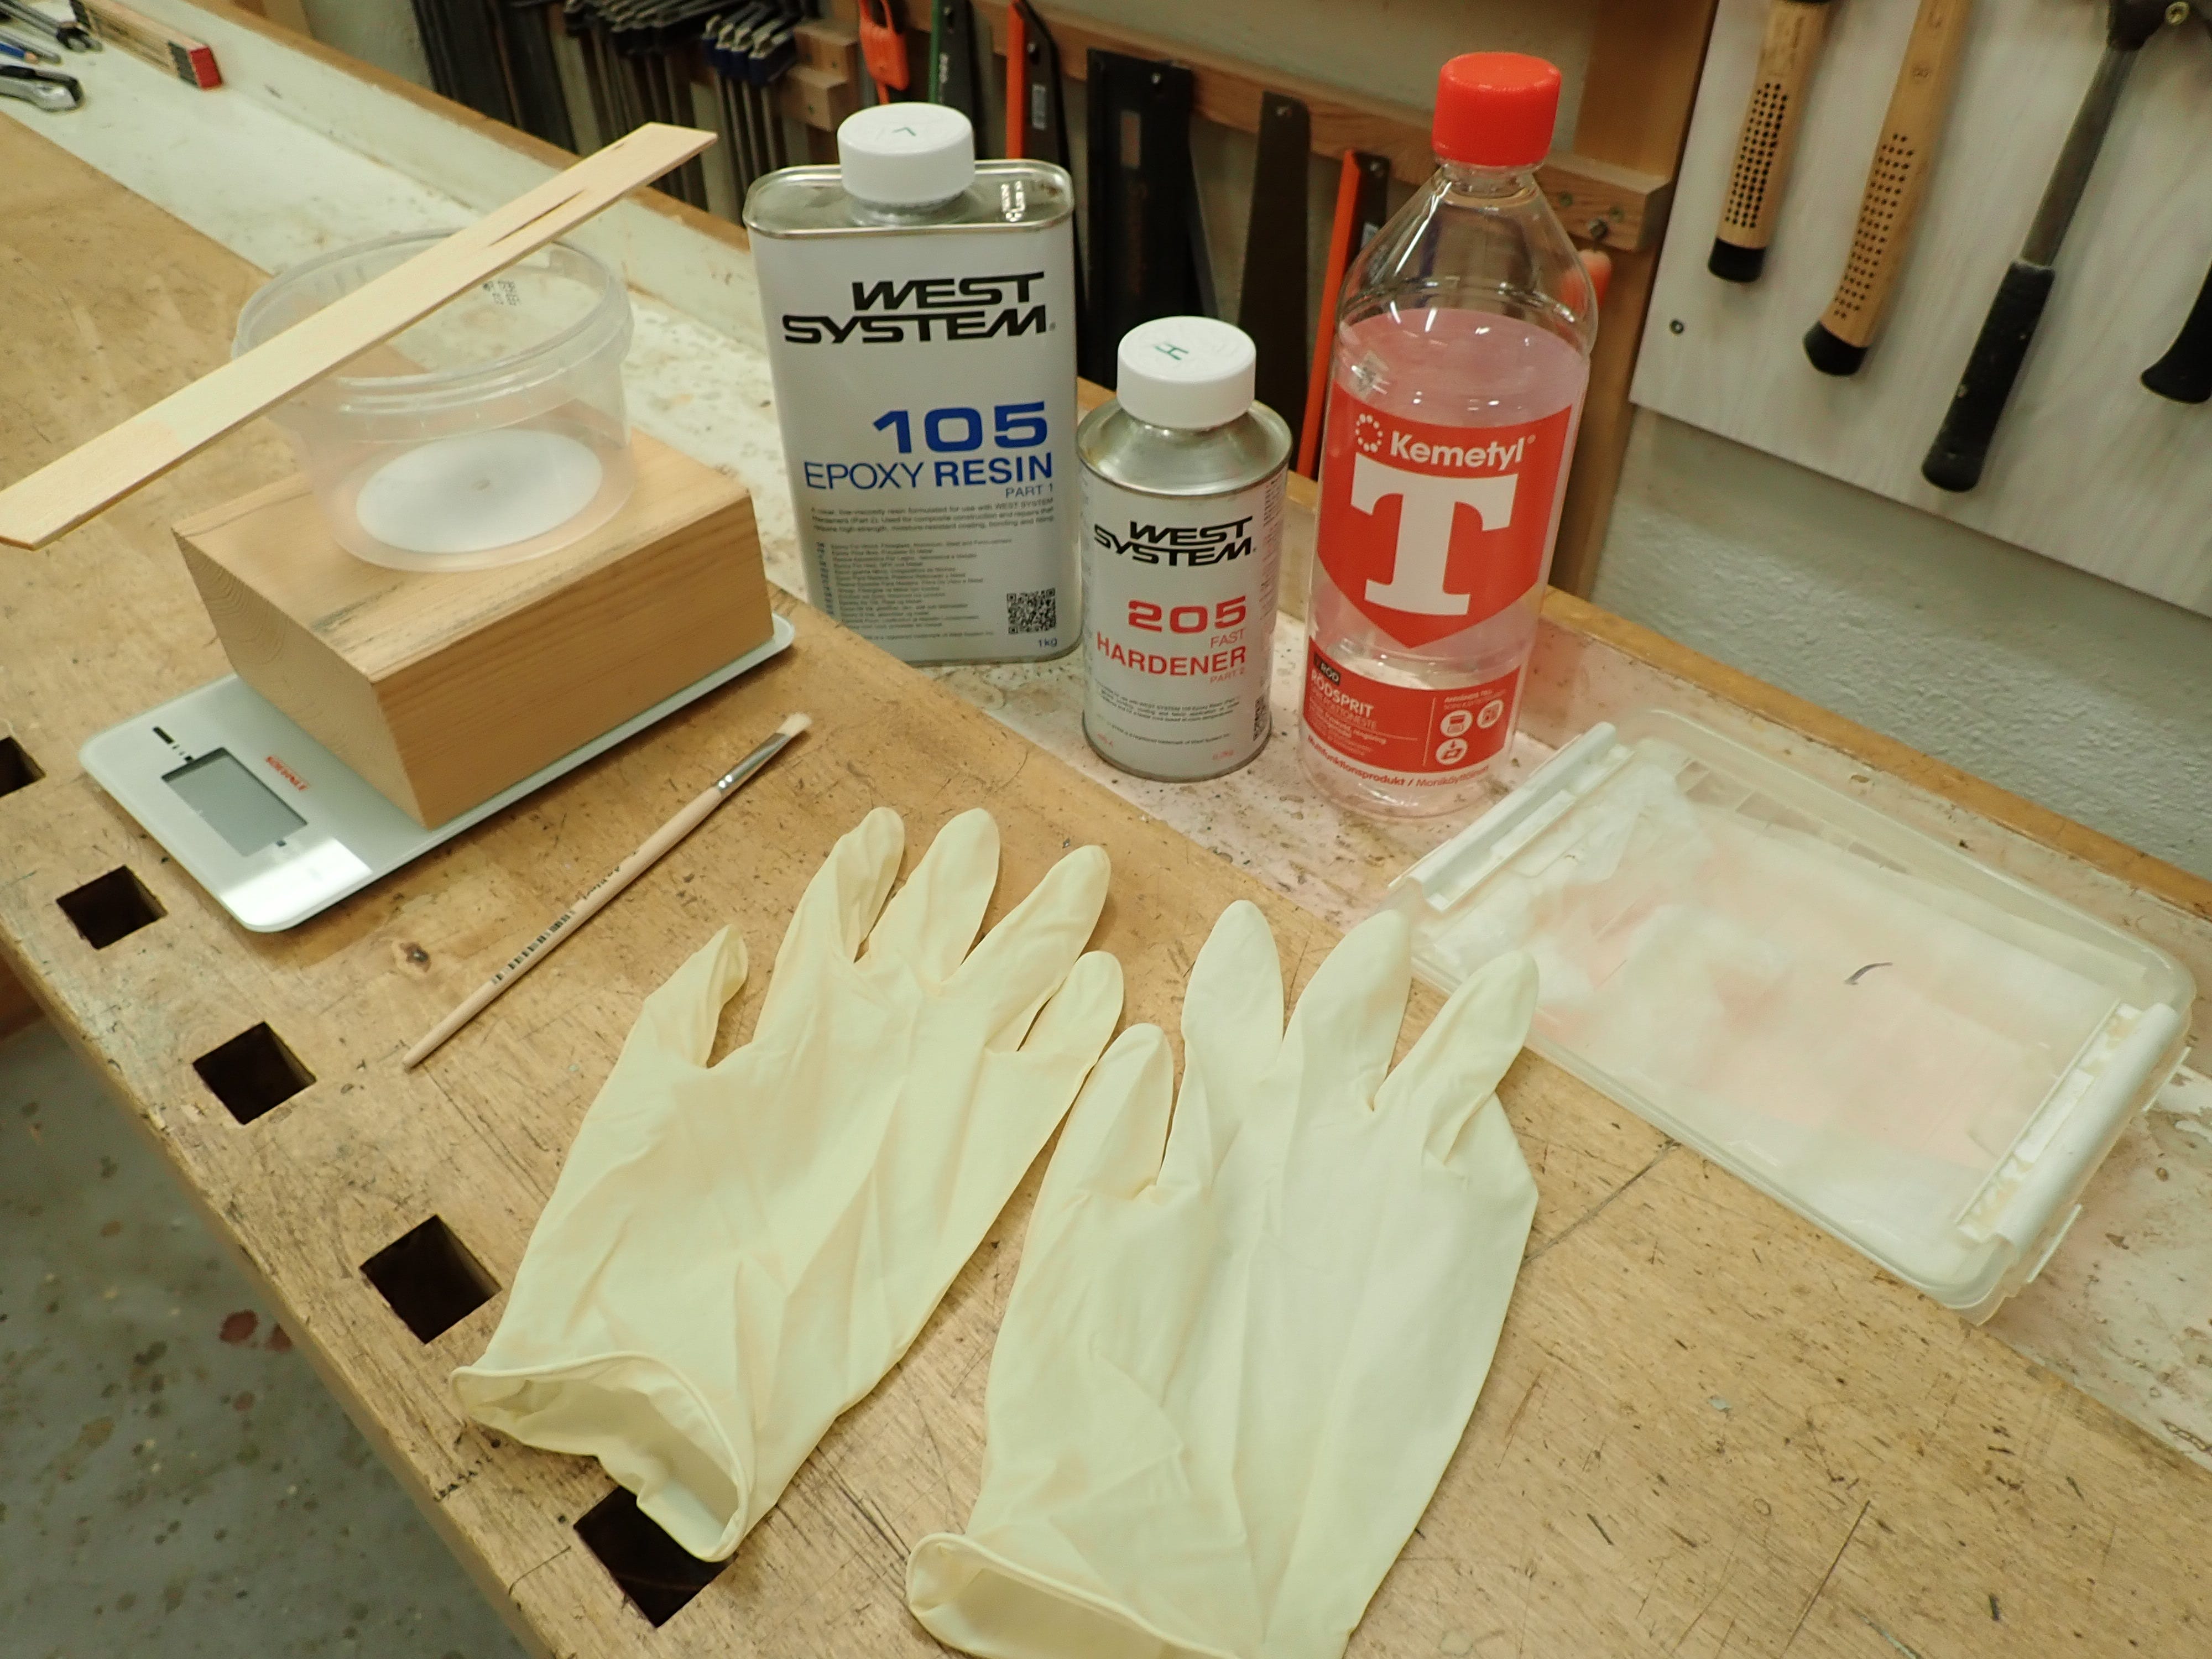
I use West System Epoxy. I buy the ‘A-pack’ = 1,2 kilogrammes which usually lasts me the better part of a year. Normally I get the slow 206 hardener, but last time I was in a hurry and left with the 205 fast hardener without noticing. Not a problem, since you still get 60–70 minutes of working time at 20°C — it’s still an ‘overnight glue’.
West System Epoxy is mixed in a ratio of 5 + 1 — whether by weight or volume (at least for smaller amounts it makes no difference.) I do not use the dysfunctional ‘glue pumps’ commonly sold with these metal cans, and instead measure by weight, using digital scales.
I keep at hand a plastic box filled with folded paper towels doused with denatured alcohol (‘red spirits’) for cleaning up wayward glue.
I stir the glue for two minutes and apply it conscientiously to all mating surfaces on both parts — mortise and tenon — with a cheap, disposable brush.
When assembling the parts and wiping off the excess glue I wear latex gloves. You do not need alcohol-diluted epoxy getting absorbed through your skin. As it is a chemically hardening glue there are no solvents to worry about (tho’ I wouldn’t actively inhale the slight smell of it!). It’s the skin-contact you ought to avoid. When properly mixed and cured, epoxy is one of the most chemically inert substances invented — or so I’ve read somewhere. Still, when sanding I take care to wear a mask and do not want to inhale the dust of it.
Epoxy is a wonderful glue but it has no business being on or in my body.
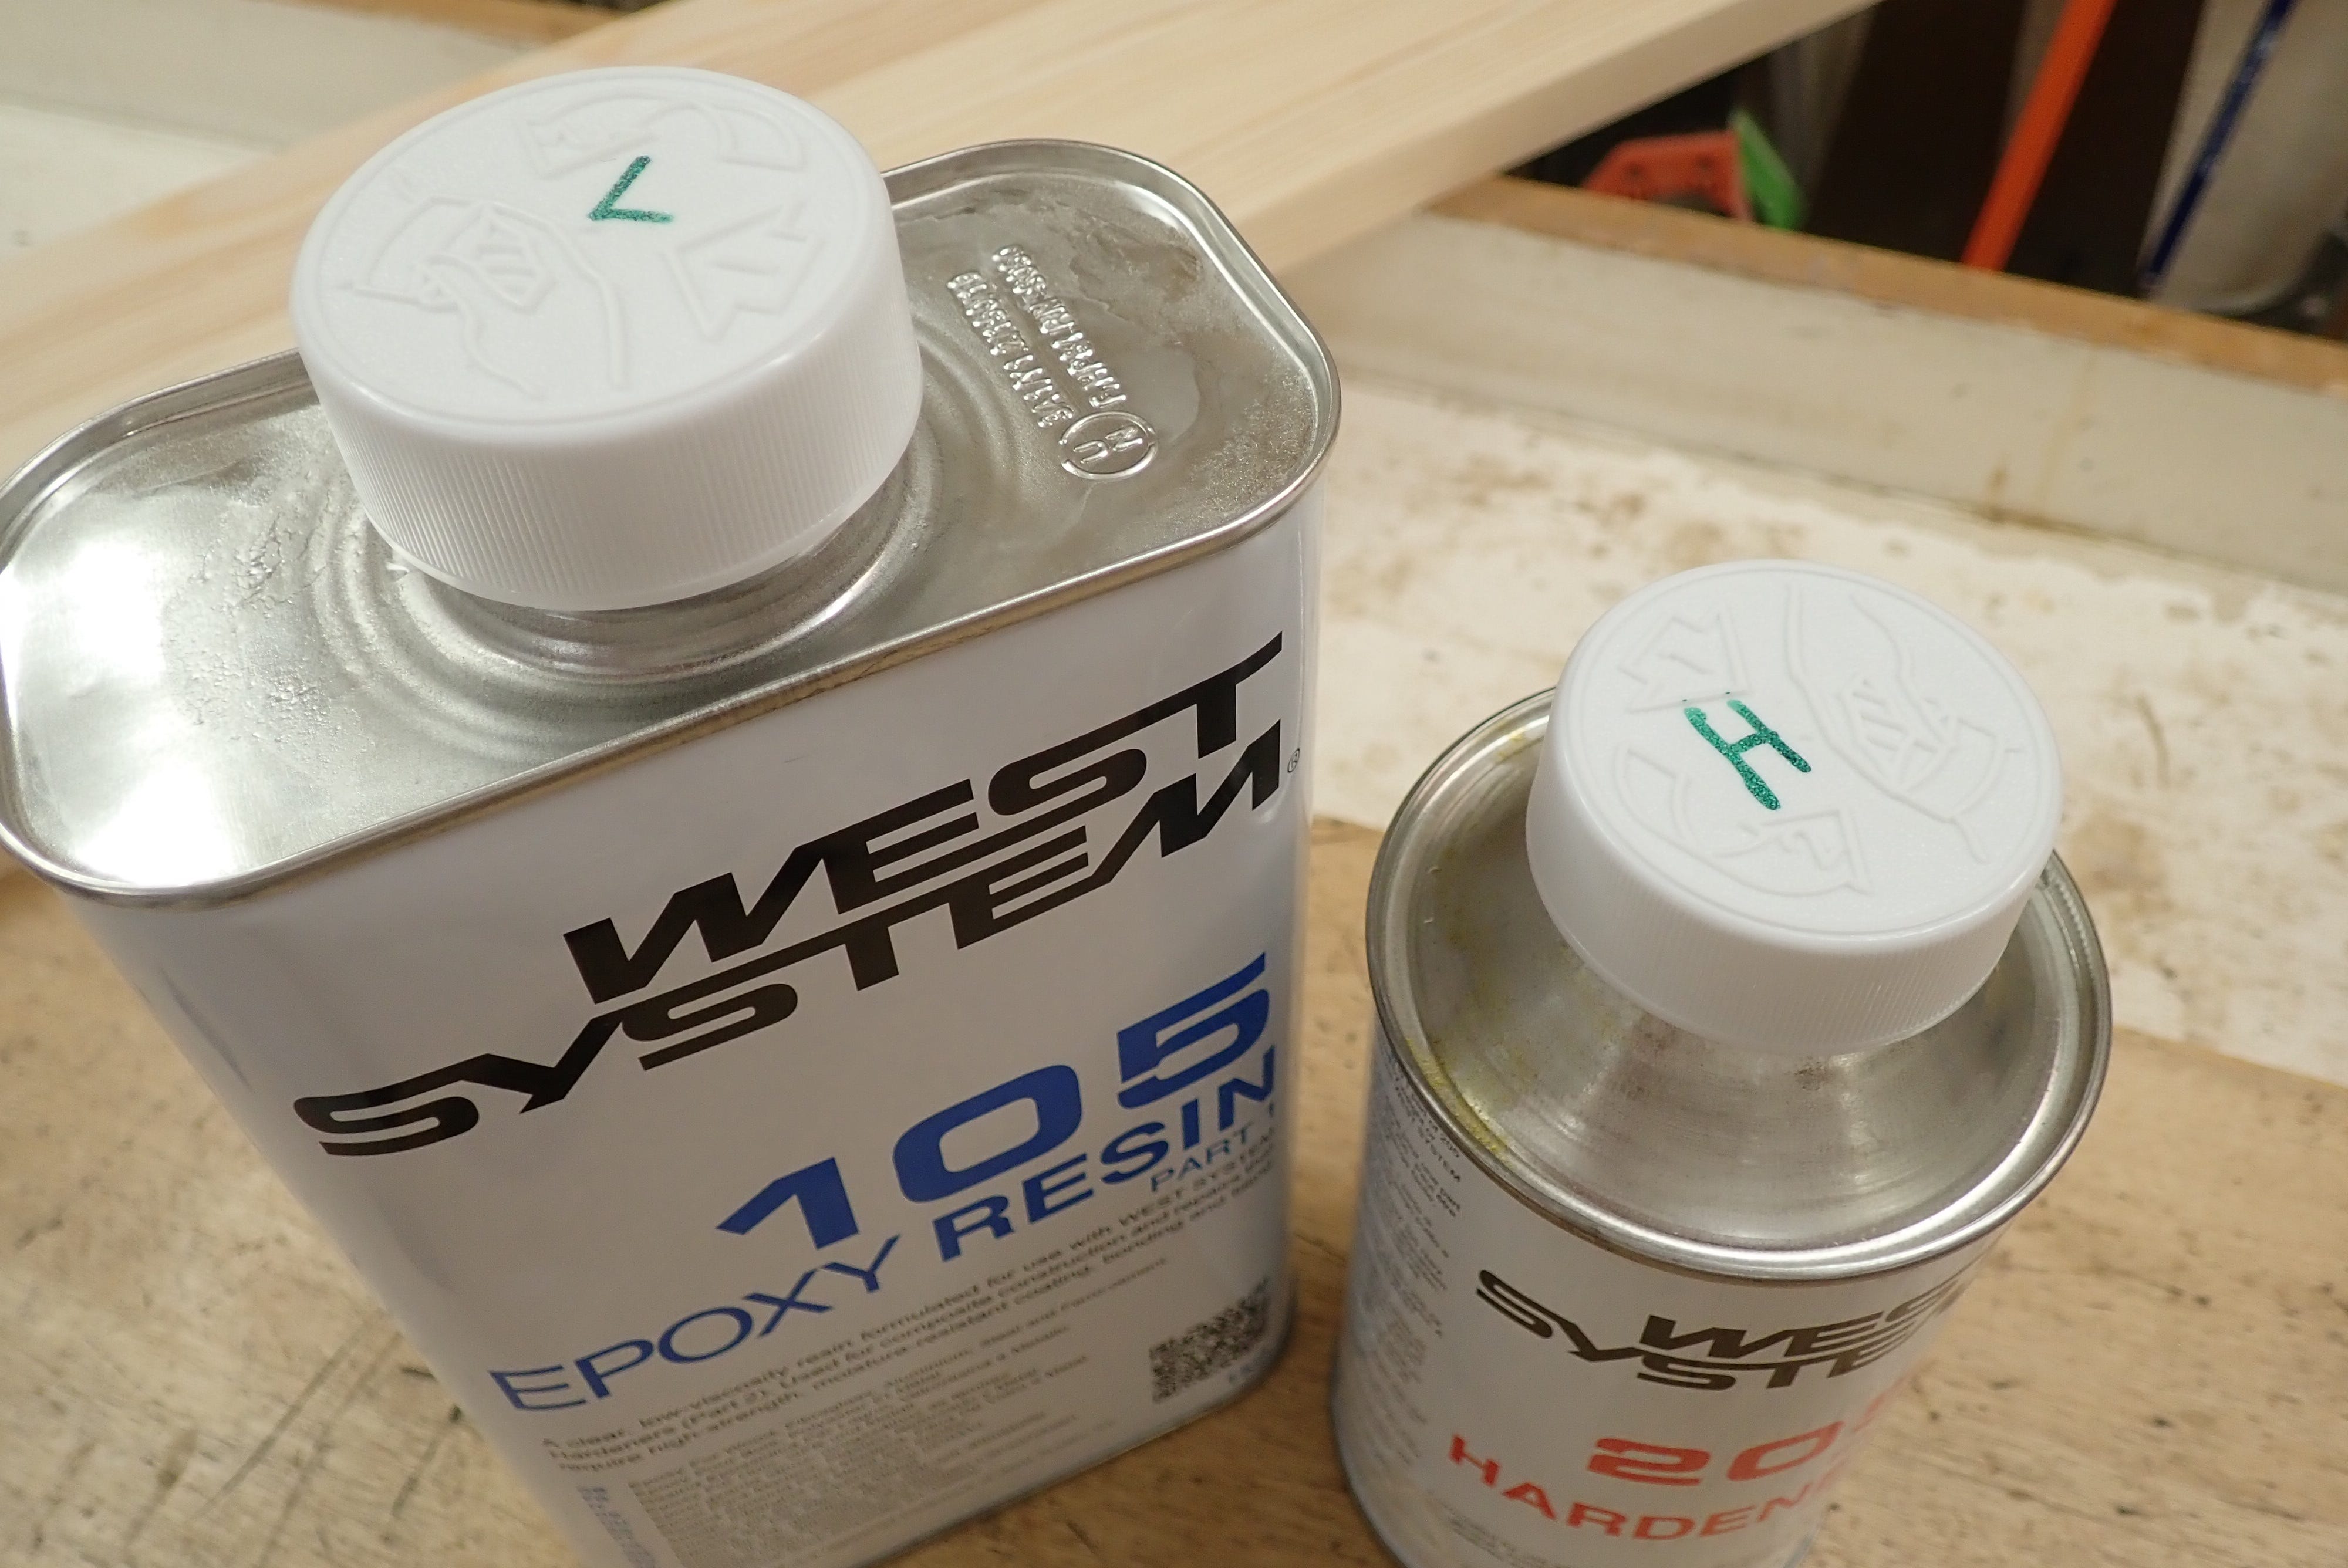
A final bit of advice: Take care to mark the caps on the cans! Get them mixed up and they will glue themselves to where they do not belong, and you’ll be reduced to punching pouring holes in the can’s shoulders. Don’t ask.
A final thing (I promise!) before we do the deed: When glueing you want some things to stick together, and other things to stay unstuck. I keep a stainless steel can with a suitably shaped natural sponge in it, resting in a slick of vaseline oil.
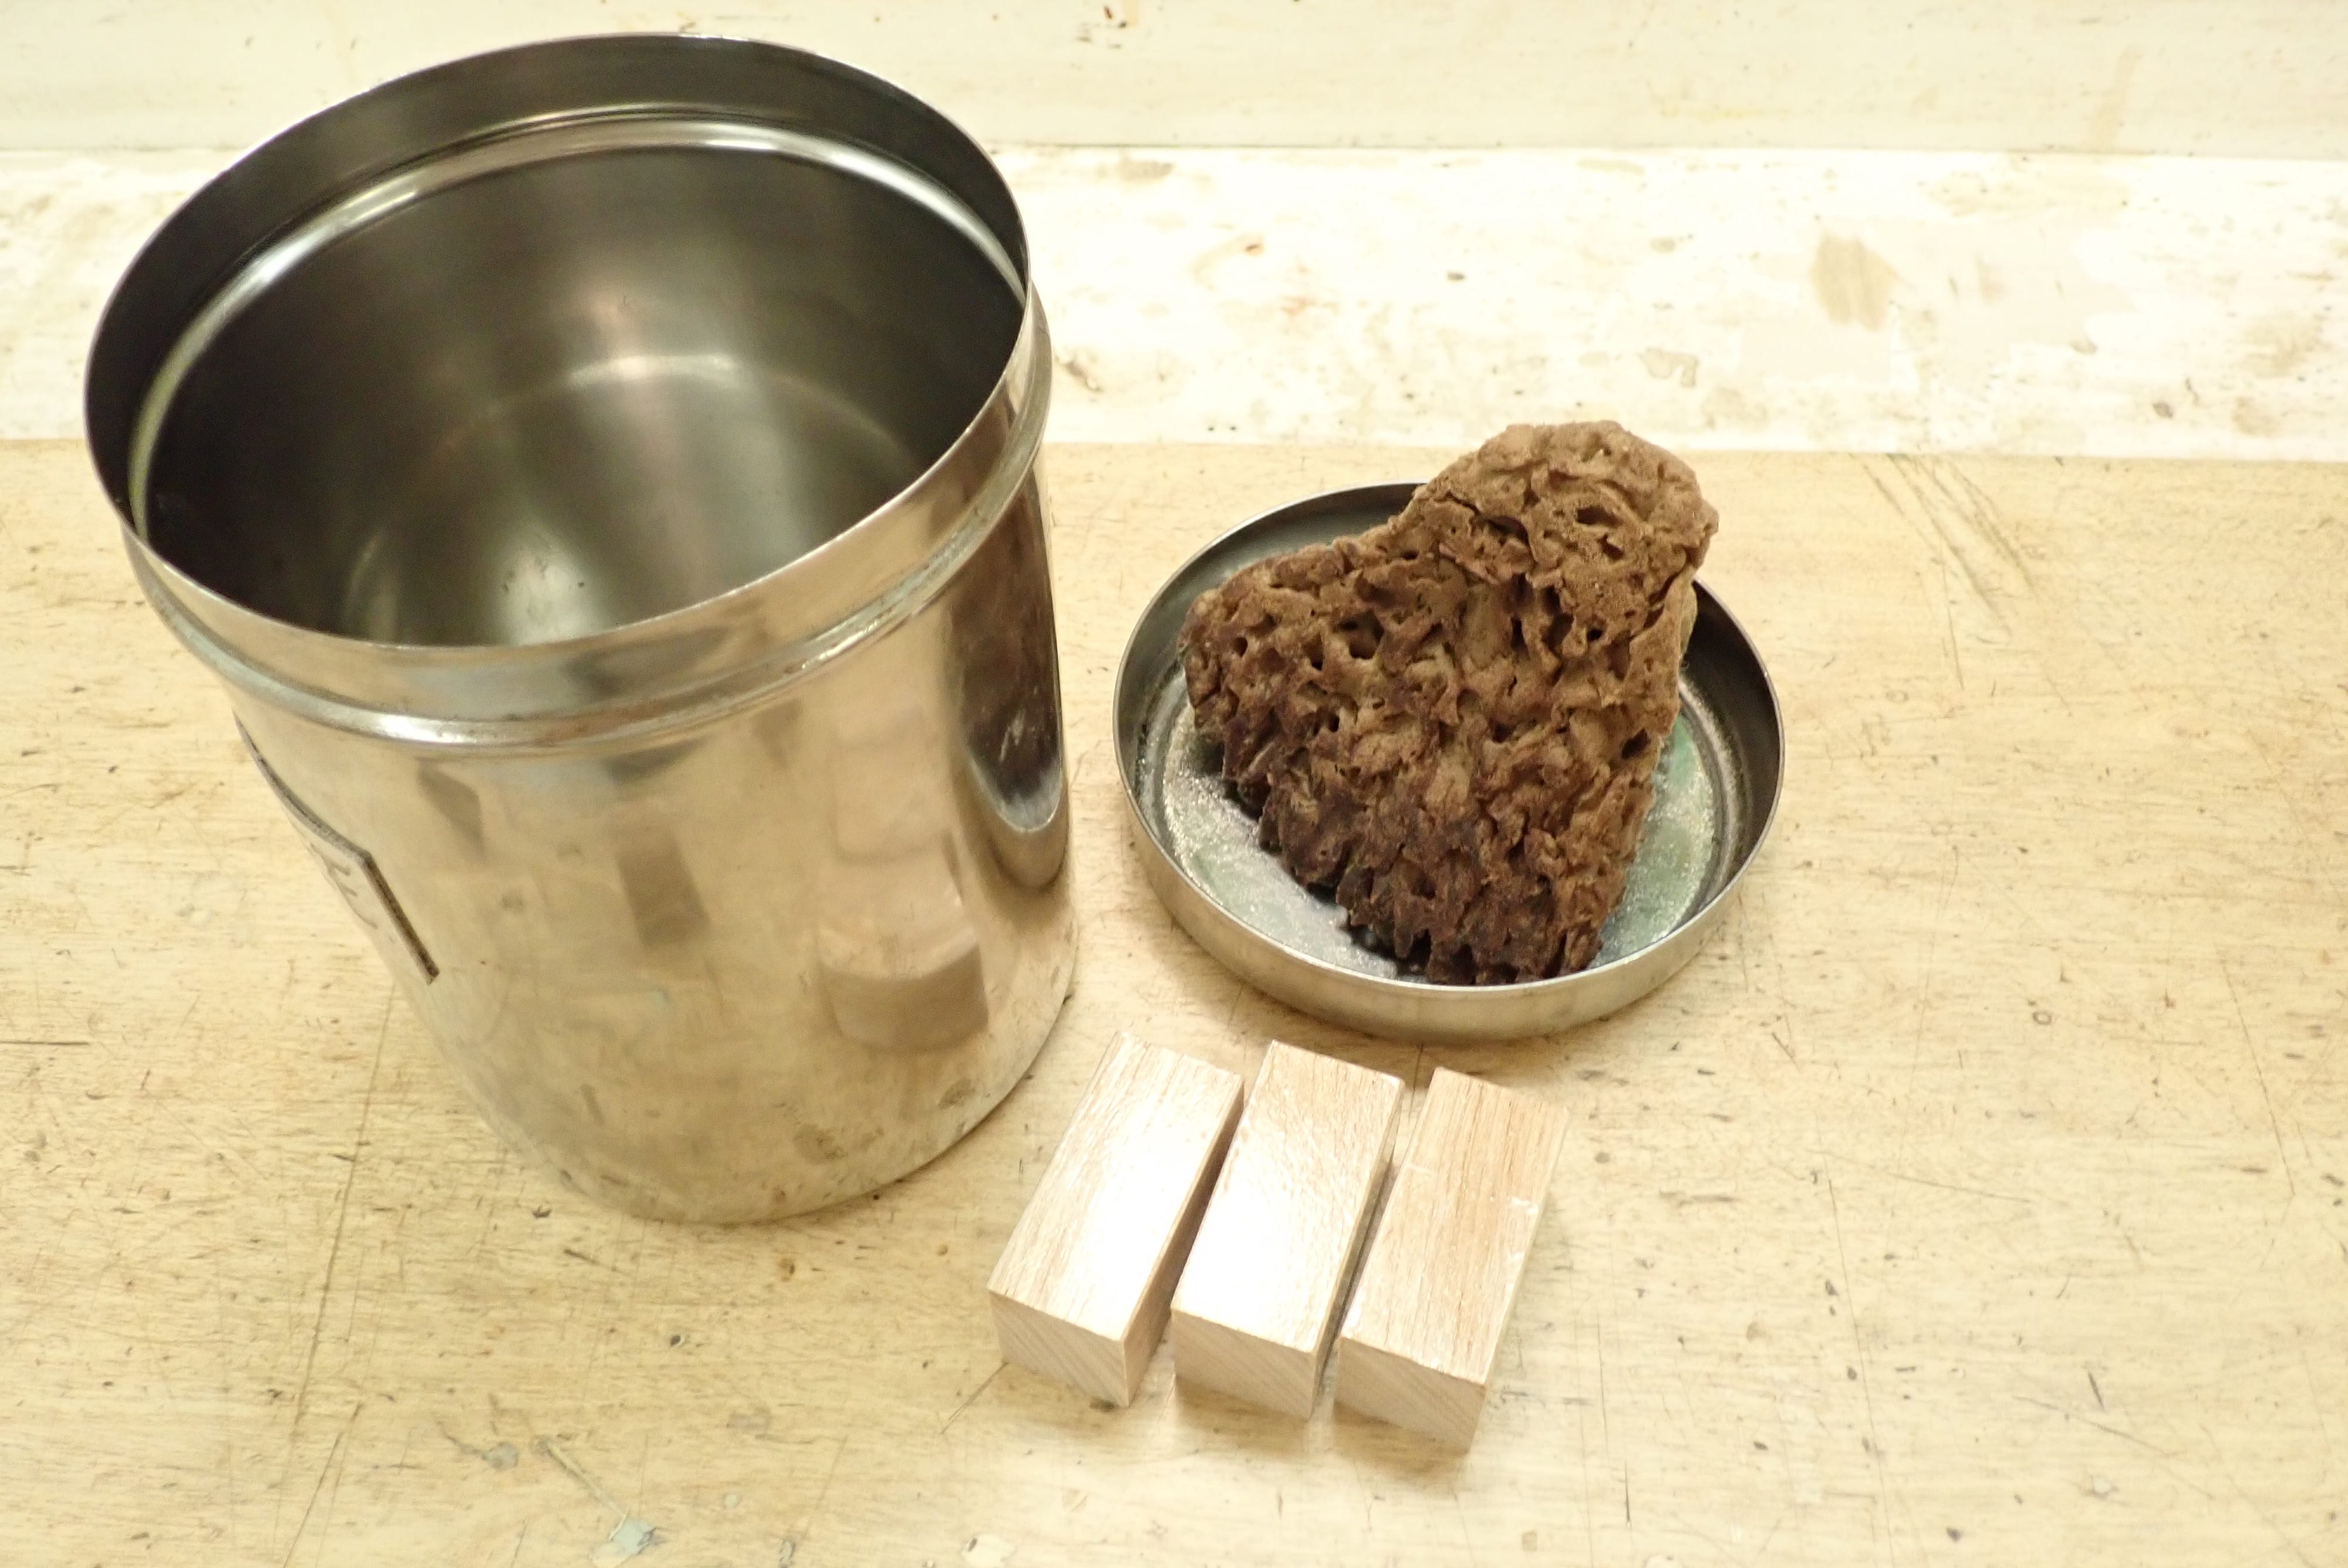
I use it to daub everything I do not want to get stuck together; clamping blocks (already coated with cheap packing tape), cauls, clamps …
In short: Epoxy is sticky, vaseline oil is anti-sticky and red spirits dissolves and cleans them both. Simples!
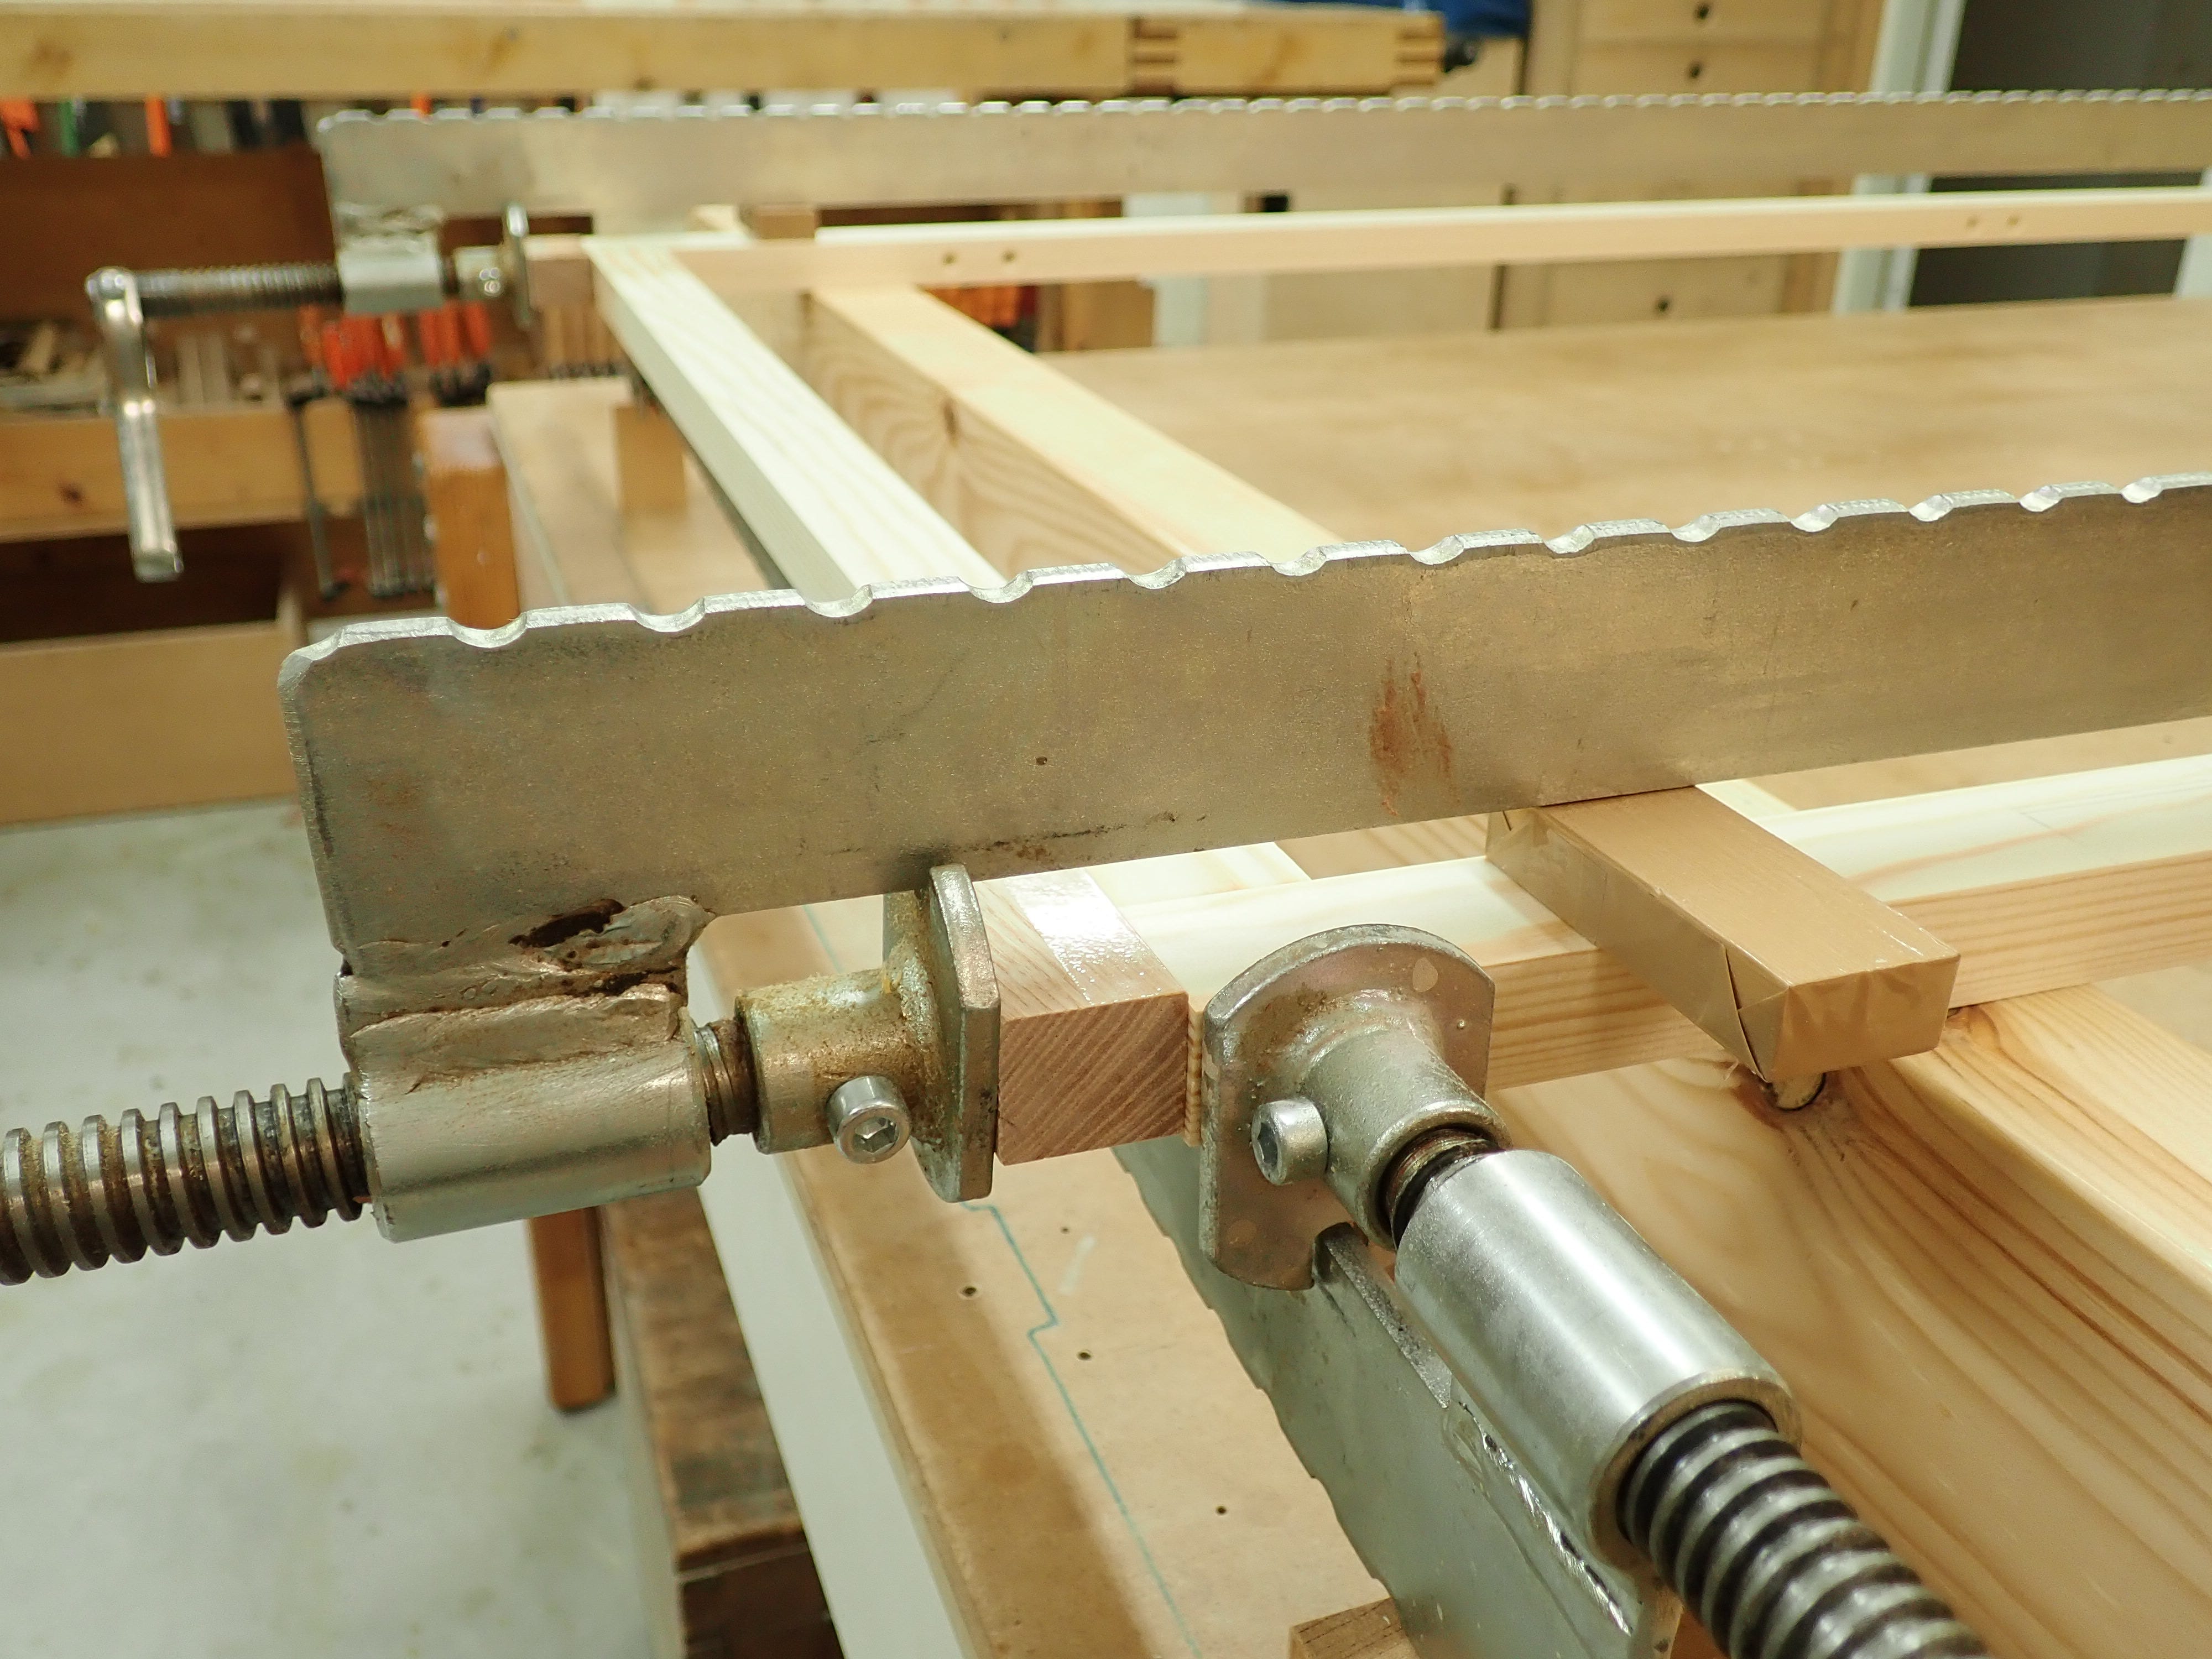
Apply glue, assemble frame, clean up squeeze-out, position, apply blocks and clamps — light pressure at first! (and with thin sections like these, there is no need to crank it up; you’ll only bend the slender sticks.)
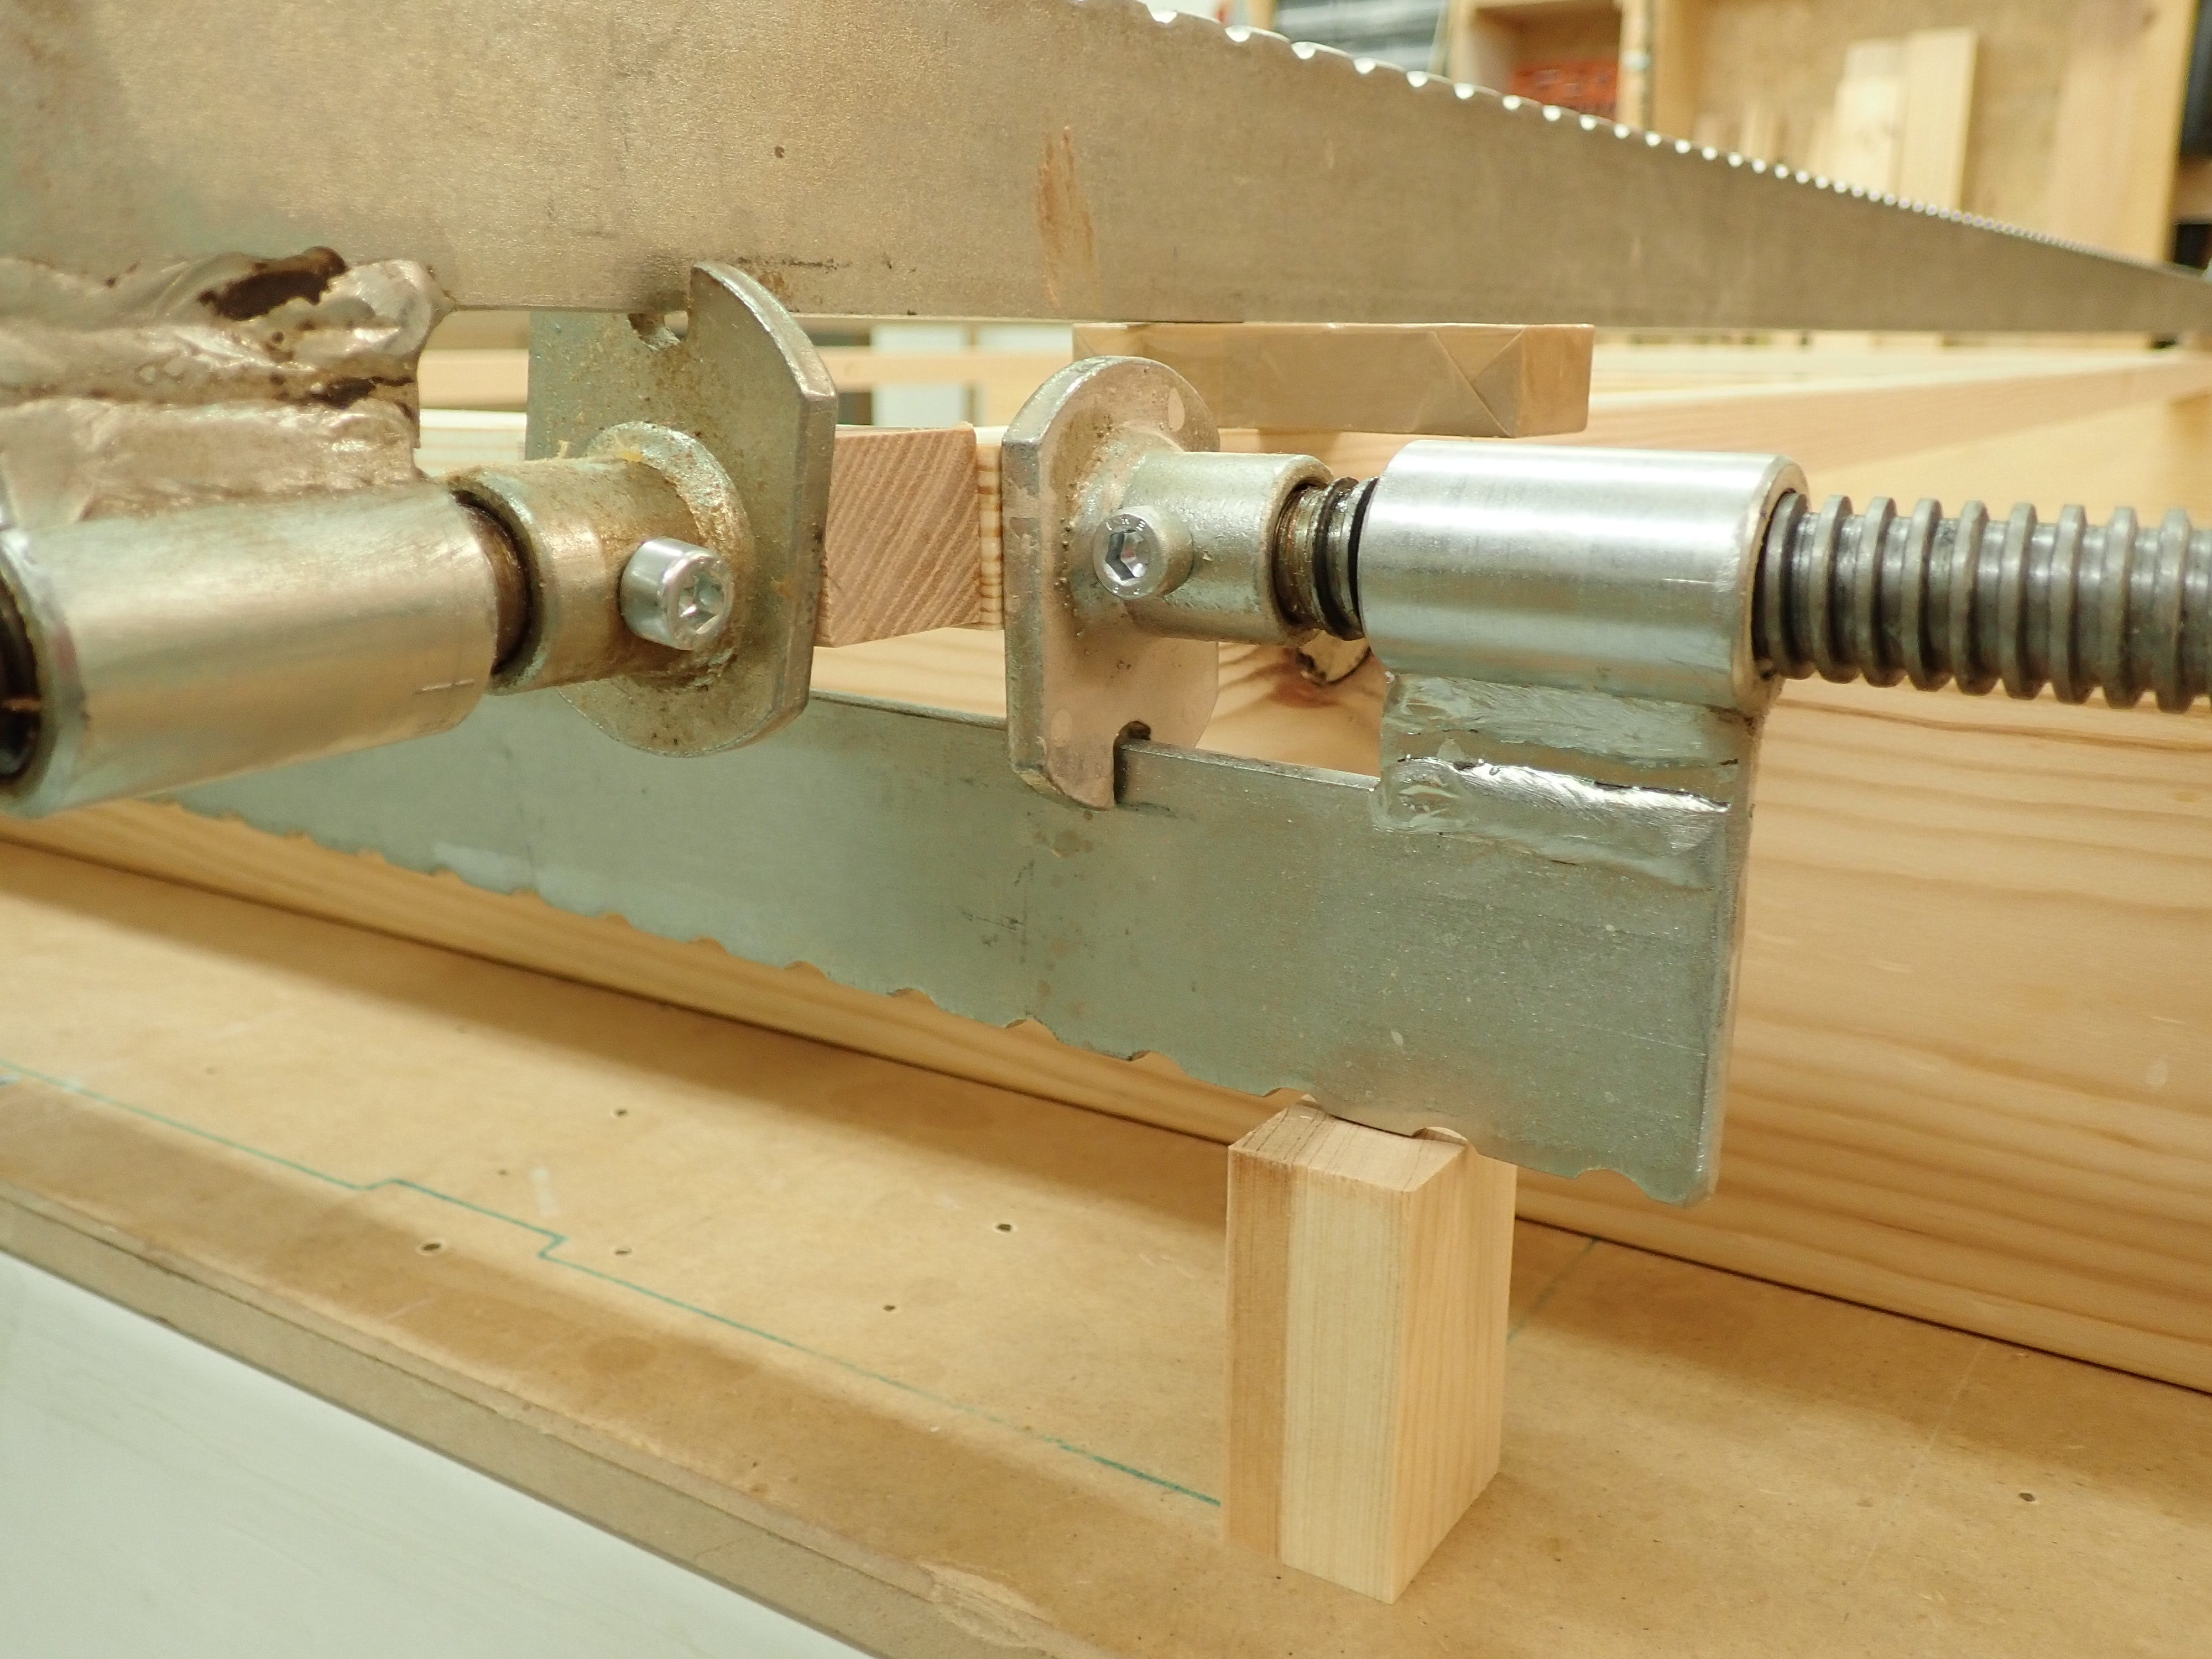
I’ll be frank: Getting long (2,5m) clamps like these in place, alone — just the right place, mind! — takes some practice. Traditionally, in the old shops, you would ask a mate to assist you with the glue-up. It’s always worth the extra time to do a dry run first, before you apply the glue. Consider it a practice run where you adjust the clamps to the required lengths and test that your set-up is viable. When the glue is spread, the clock is ticking!
I use positioning blocks to get the clamps just where I want them, and perhaps now you understand why I use a slow-setting glue? Don’t be disheartened if it all seems overly complicated and difficult! Nothing is difficult when you’ve done it often enough, and I started out with much smaller and easier clamp-ups 30 years ago. Start small and easy and grow from there! There is nothing I can do that you can’t learn :-)
When the long clamps are in position and slightly tightened, it’s time to check for squareness. We do not use a square for this! We use diagonal-sticks.
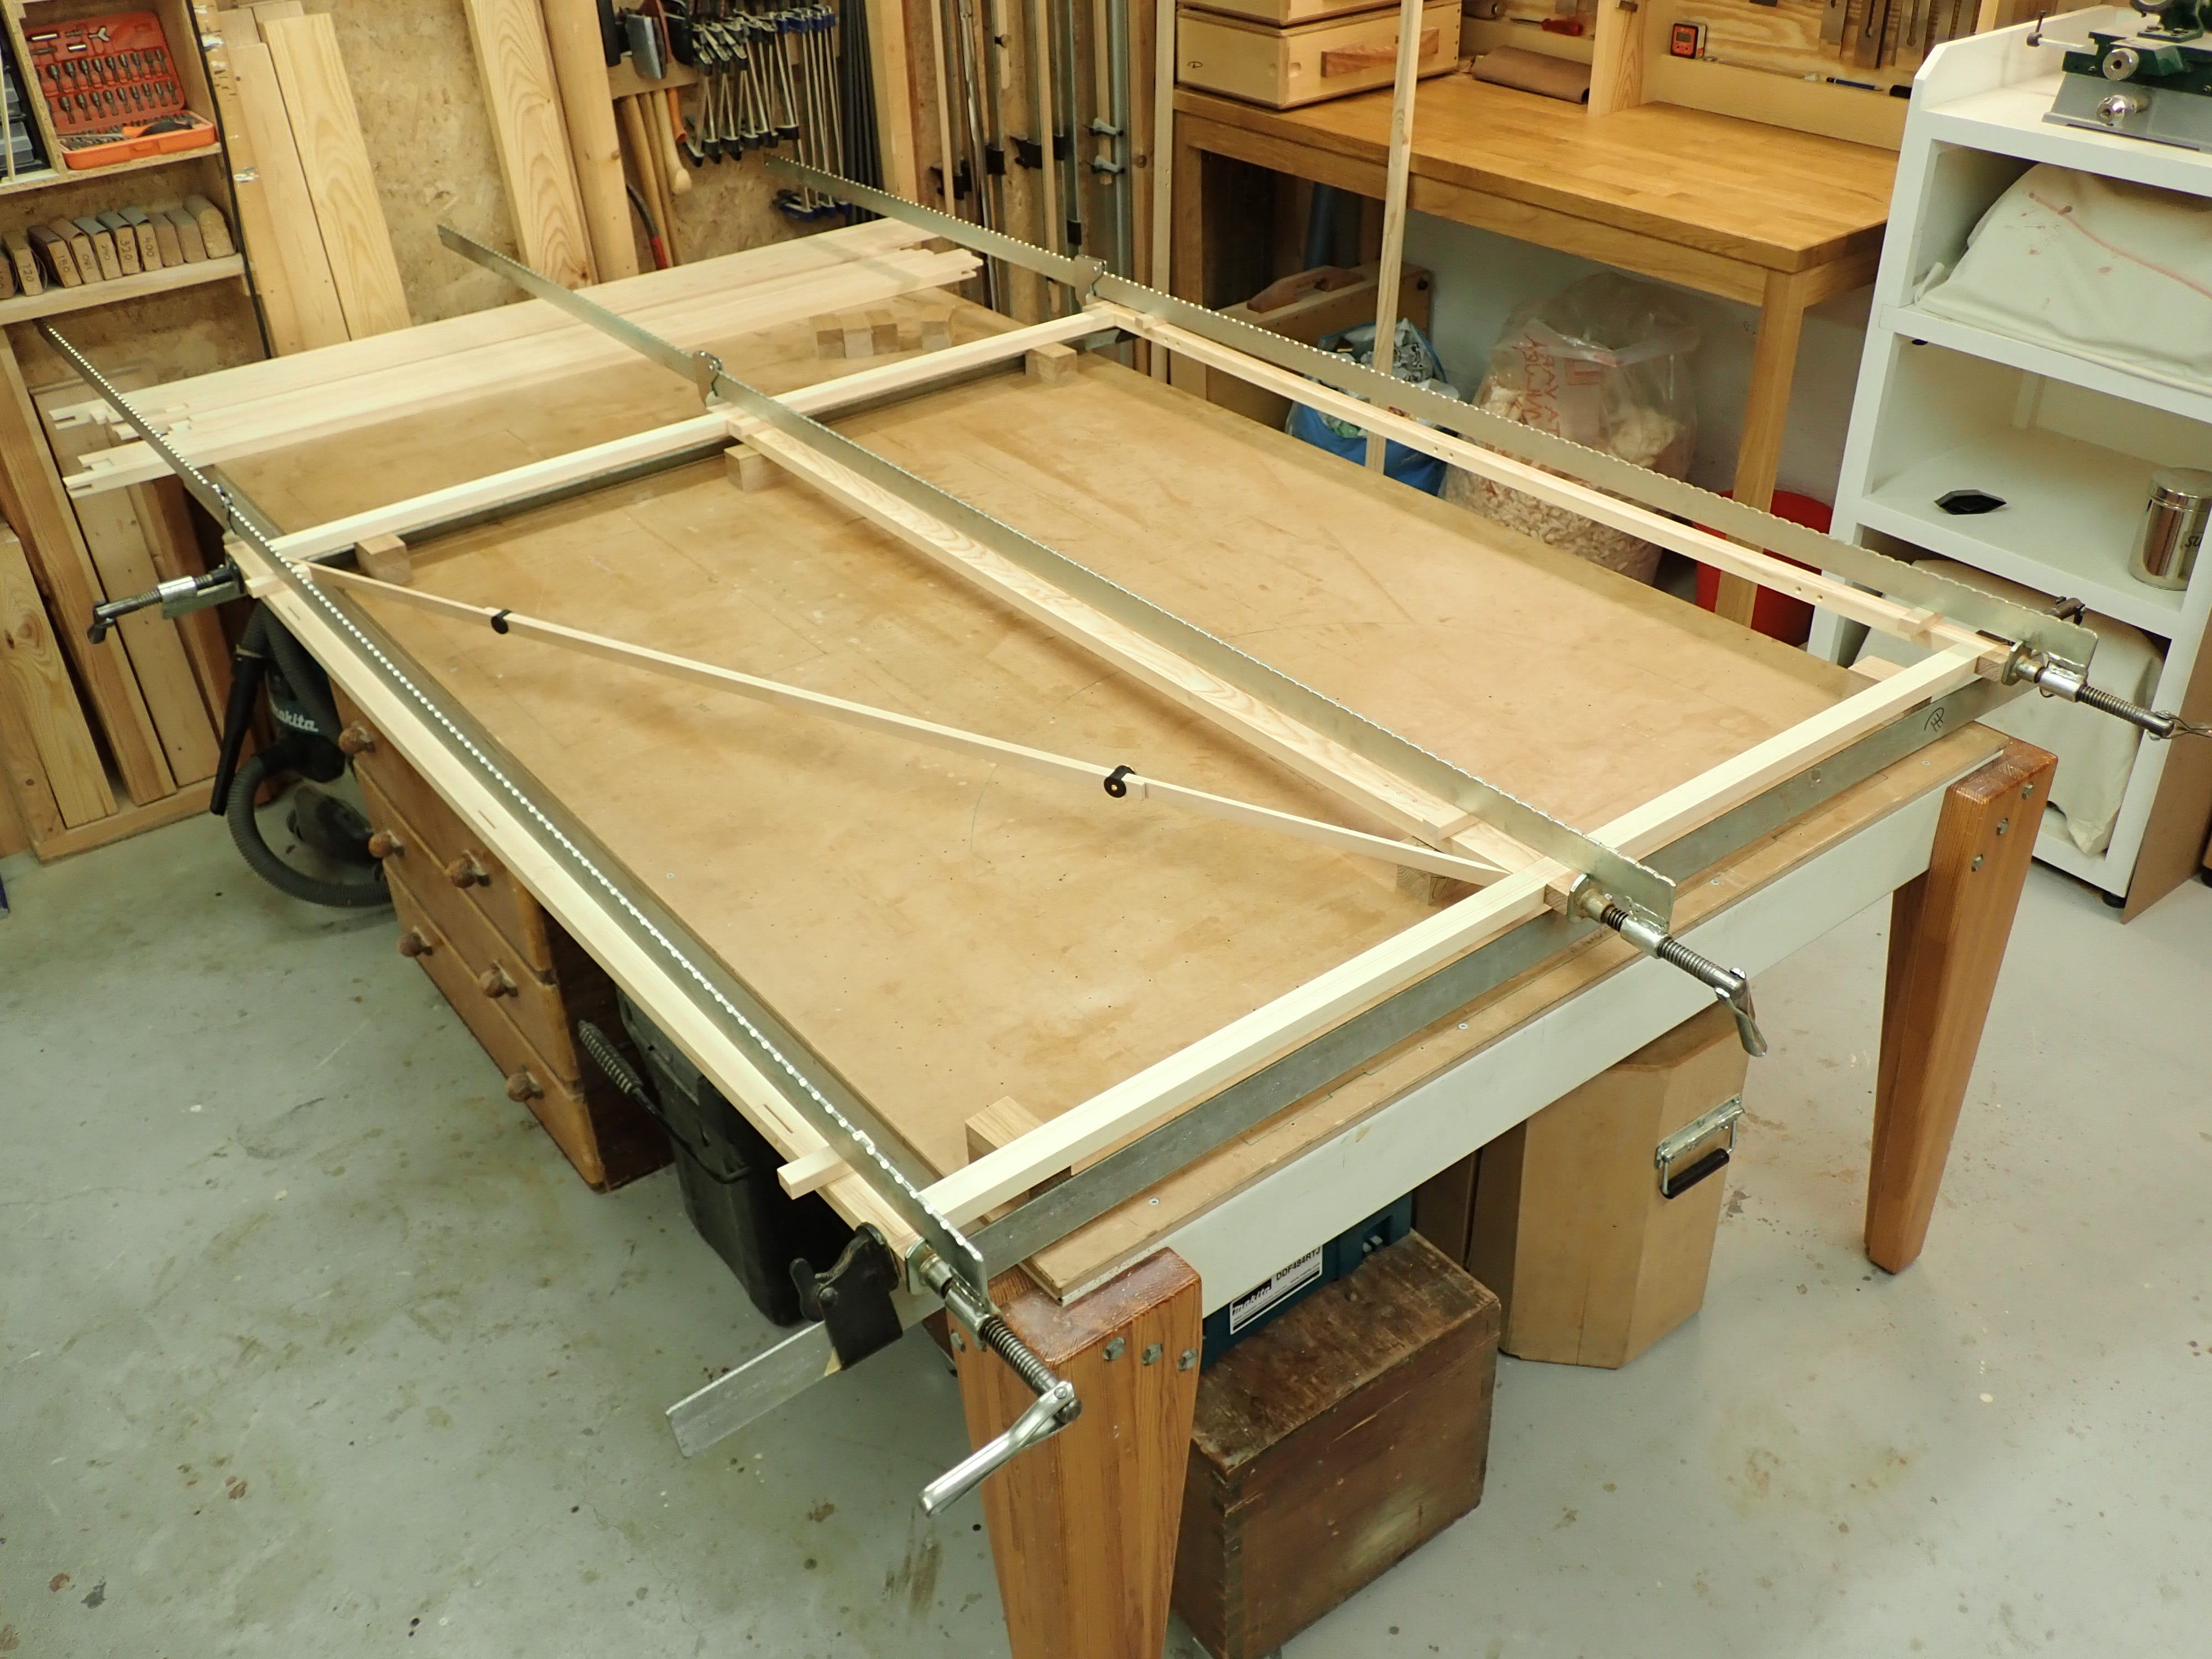
It is a geometrical fact that when the diagonals are of equal length, the rectangle is true. Ask Euclid if you don’t believe me!
This is the secret to getting the glue-up square: Measure diagonals. Move the clamps slightly more parallel to the longest diagonal. Test diagonals again. Adjust. Repeat quantum satis.
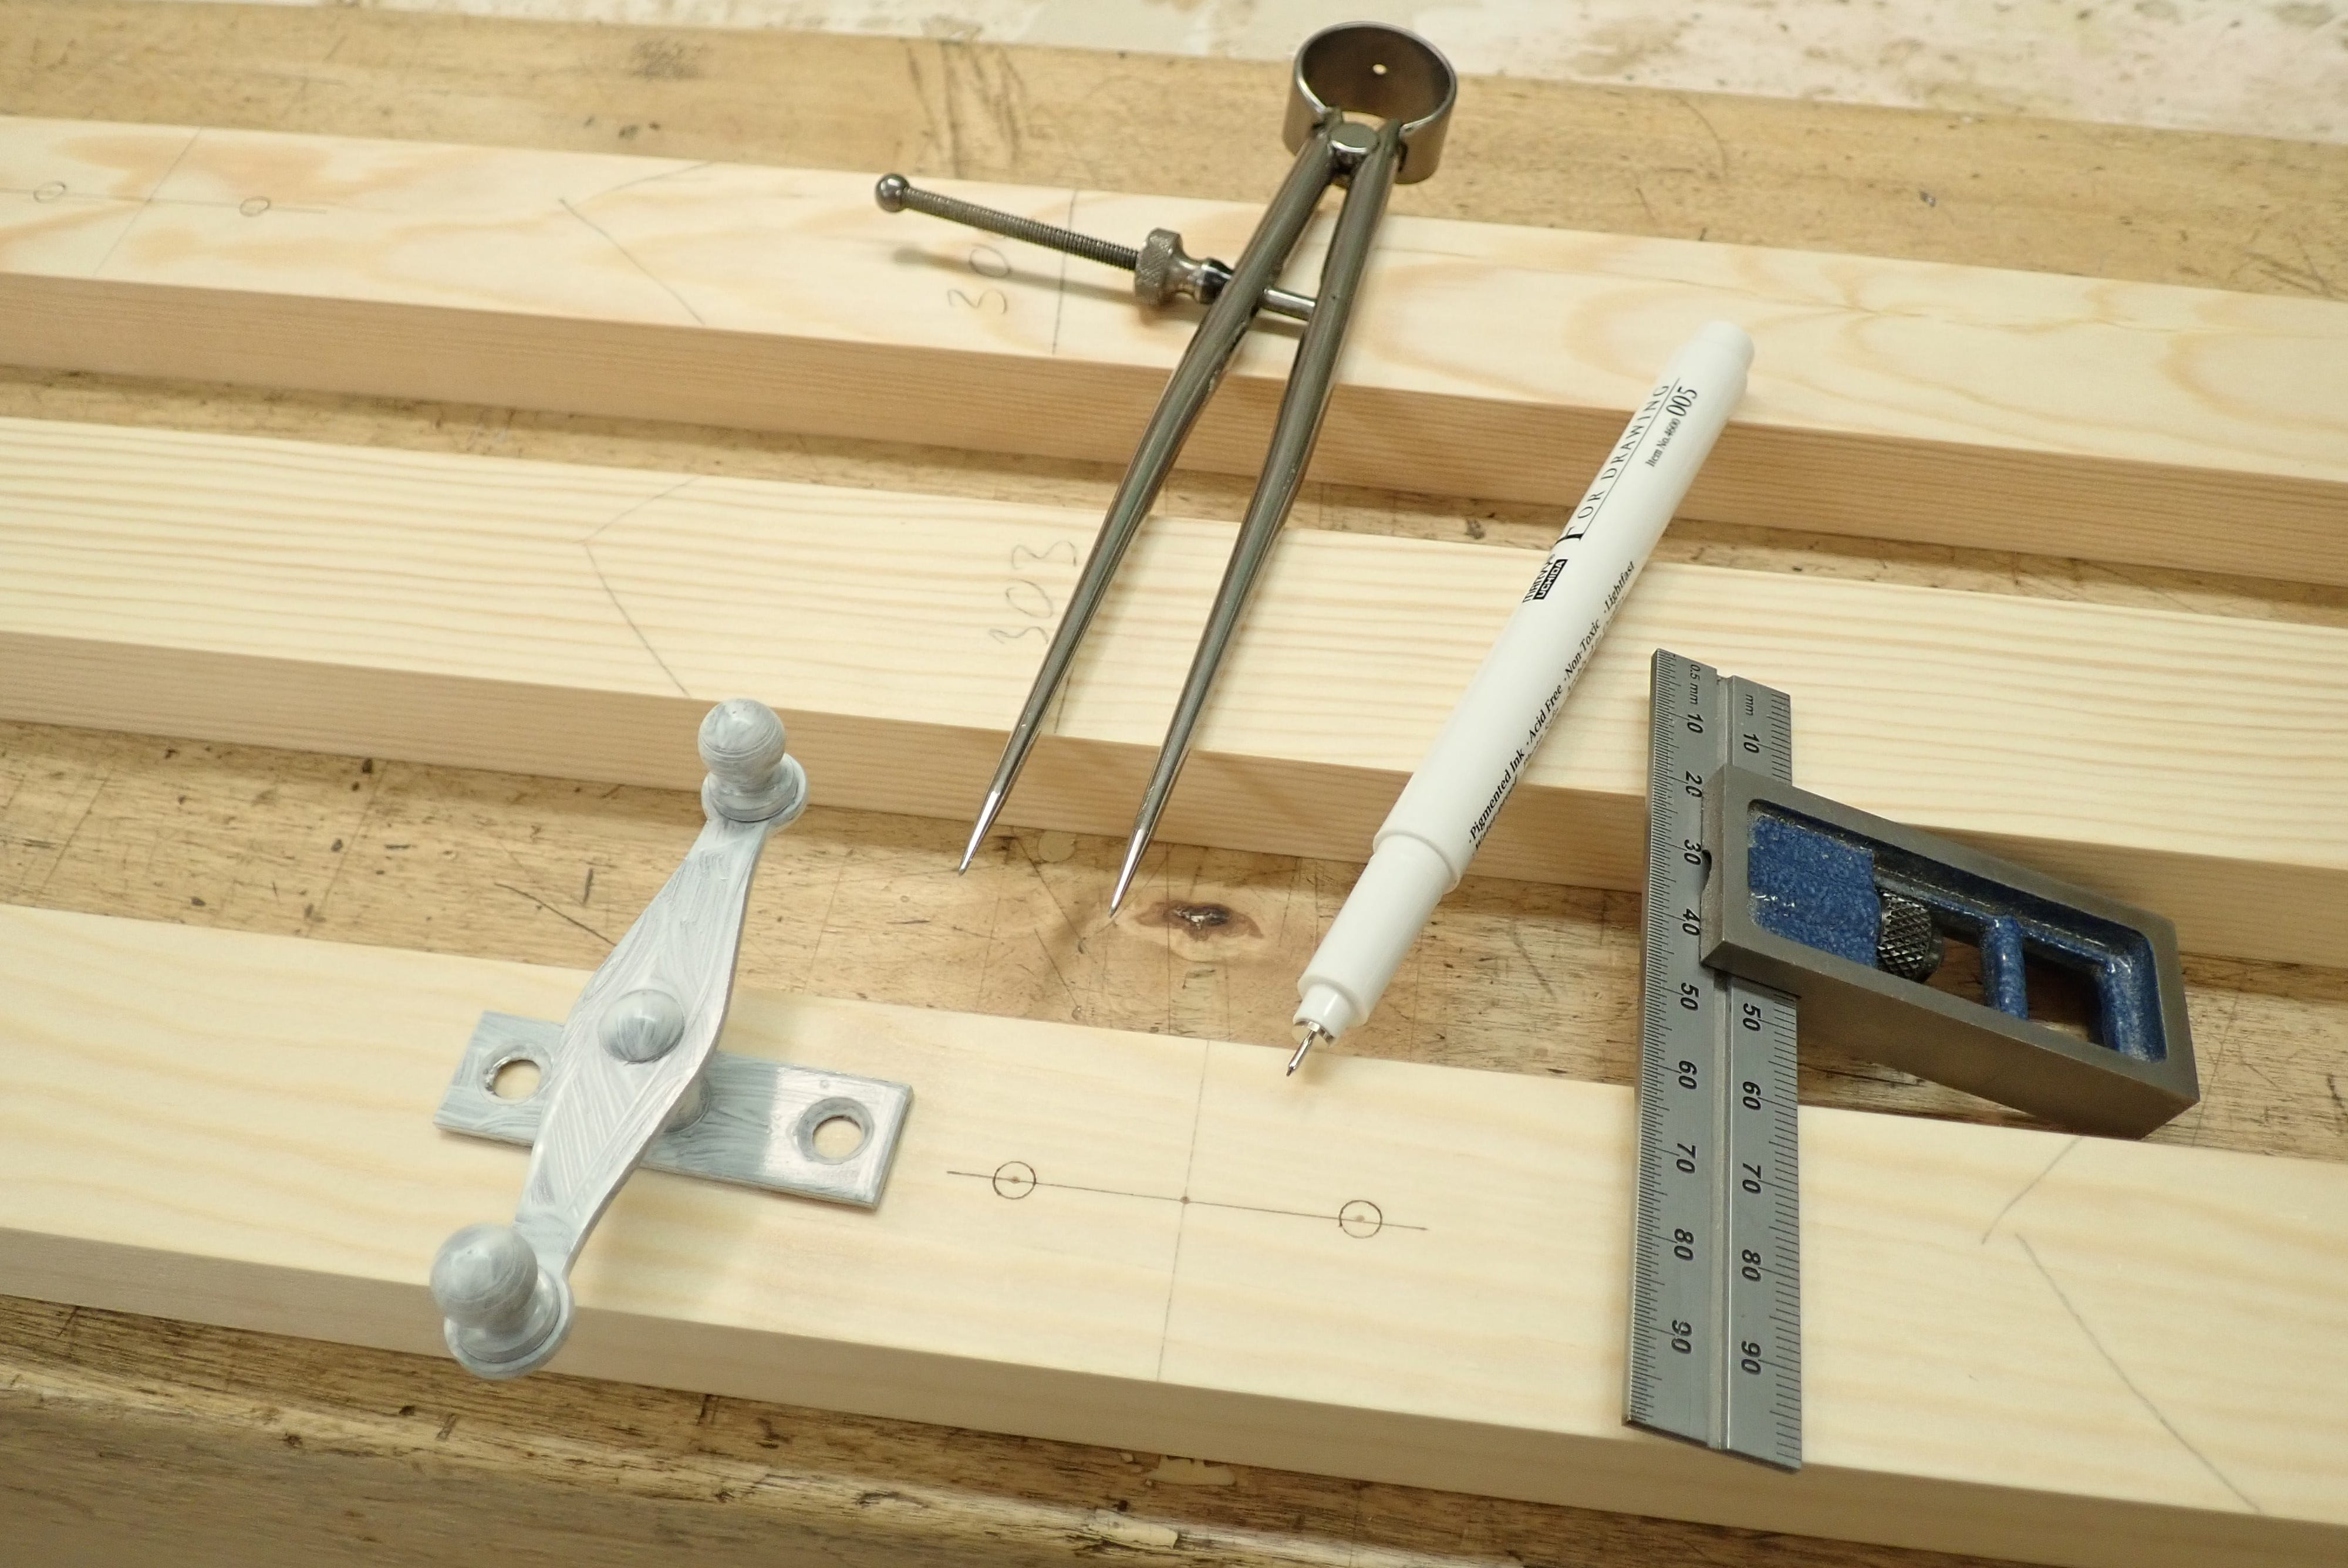
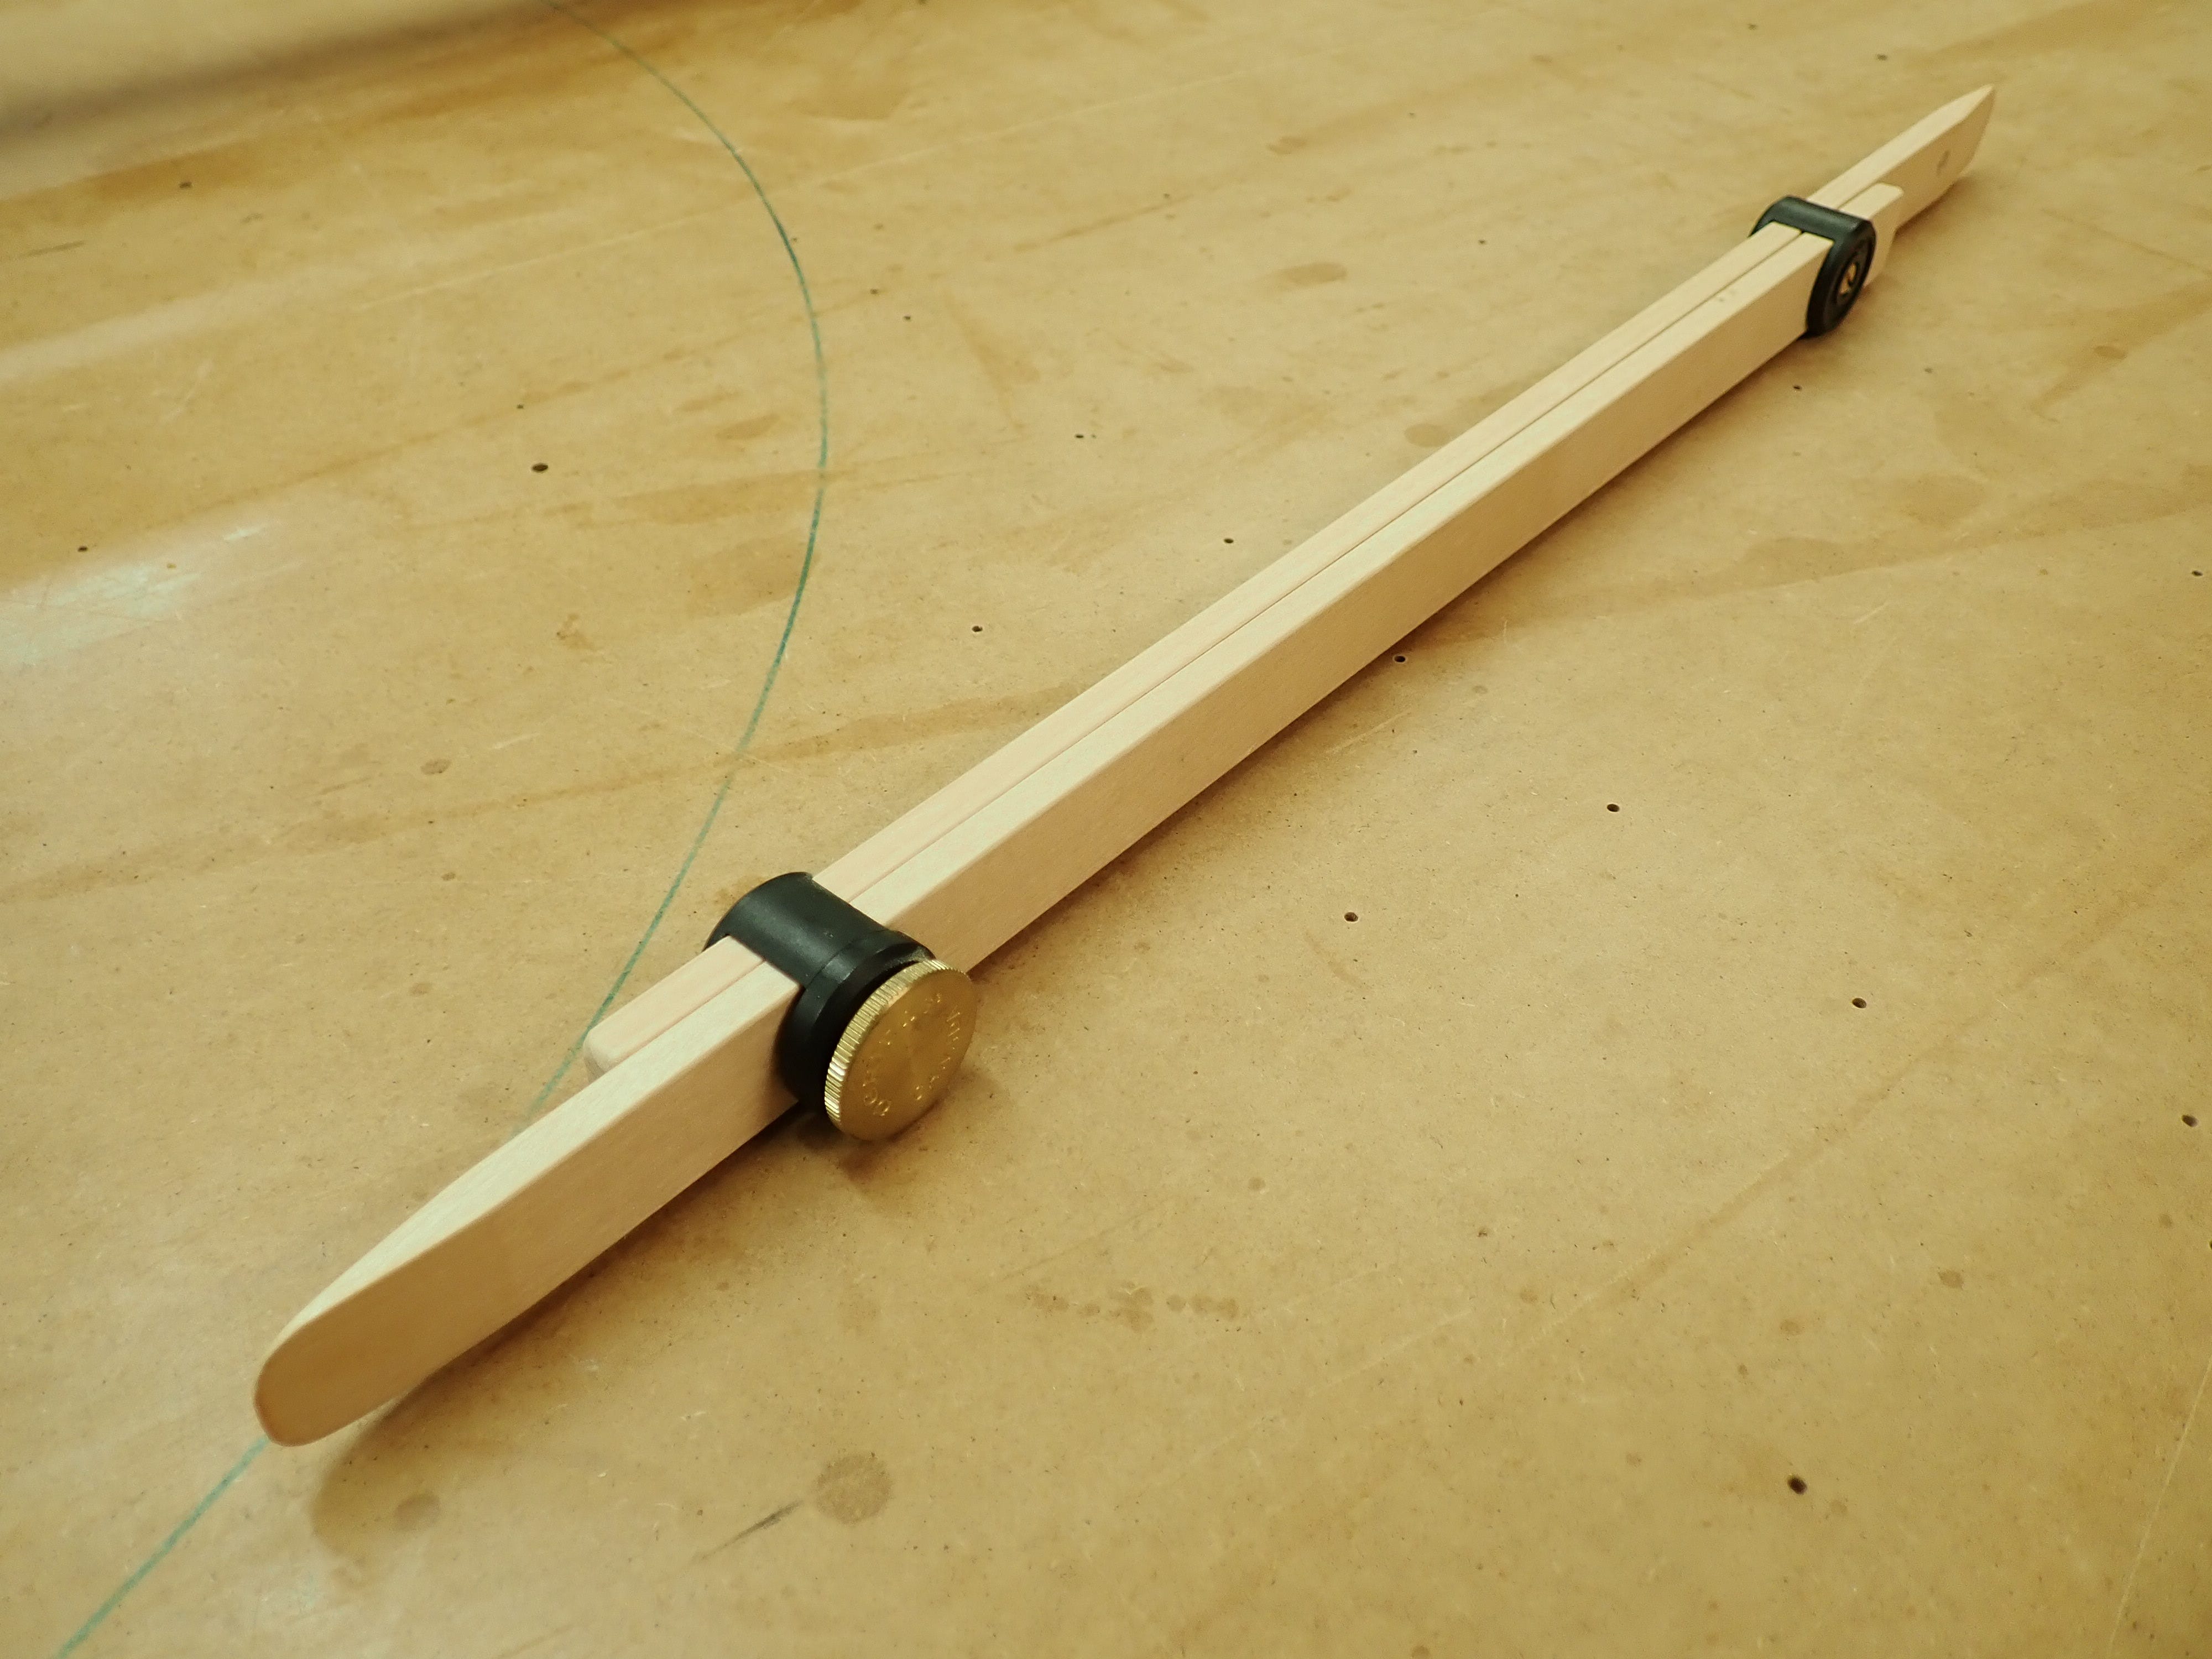
To measure the diagonals I use what Veritas call ‘Bar Gauges’. I keep five or six of them, of differing lengths, for different sized jobs. Here’s the ‘mini’:
That’s about it, I guess.
Glueing is neither glamorous nor especially fun, but needs to be done consistently well if our frames are to hold up. Have you noticed all the saggy window- and door-frames in the world?
There is a quiet and deep satisfaction to be found in doing simple things well.
The Japanese know this. Quiet. Quality. Not for likes on Instagram, but for the inherent beauty of it.
***