
Get a grip!
... or how to make a handhold

[ soundtrack : Polegnala E Todora - Bulgarian State Television Female Choir ]
***
This post is too long for email — open in browser for full length.
***
Work is slow so I might as well make something useful for the workshop and pretend that Christmas holiday came early this year.
I want to make four pieces of workshop furniture: thigh-high saw horses/trestles, the kind you rest your knee up on, for rough-cutting lumber.
Working surface: 32 x 240 x 960 mm — height = 660 mm. Construction: staked legs through dovetailed battens (like a Brettstuhl).
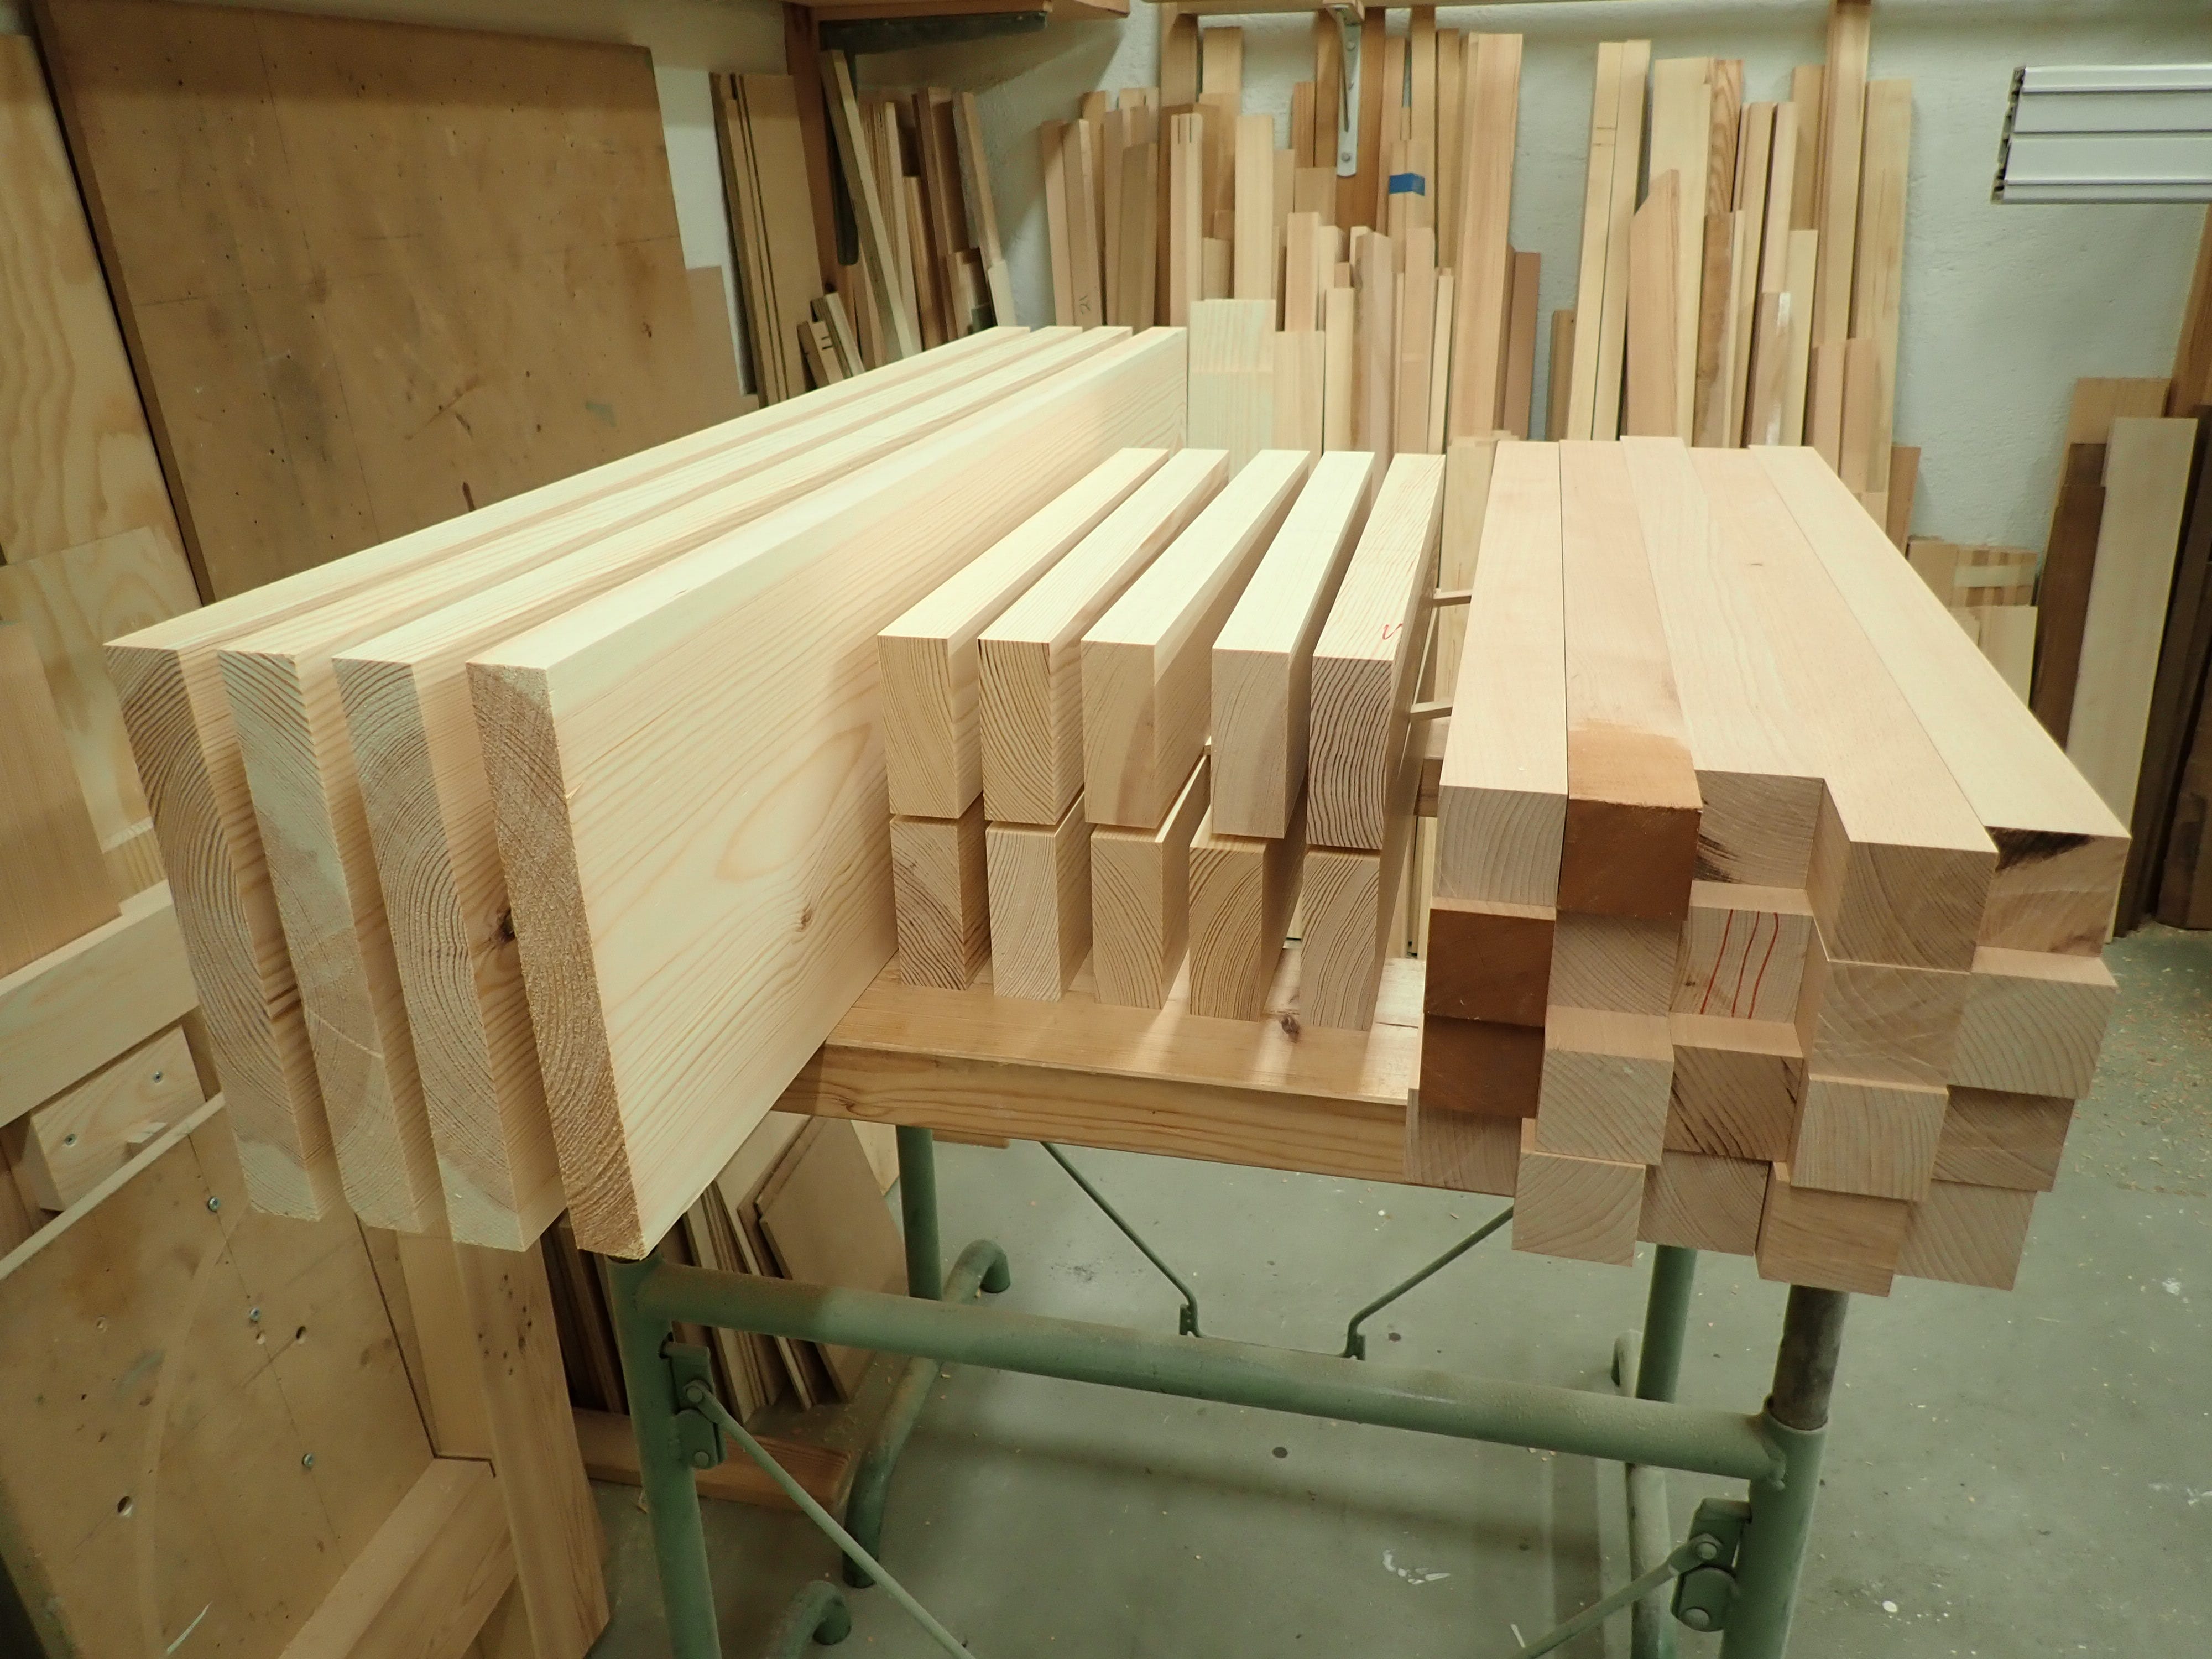
I’ve rustled up some suitable scraps and done the basic stock prep.
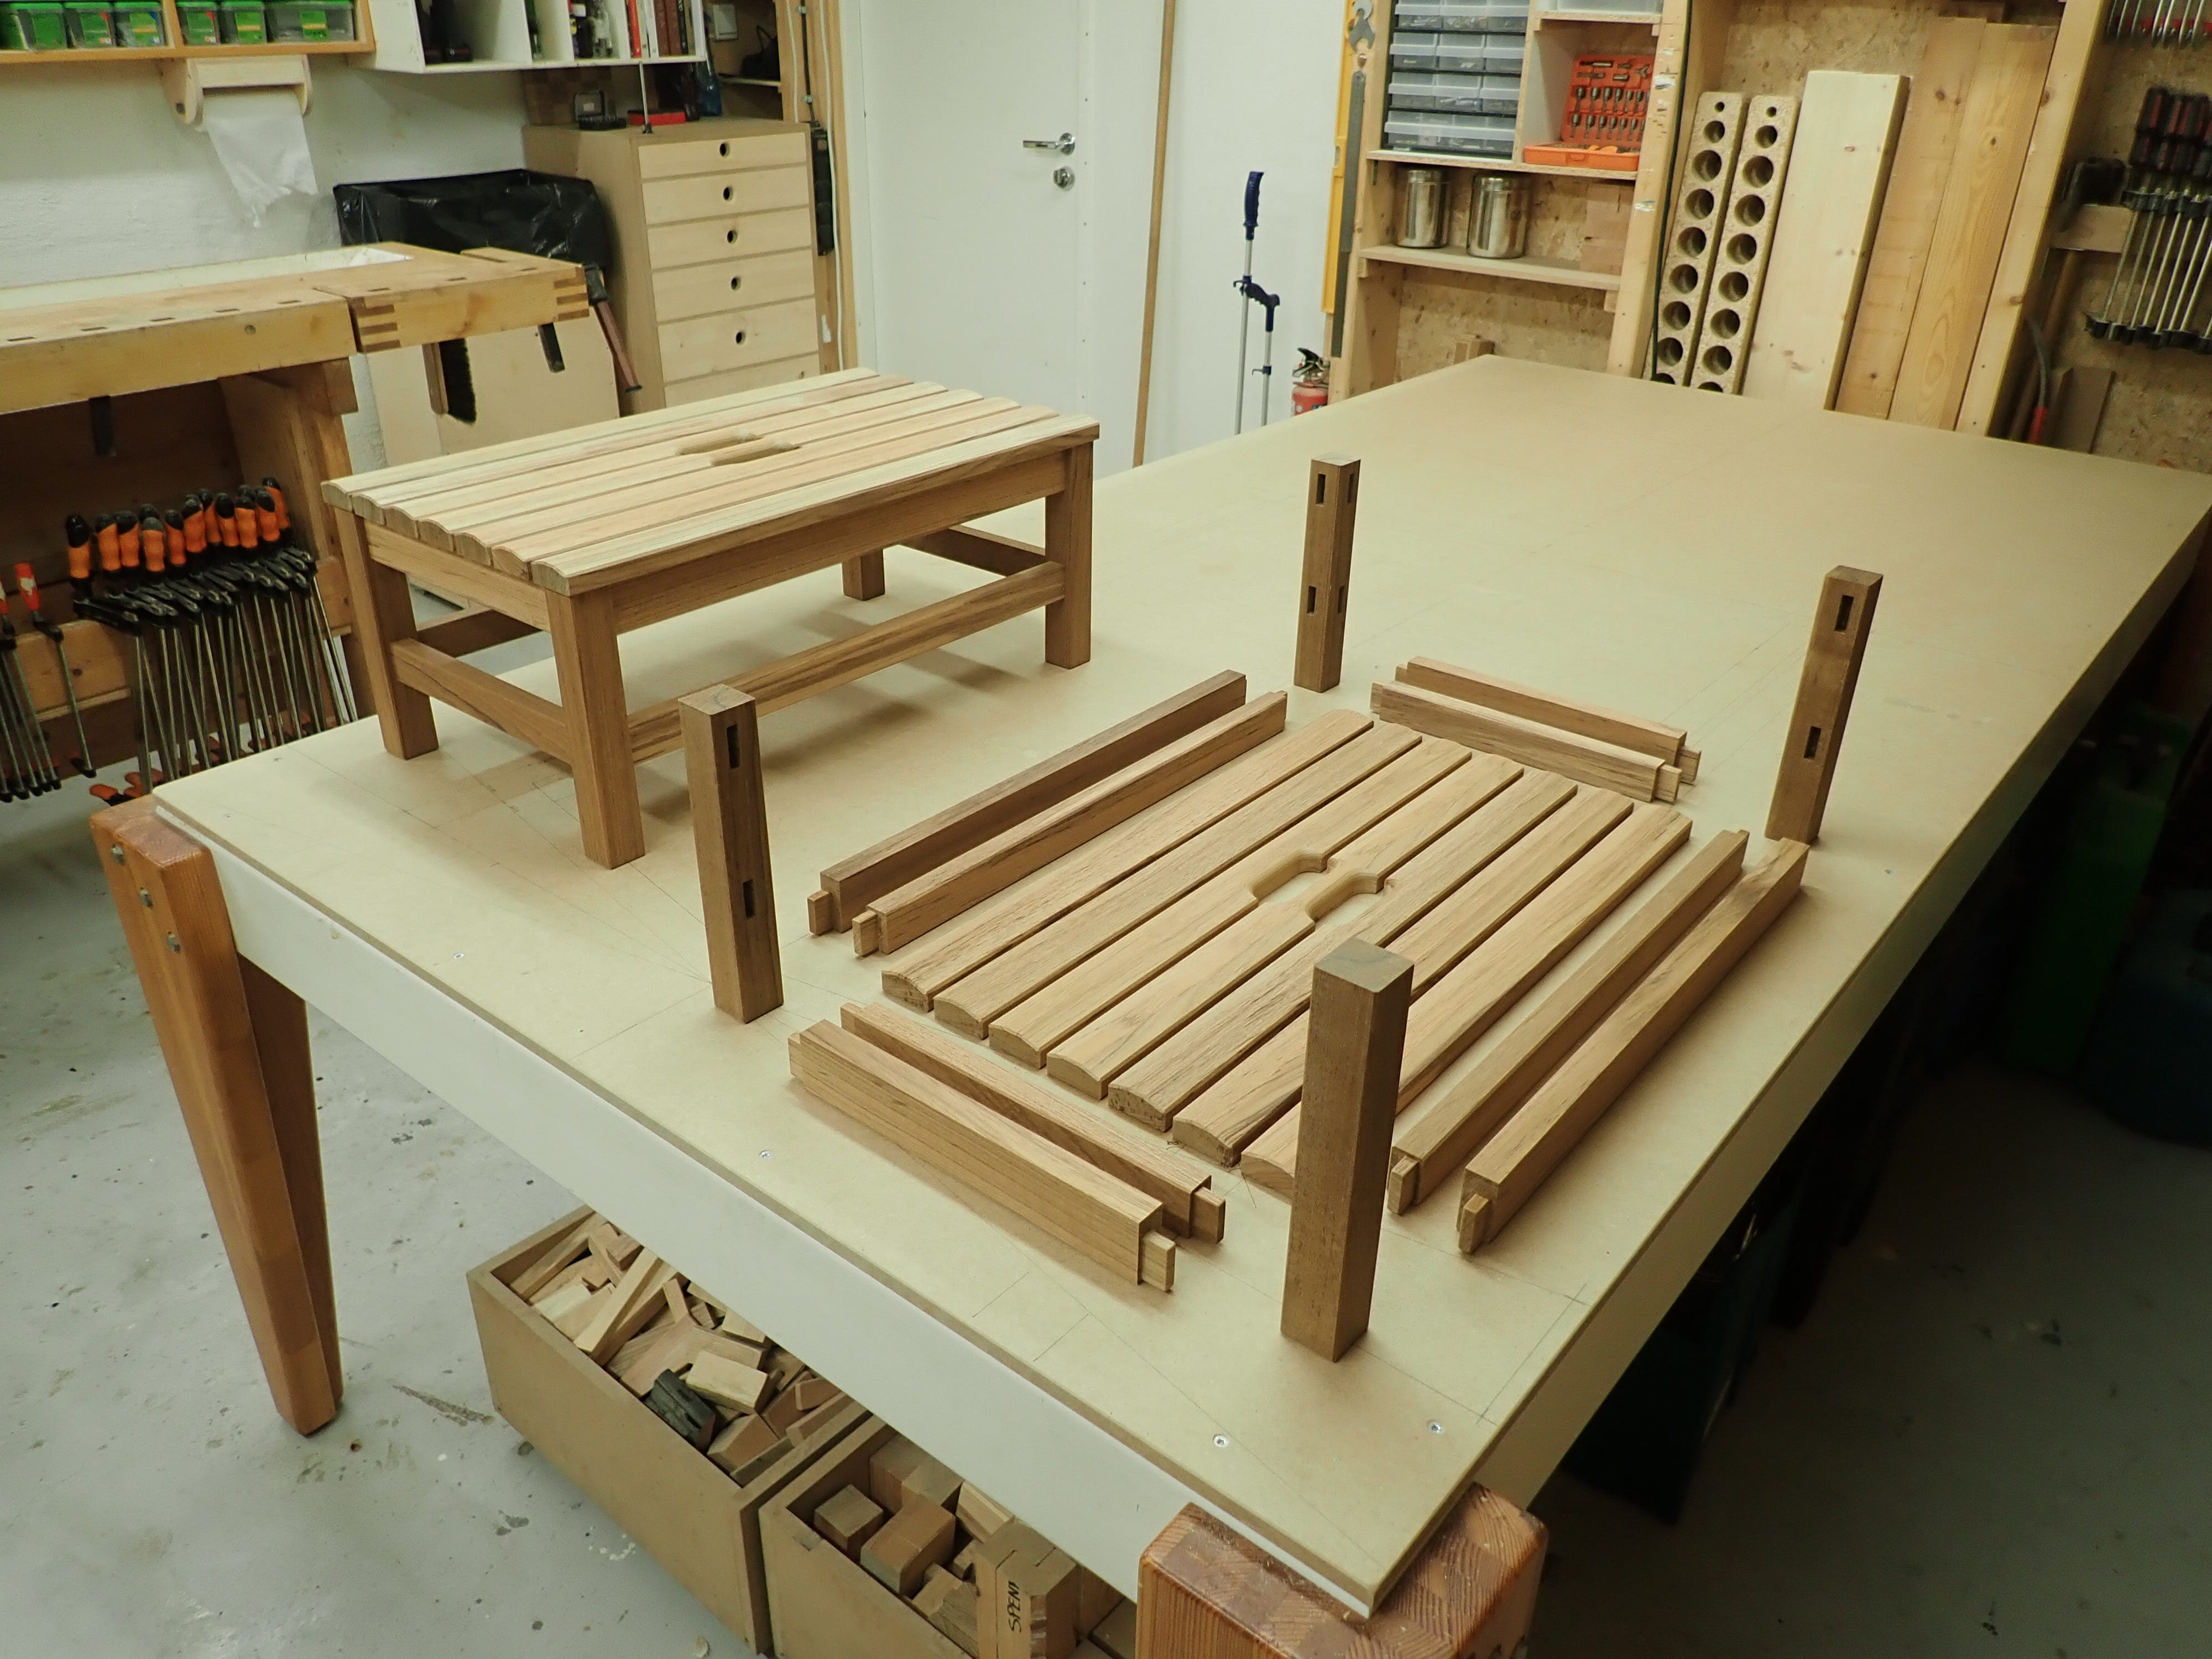
I want them to have a handhold in the middle of the work-surface, making them easier to carry and move around. A cheap and easy way of adding a handle/grip/handhold is to remove some material or drill a hole, like I’ve done on this pair of low footstools (notice also the finger-holes in the drawer section in the background). It doesn’t cost much to add a bit of nothing.
So I sketched out the basic geometry:

When you’ve decided how you’ll go about it, it’s time to break out the marking tools. If mathematics is the queen of the sciences, the compass is the prince of layout tools — I’m sure you could use several. Noli turbare circulos meos!
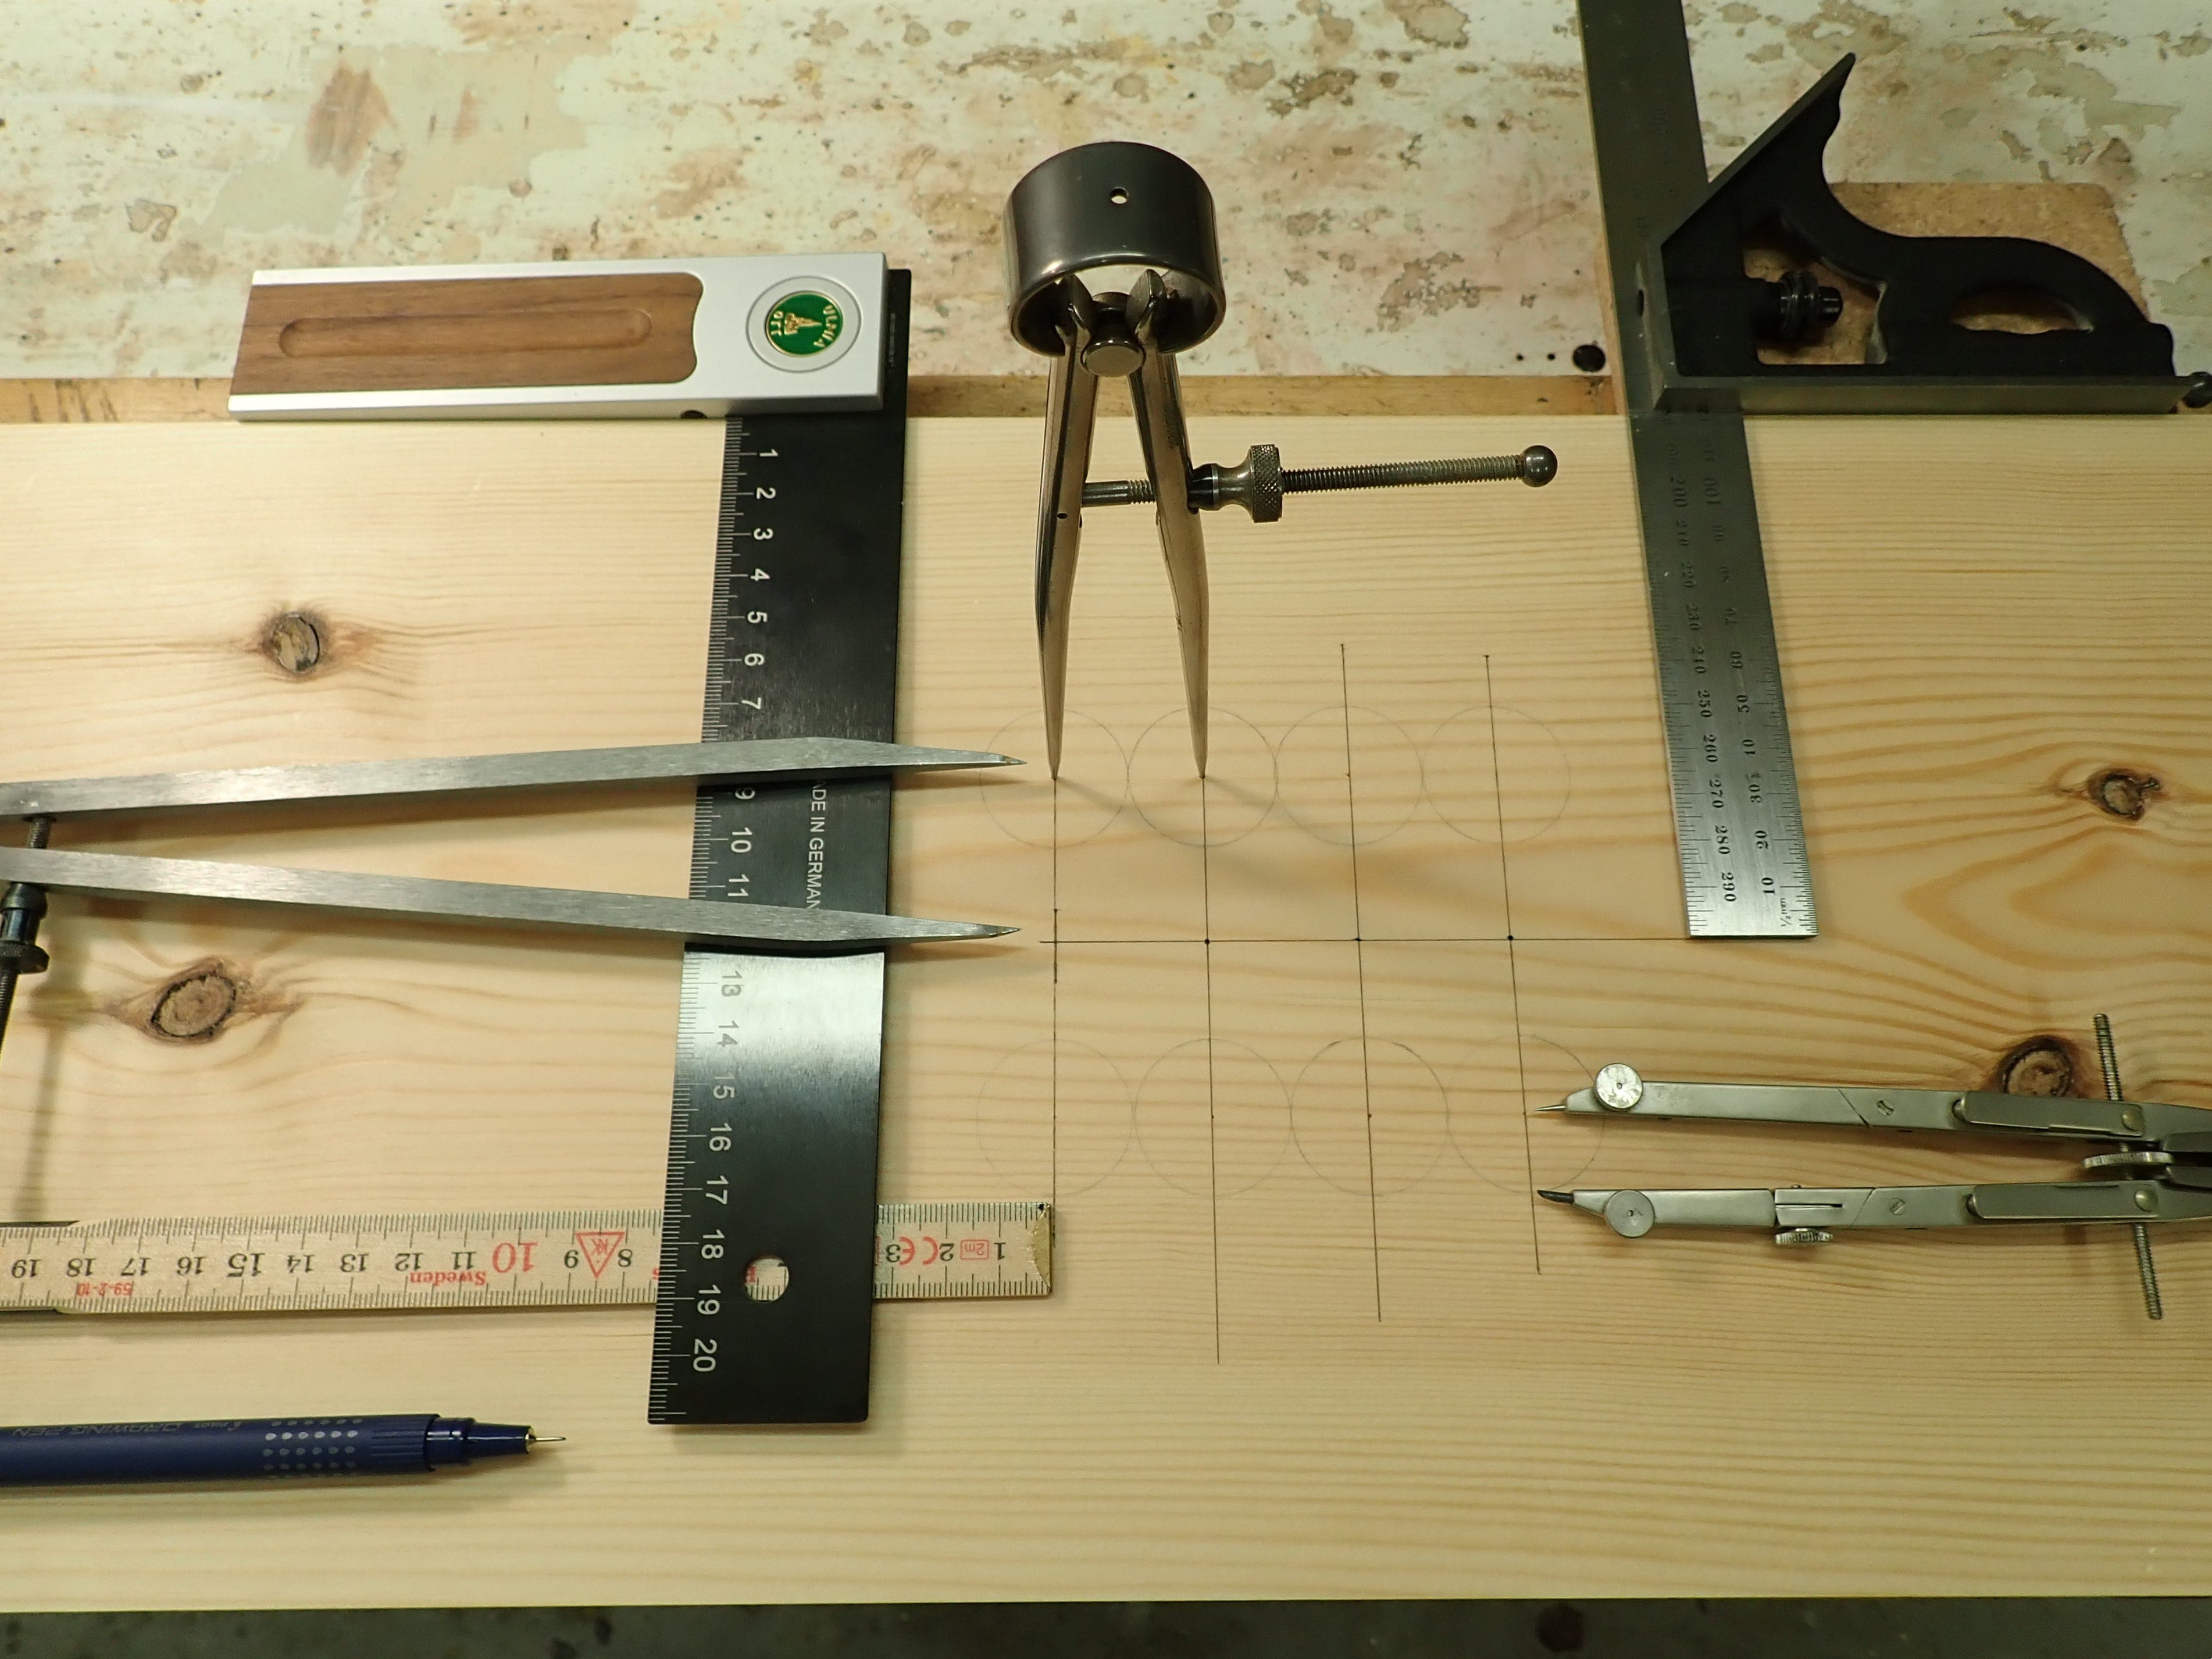
I also drew some lines parallel to the long edges — you’ll soon see why.
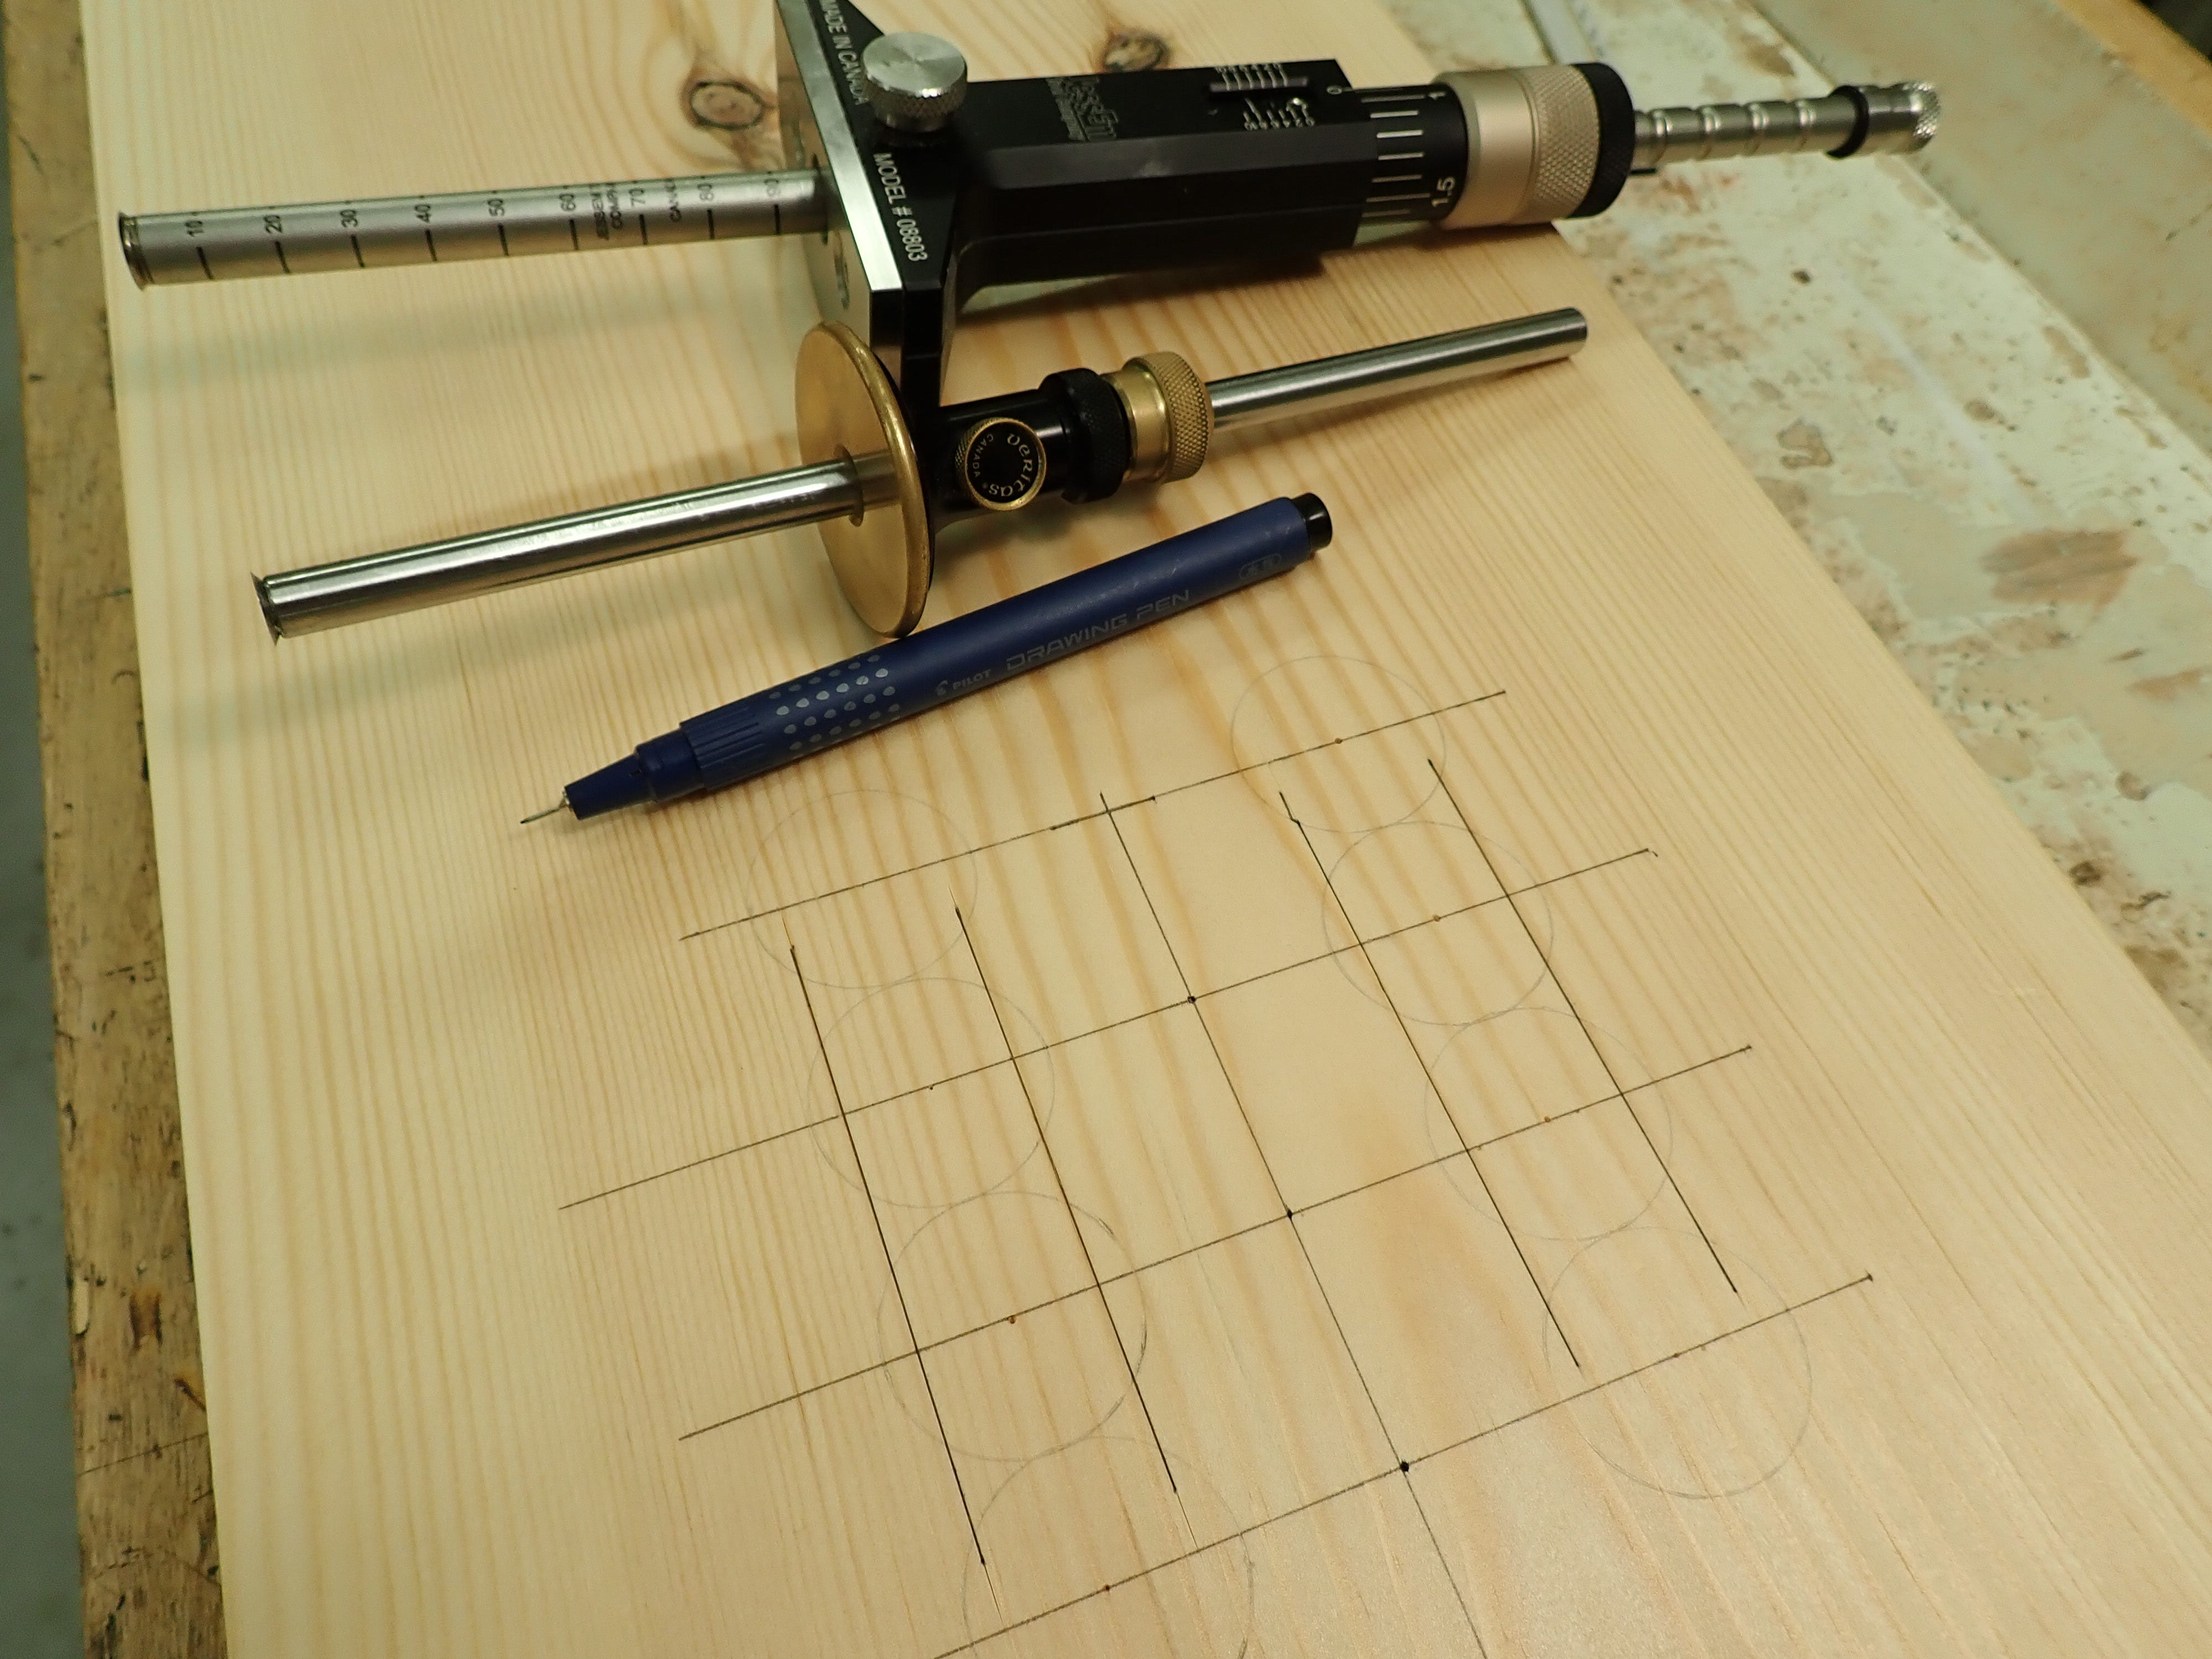
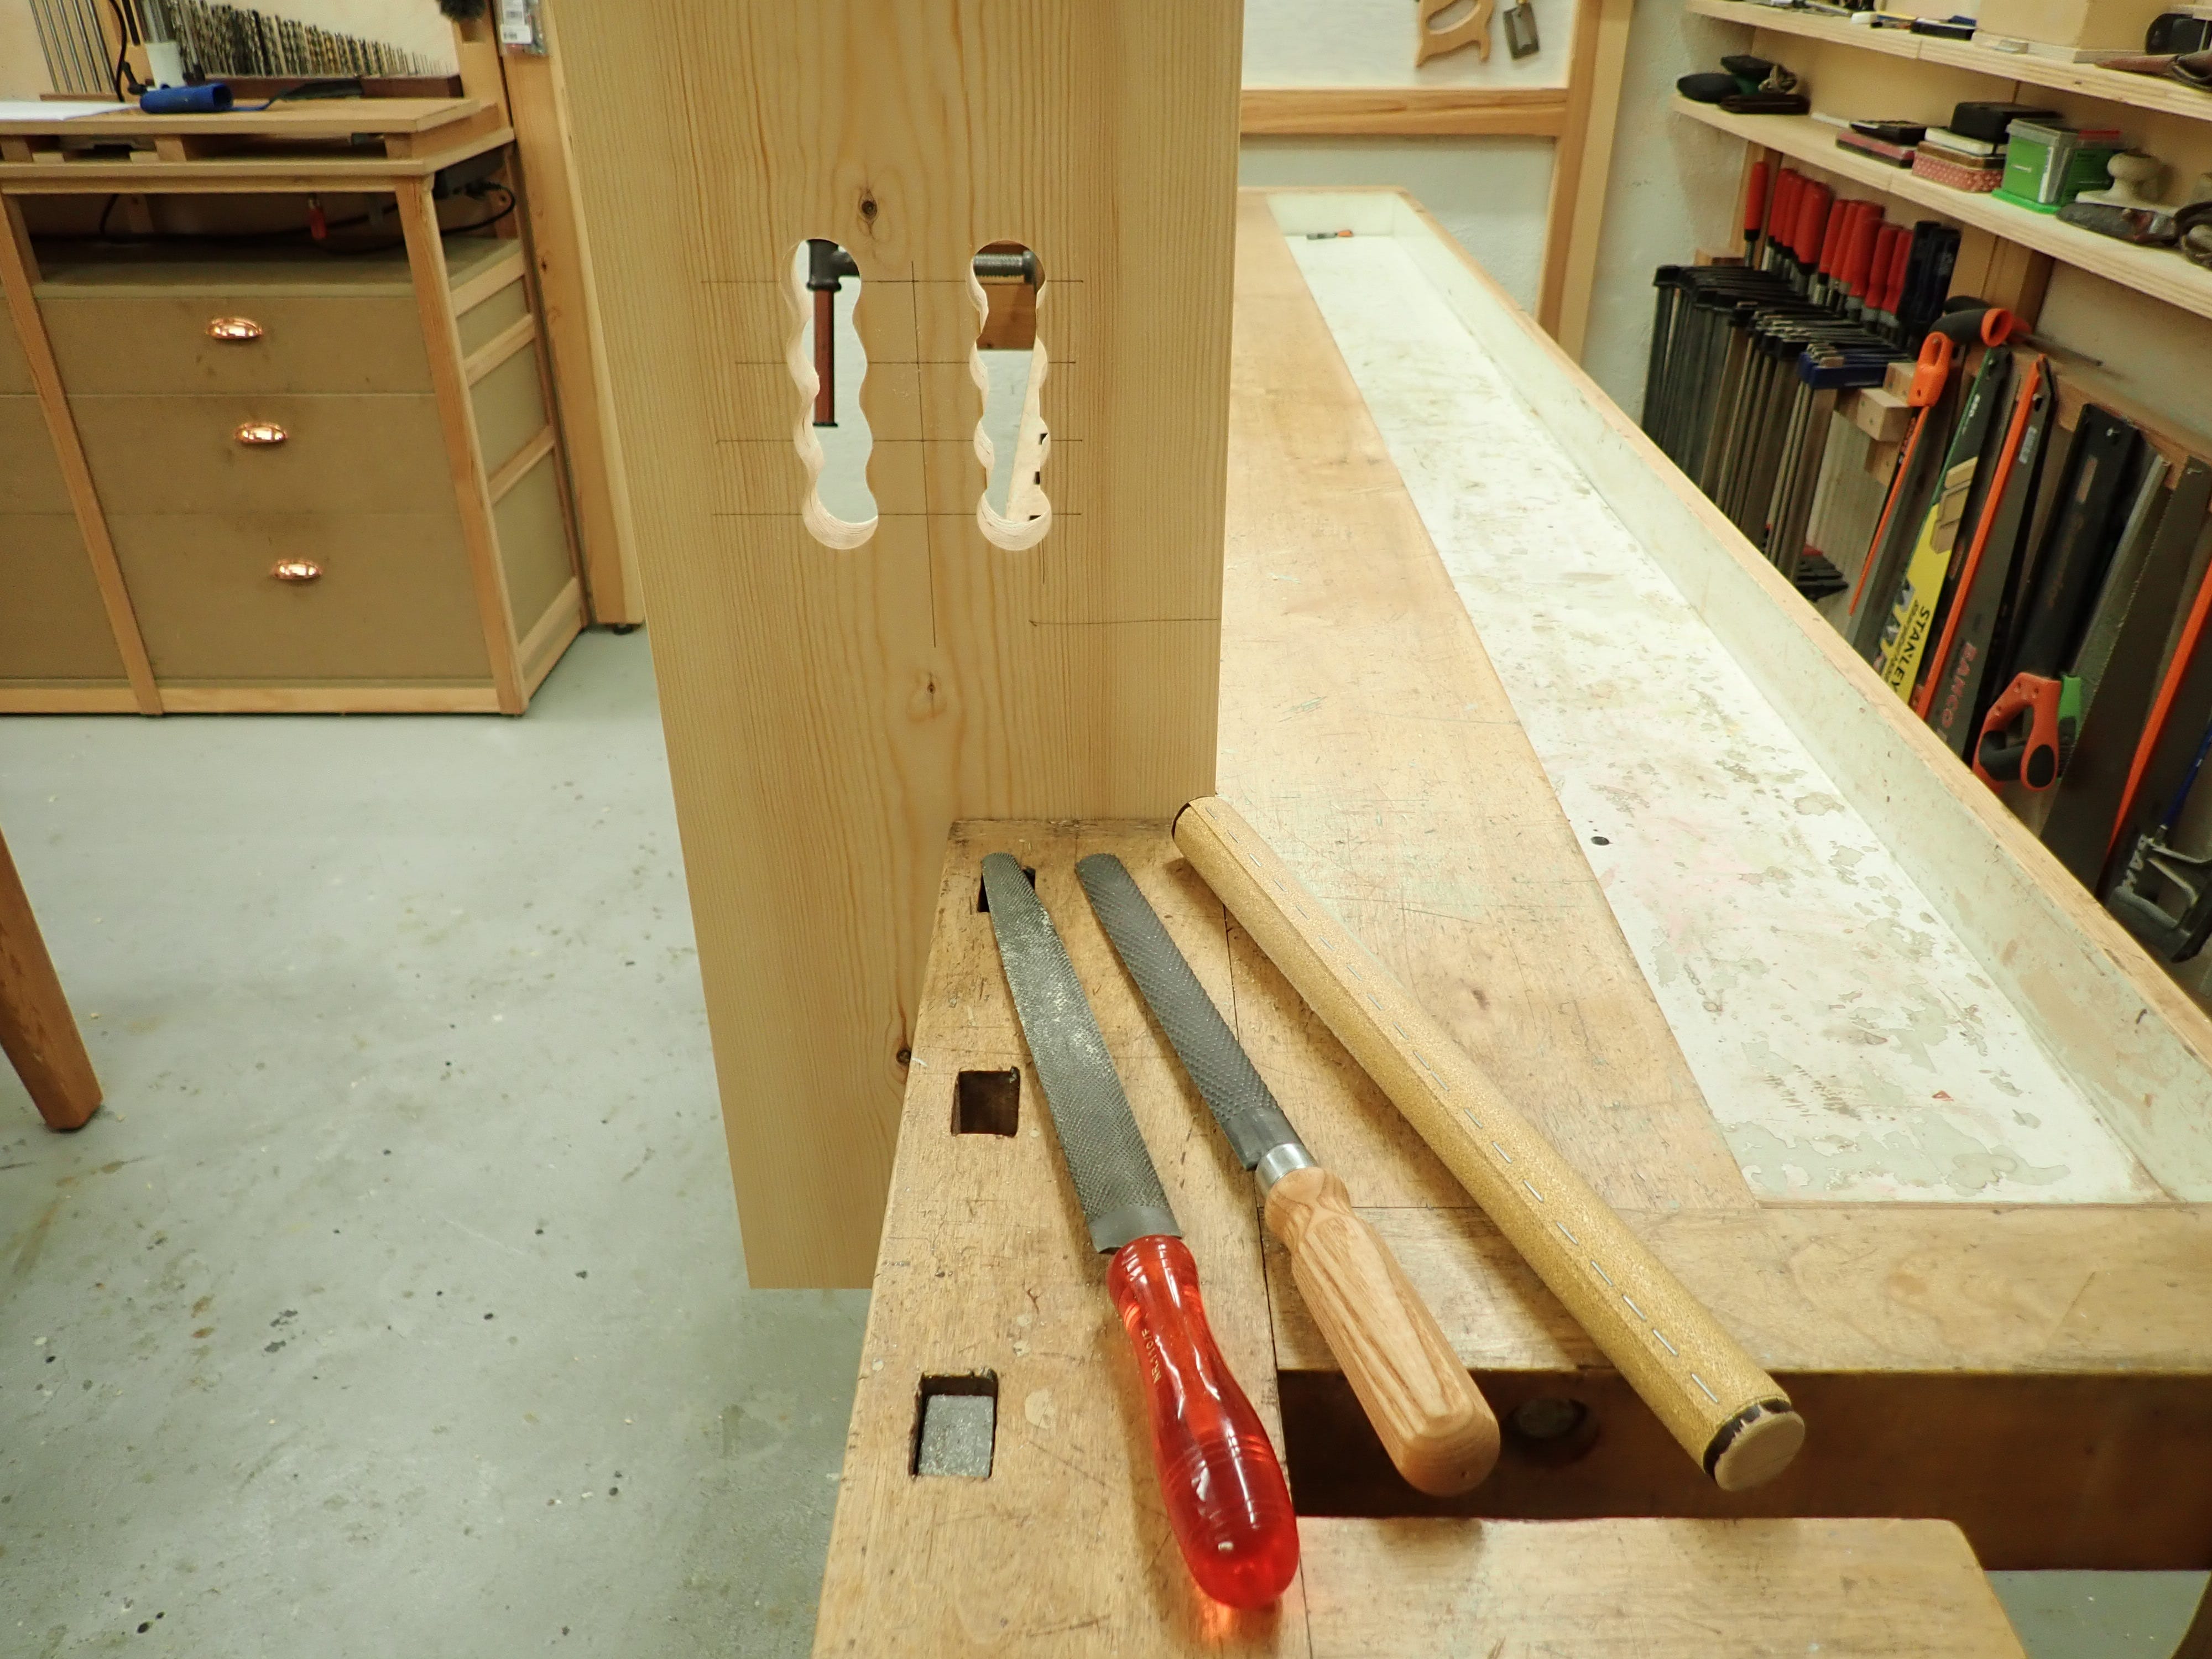
I’ll use a Ø=30mm Forstner bit for the ‘finger-holes’ but I want to drill halfway in from both sides (to avoid ugly spelching), so I’ll need some pretty precise pilot holes. For the pilot hole to be able to guide the brad (centre) point on the drill-bit, it needs to be somewhat smaller than the actual, conical centre-point, or else it’ll just wander about in the over-sized pilot hole:
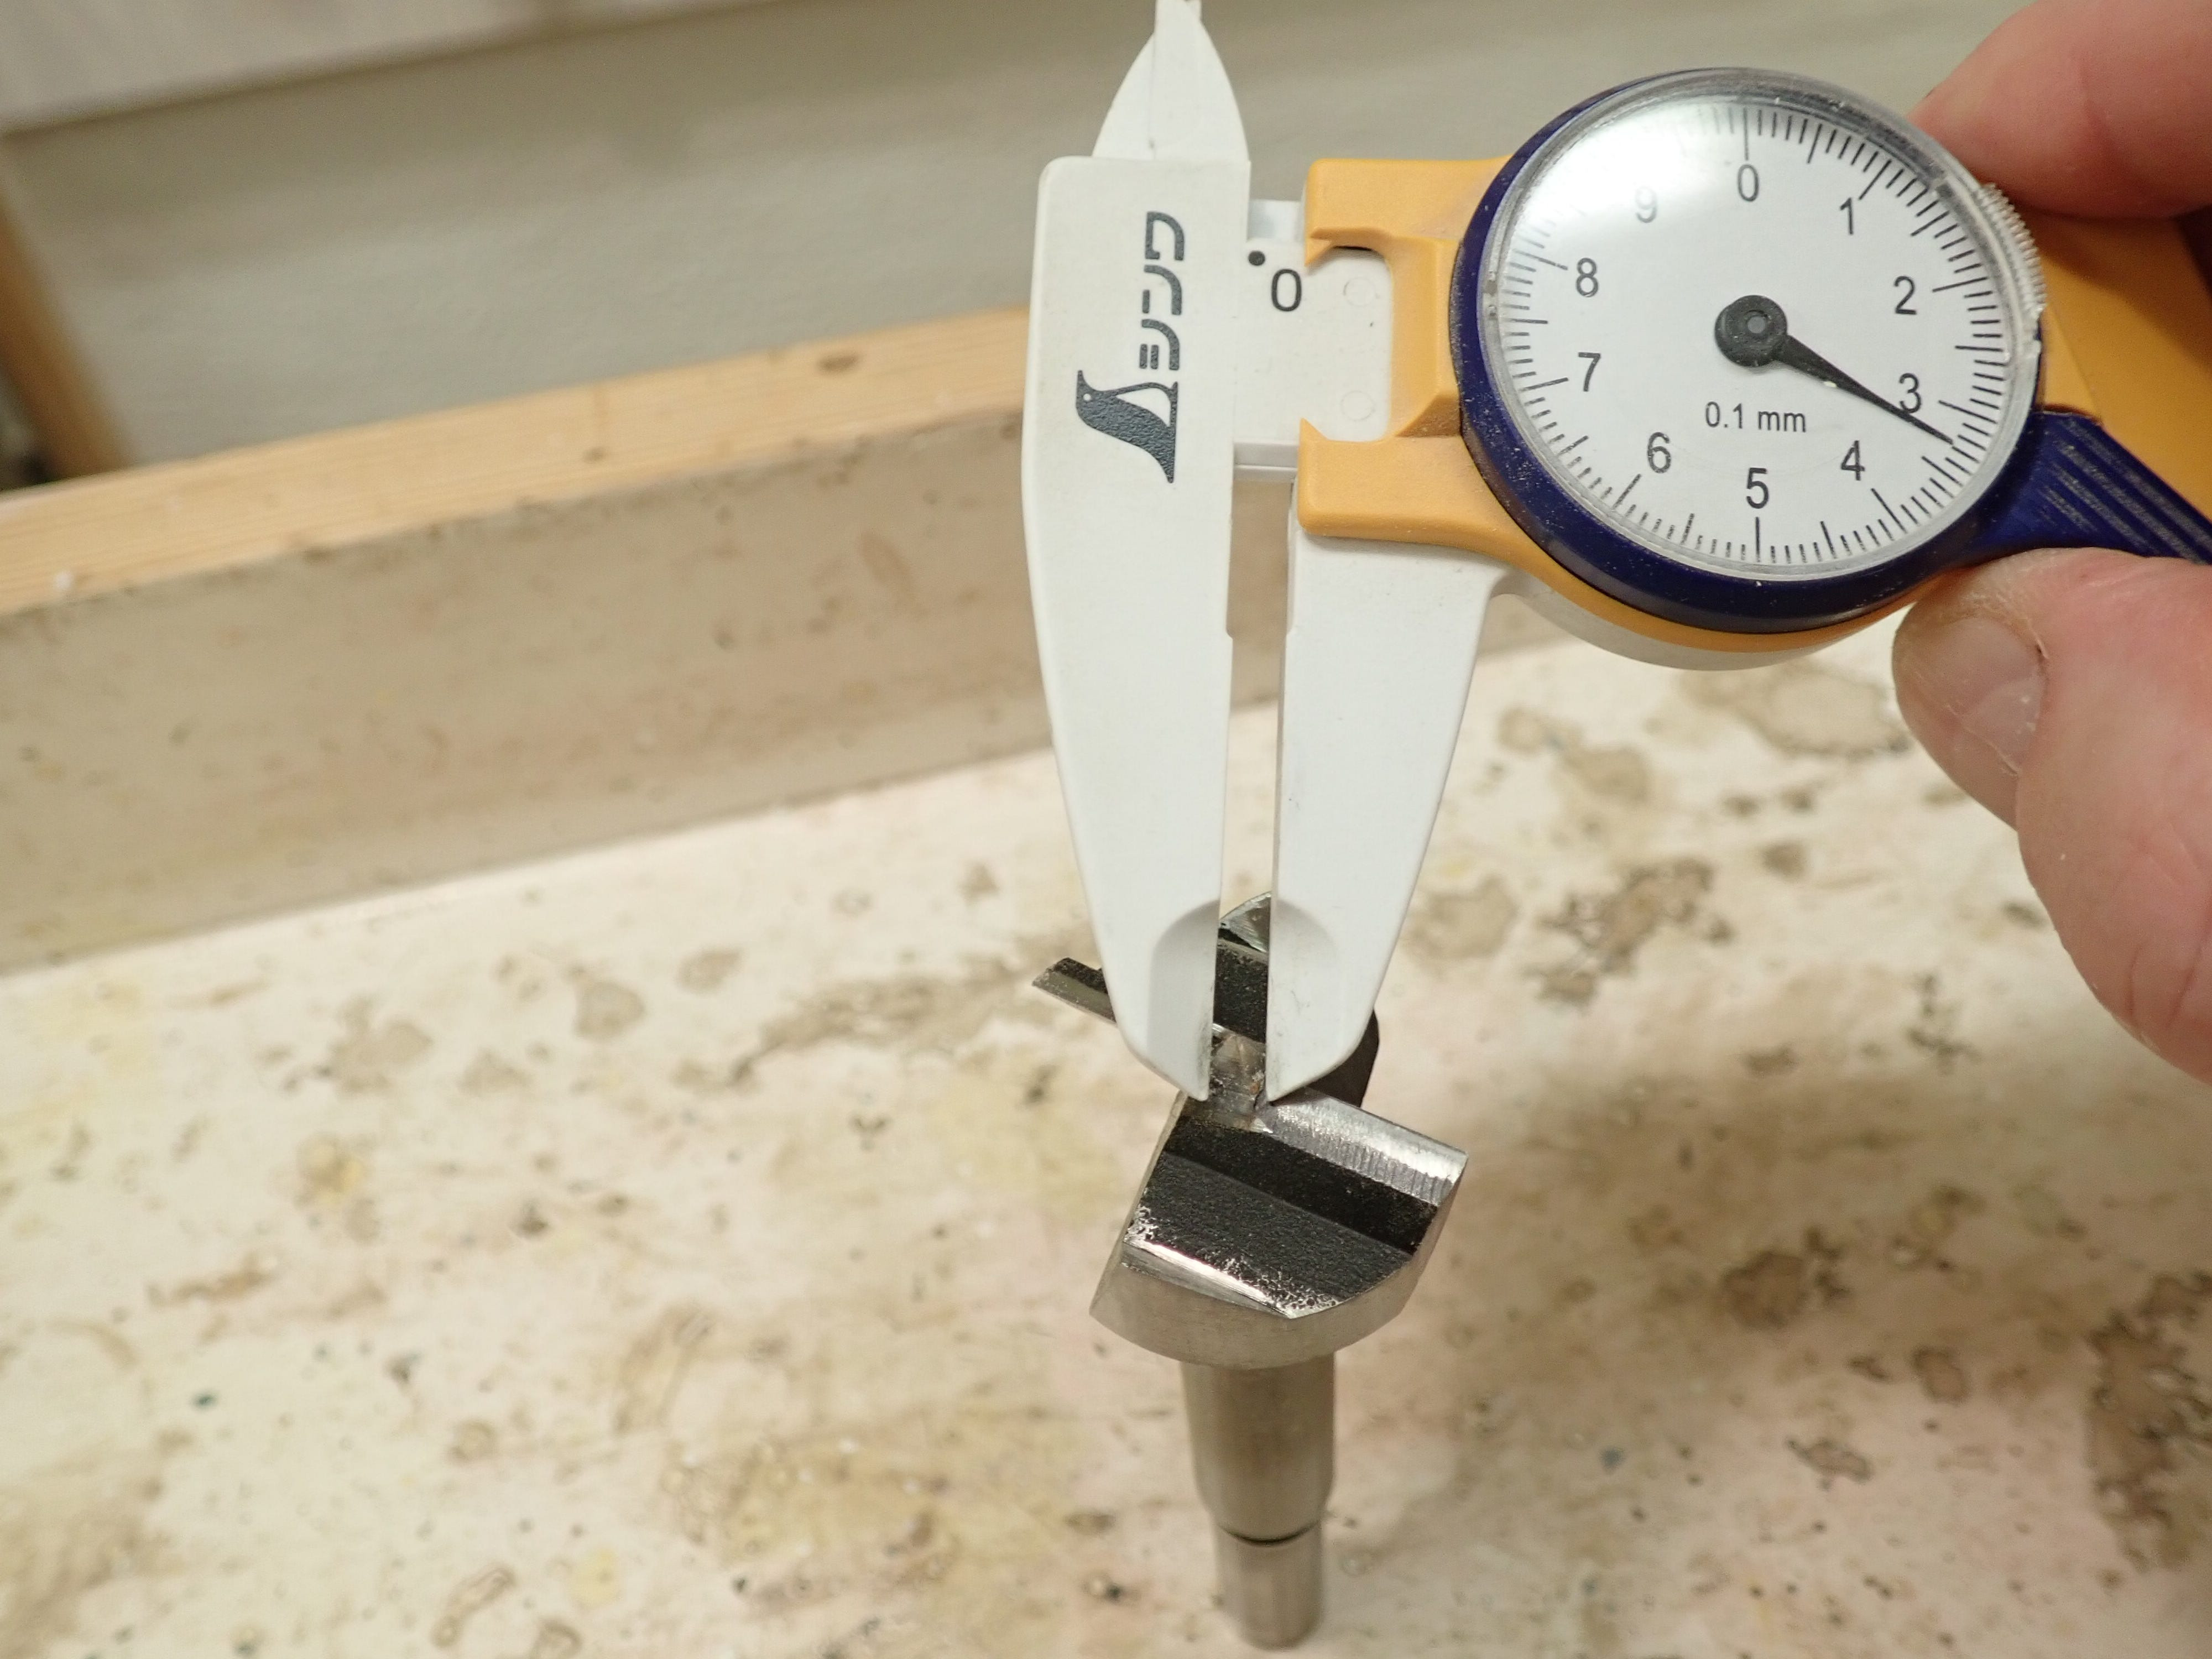
A 2mm pilot hole will be suitable. Before drilling, I used a stabbing awl to enlarge the small marks left by the compass, so it would be easier to centre the drill on the right spot. This is best done with a drill press.
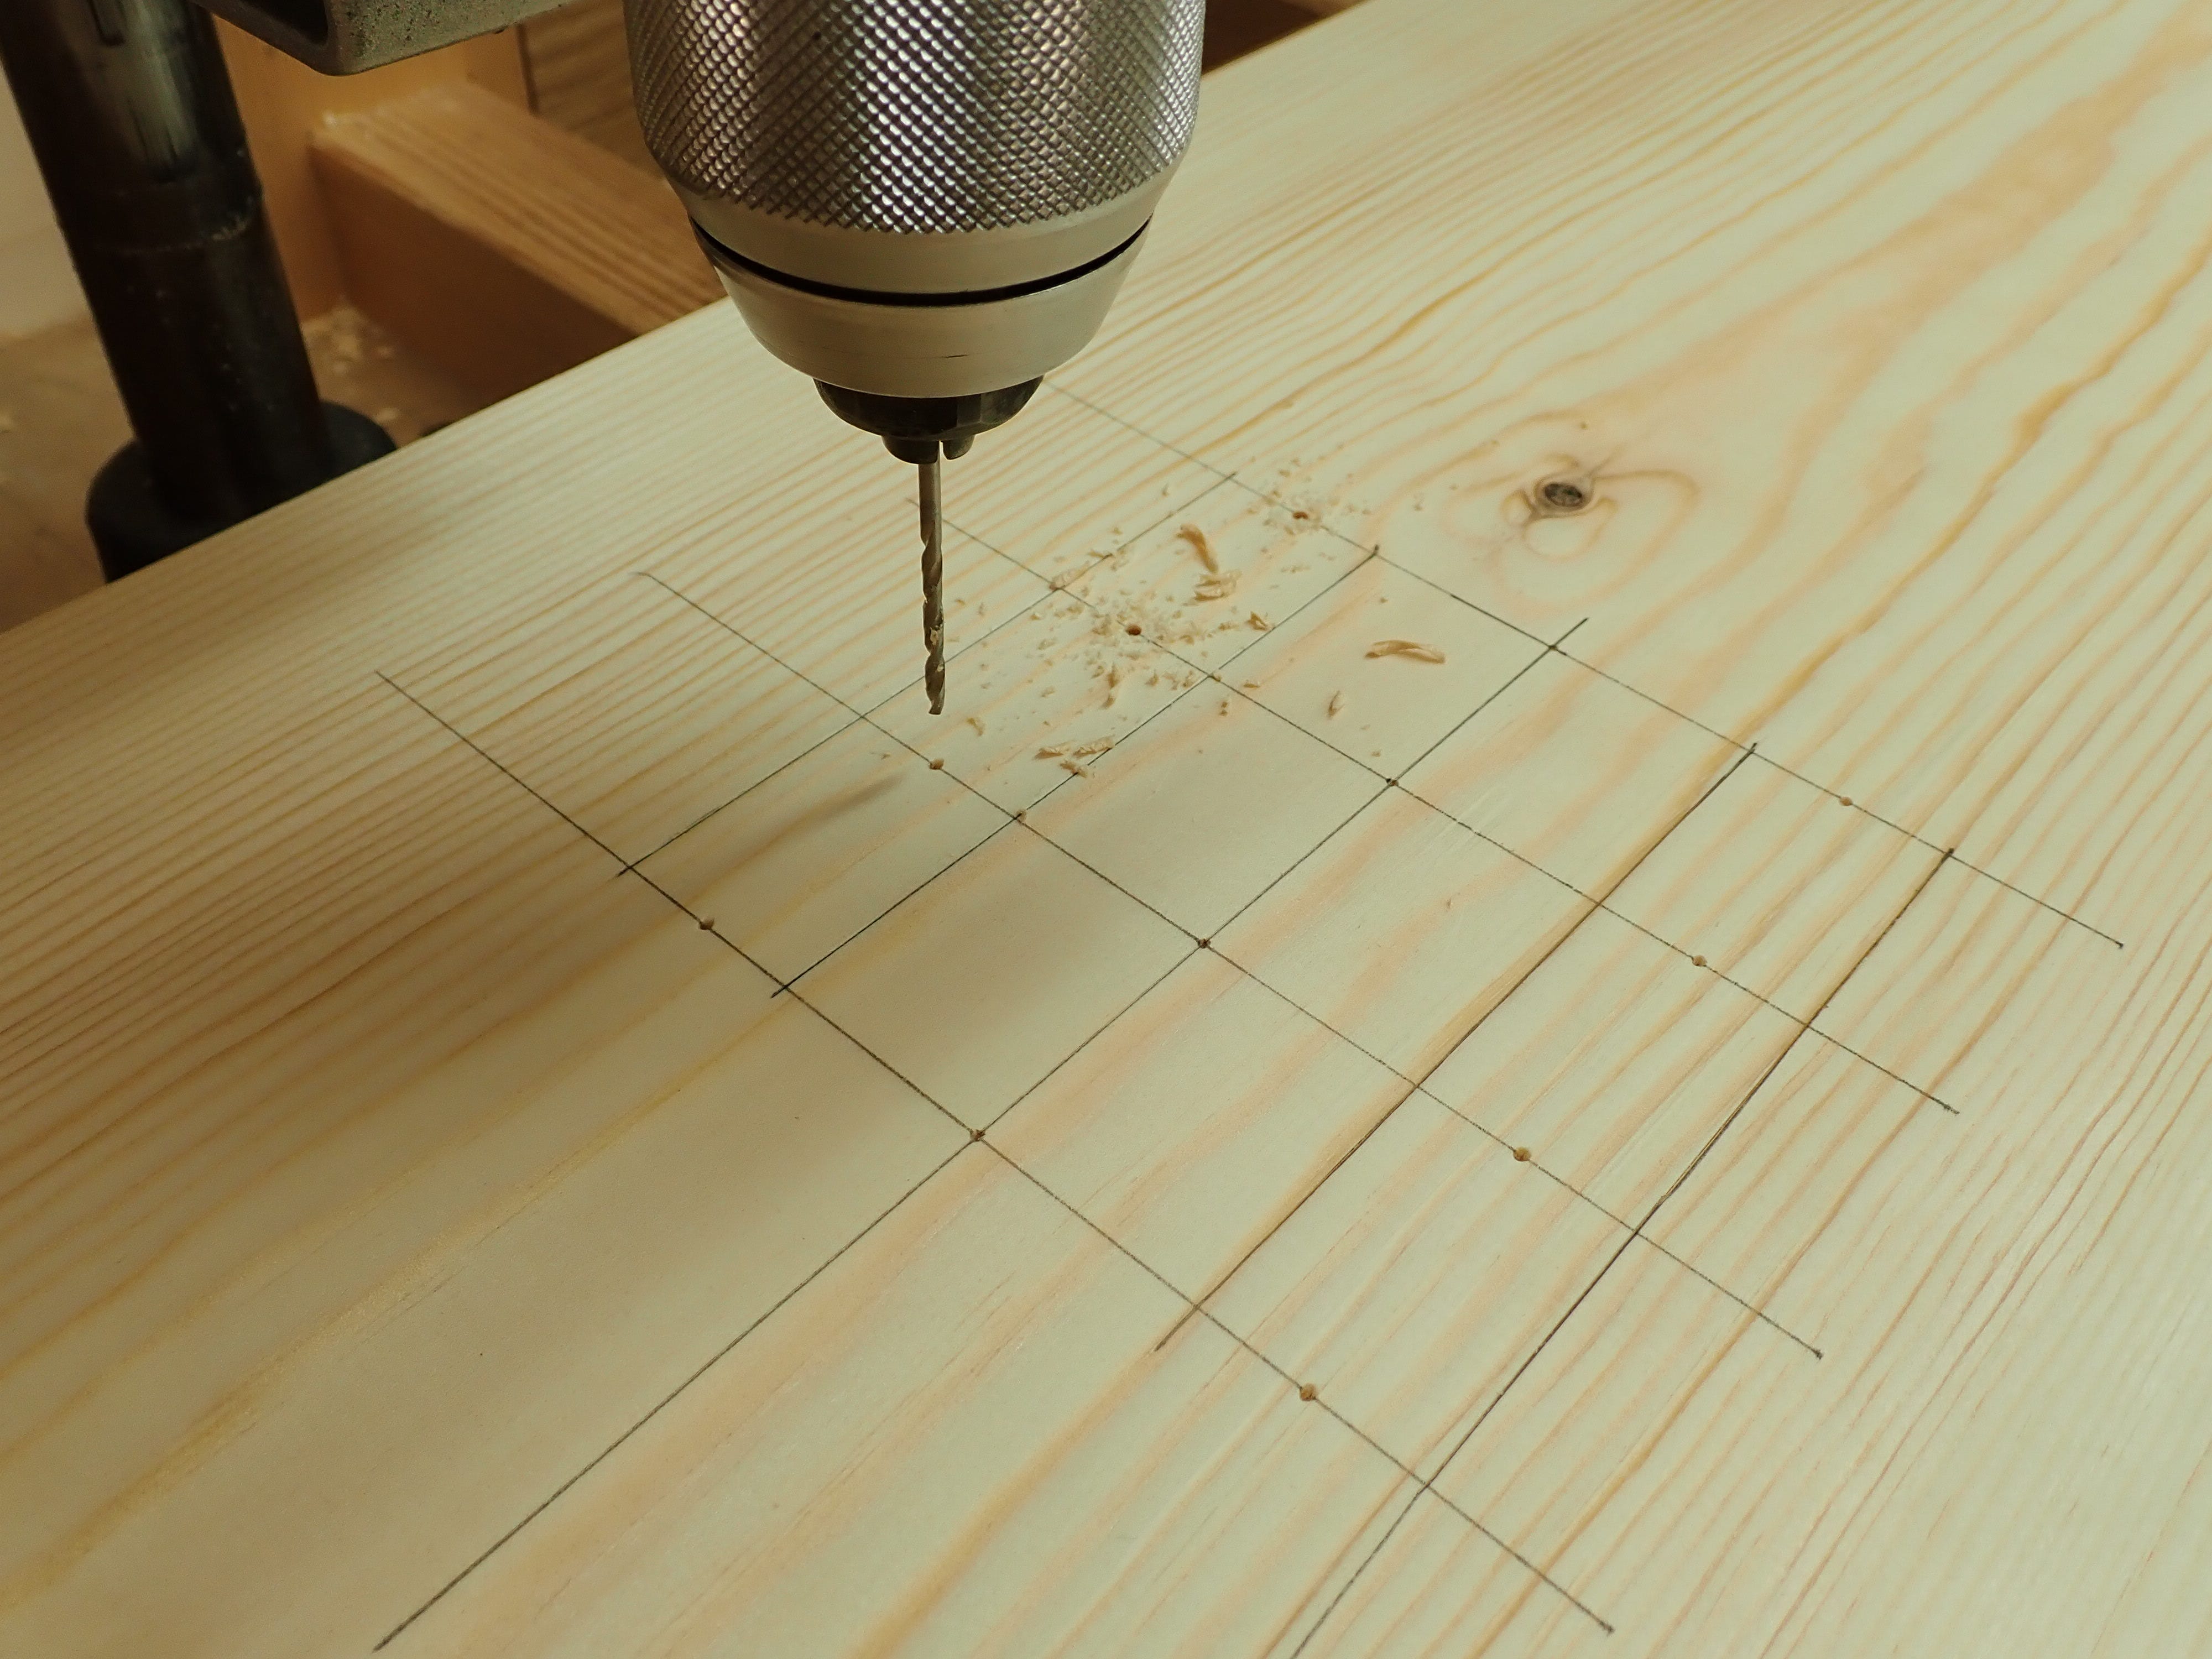
Thin drills like this are surprisingly flexible, and pine varies greatly in hardness between early-and latewood. If you’re not careful, your thin drill can be deflected by a hard layer of latewood, messing up your accuracy. The remedy is to use a new, sharp drill and to avoid forcing it; ‘peck at’ the hole and lift often to unclog the flutes — let the drill eat its way through the wood!
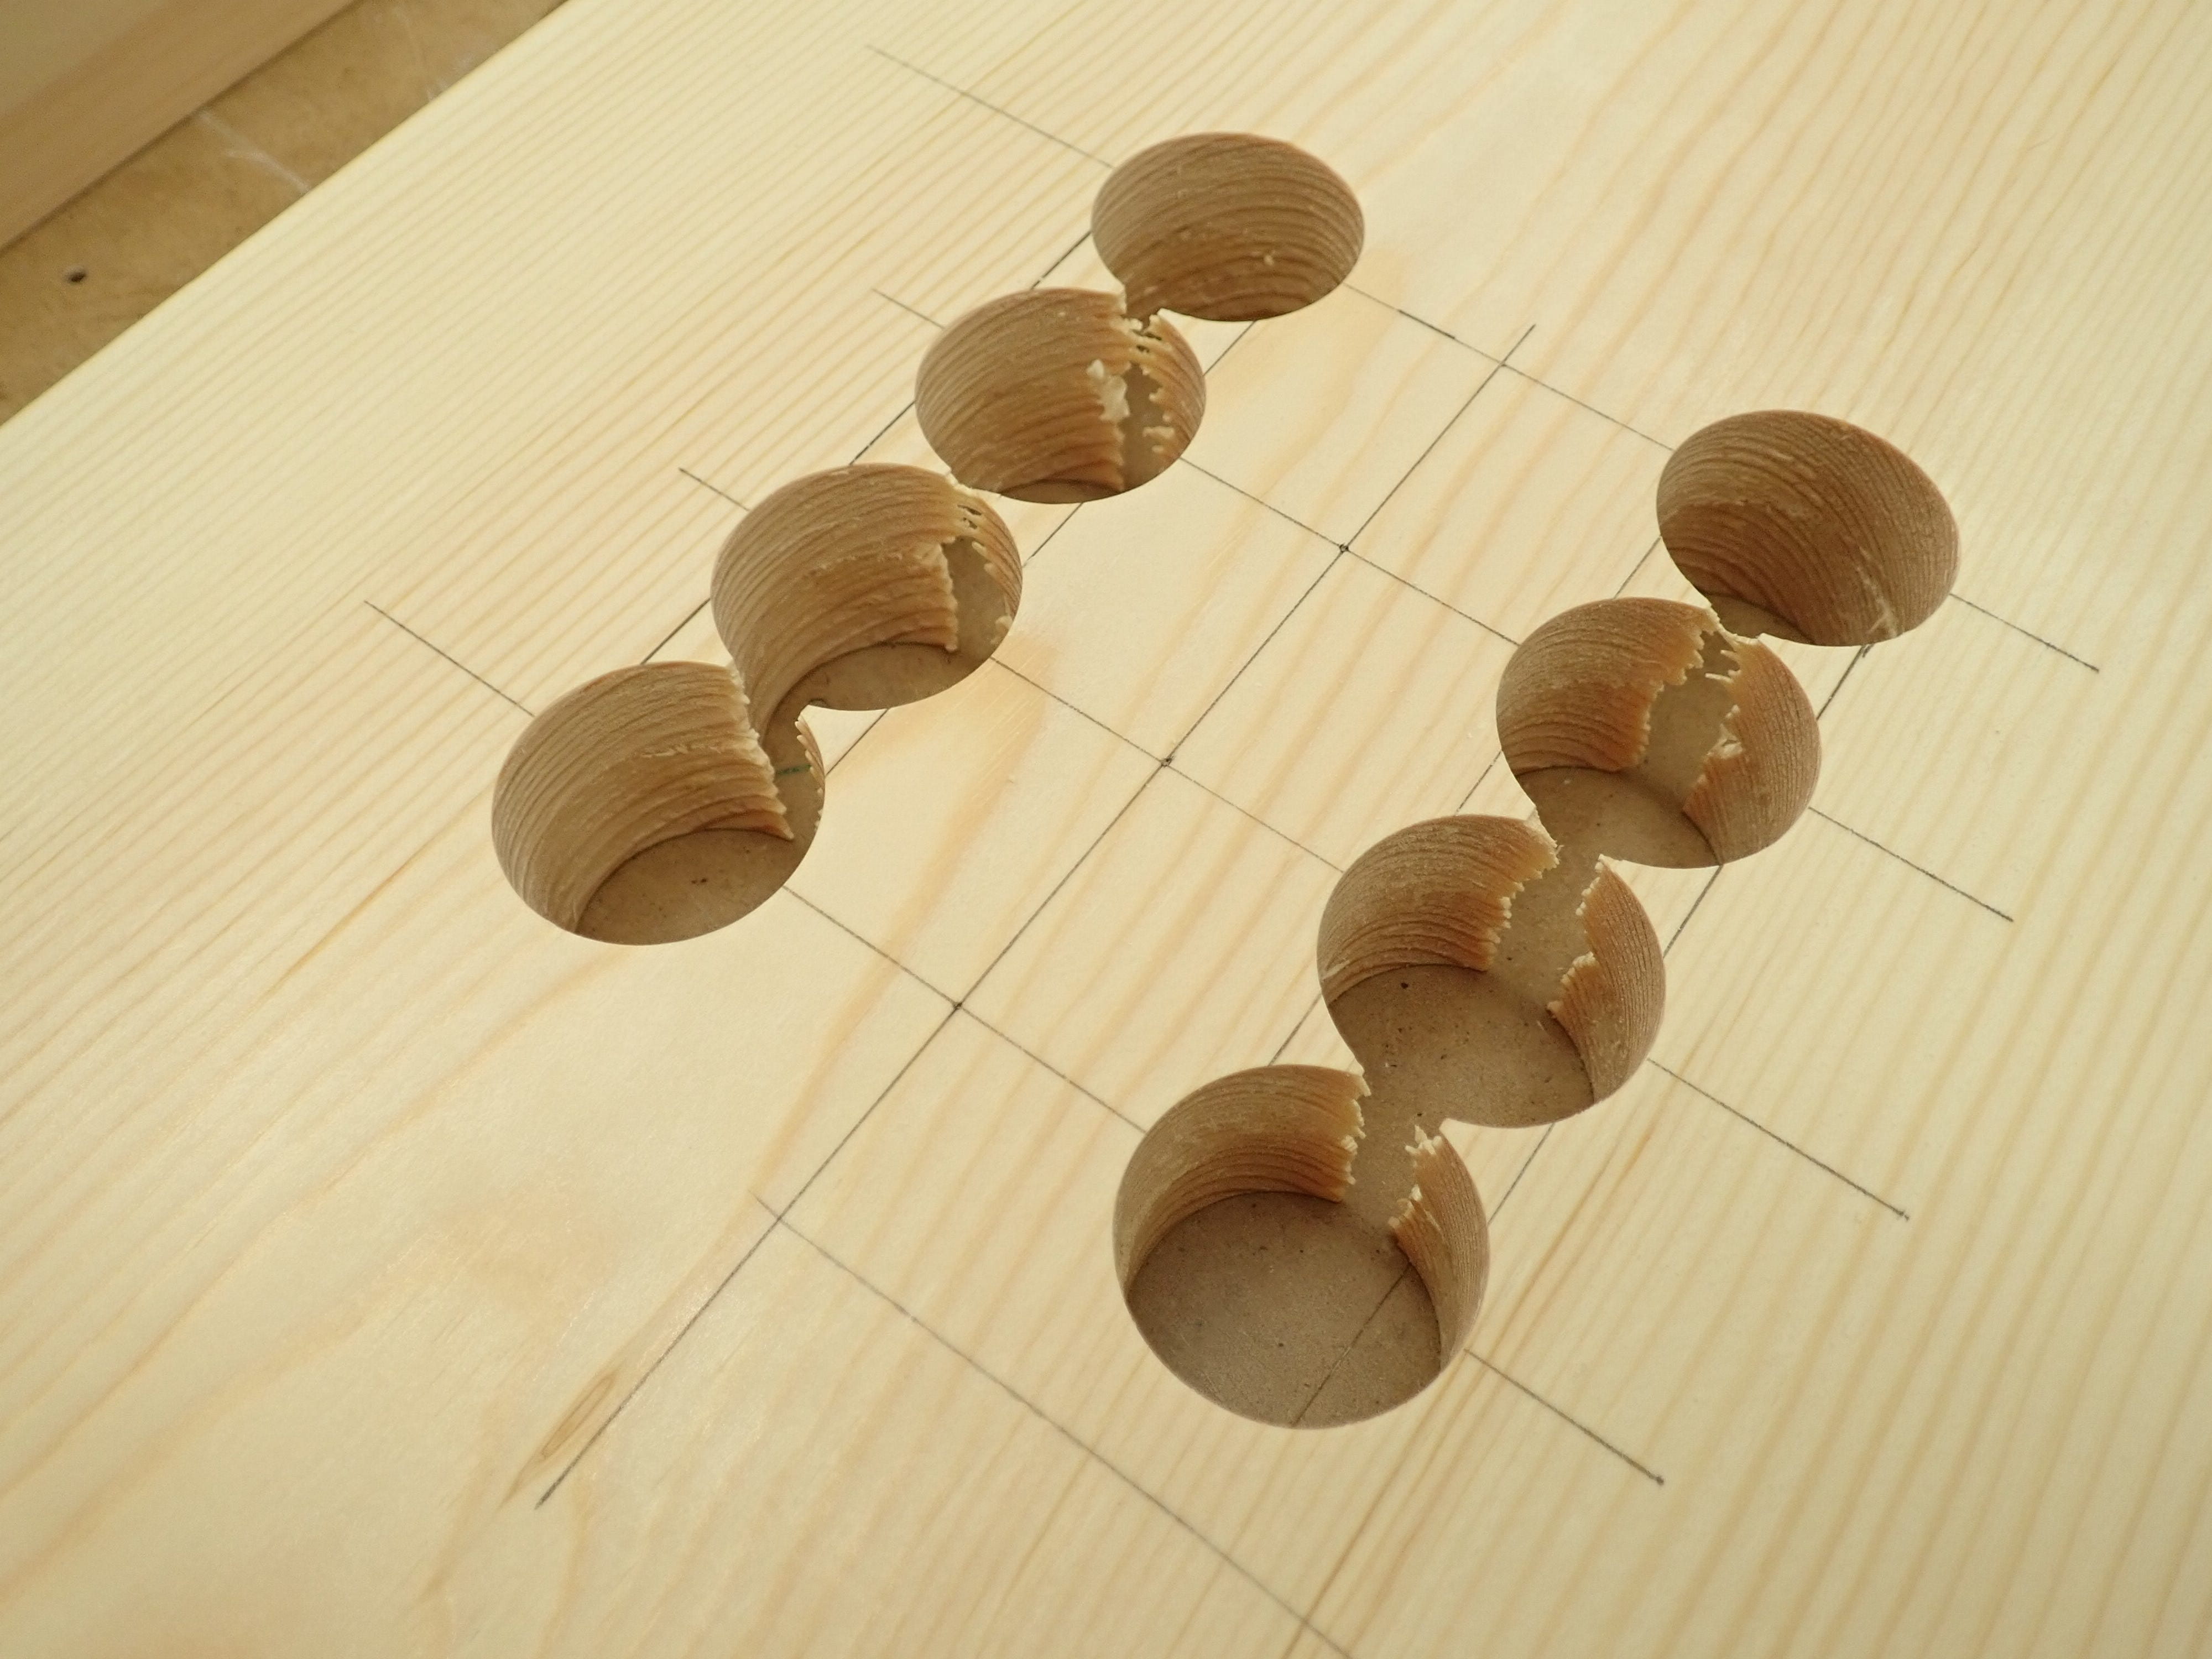
Pilot holes done, you can tuck into the main course: Place your work-piece in what you judge to be the right position, lower the Forstner bit gingerly and let the centre-point ‘find’ the pilot hole without you holding the wood too firmly; the conical shape of the centre-point will tend to centre itself in the pilot hole if you let it, although this technique needs some Fingerspitzengefühl.

Big holes means much waste — better keep your bench-brush at hand. The tricky part is not to overheat your Forstner bit; adjust the rippums and your feed rate for well-formed chips and cool working — not too much, not too little. Should look something like this:
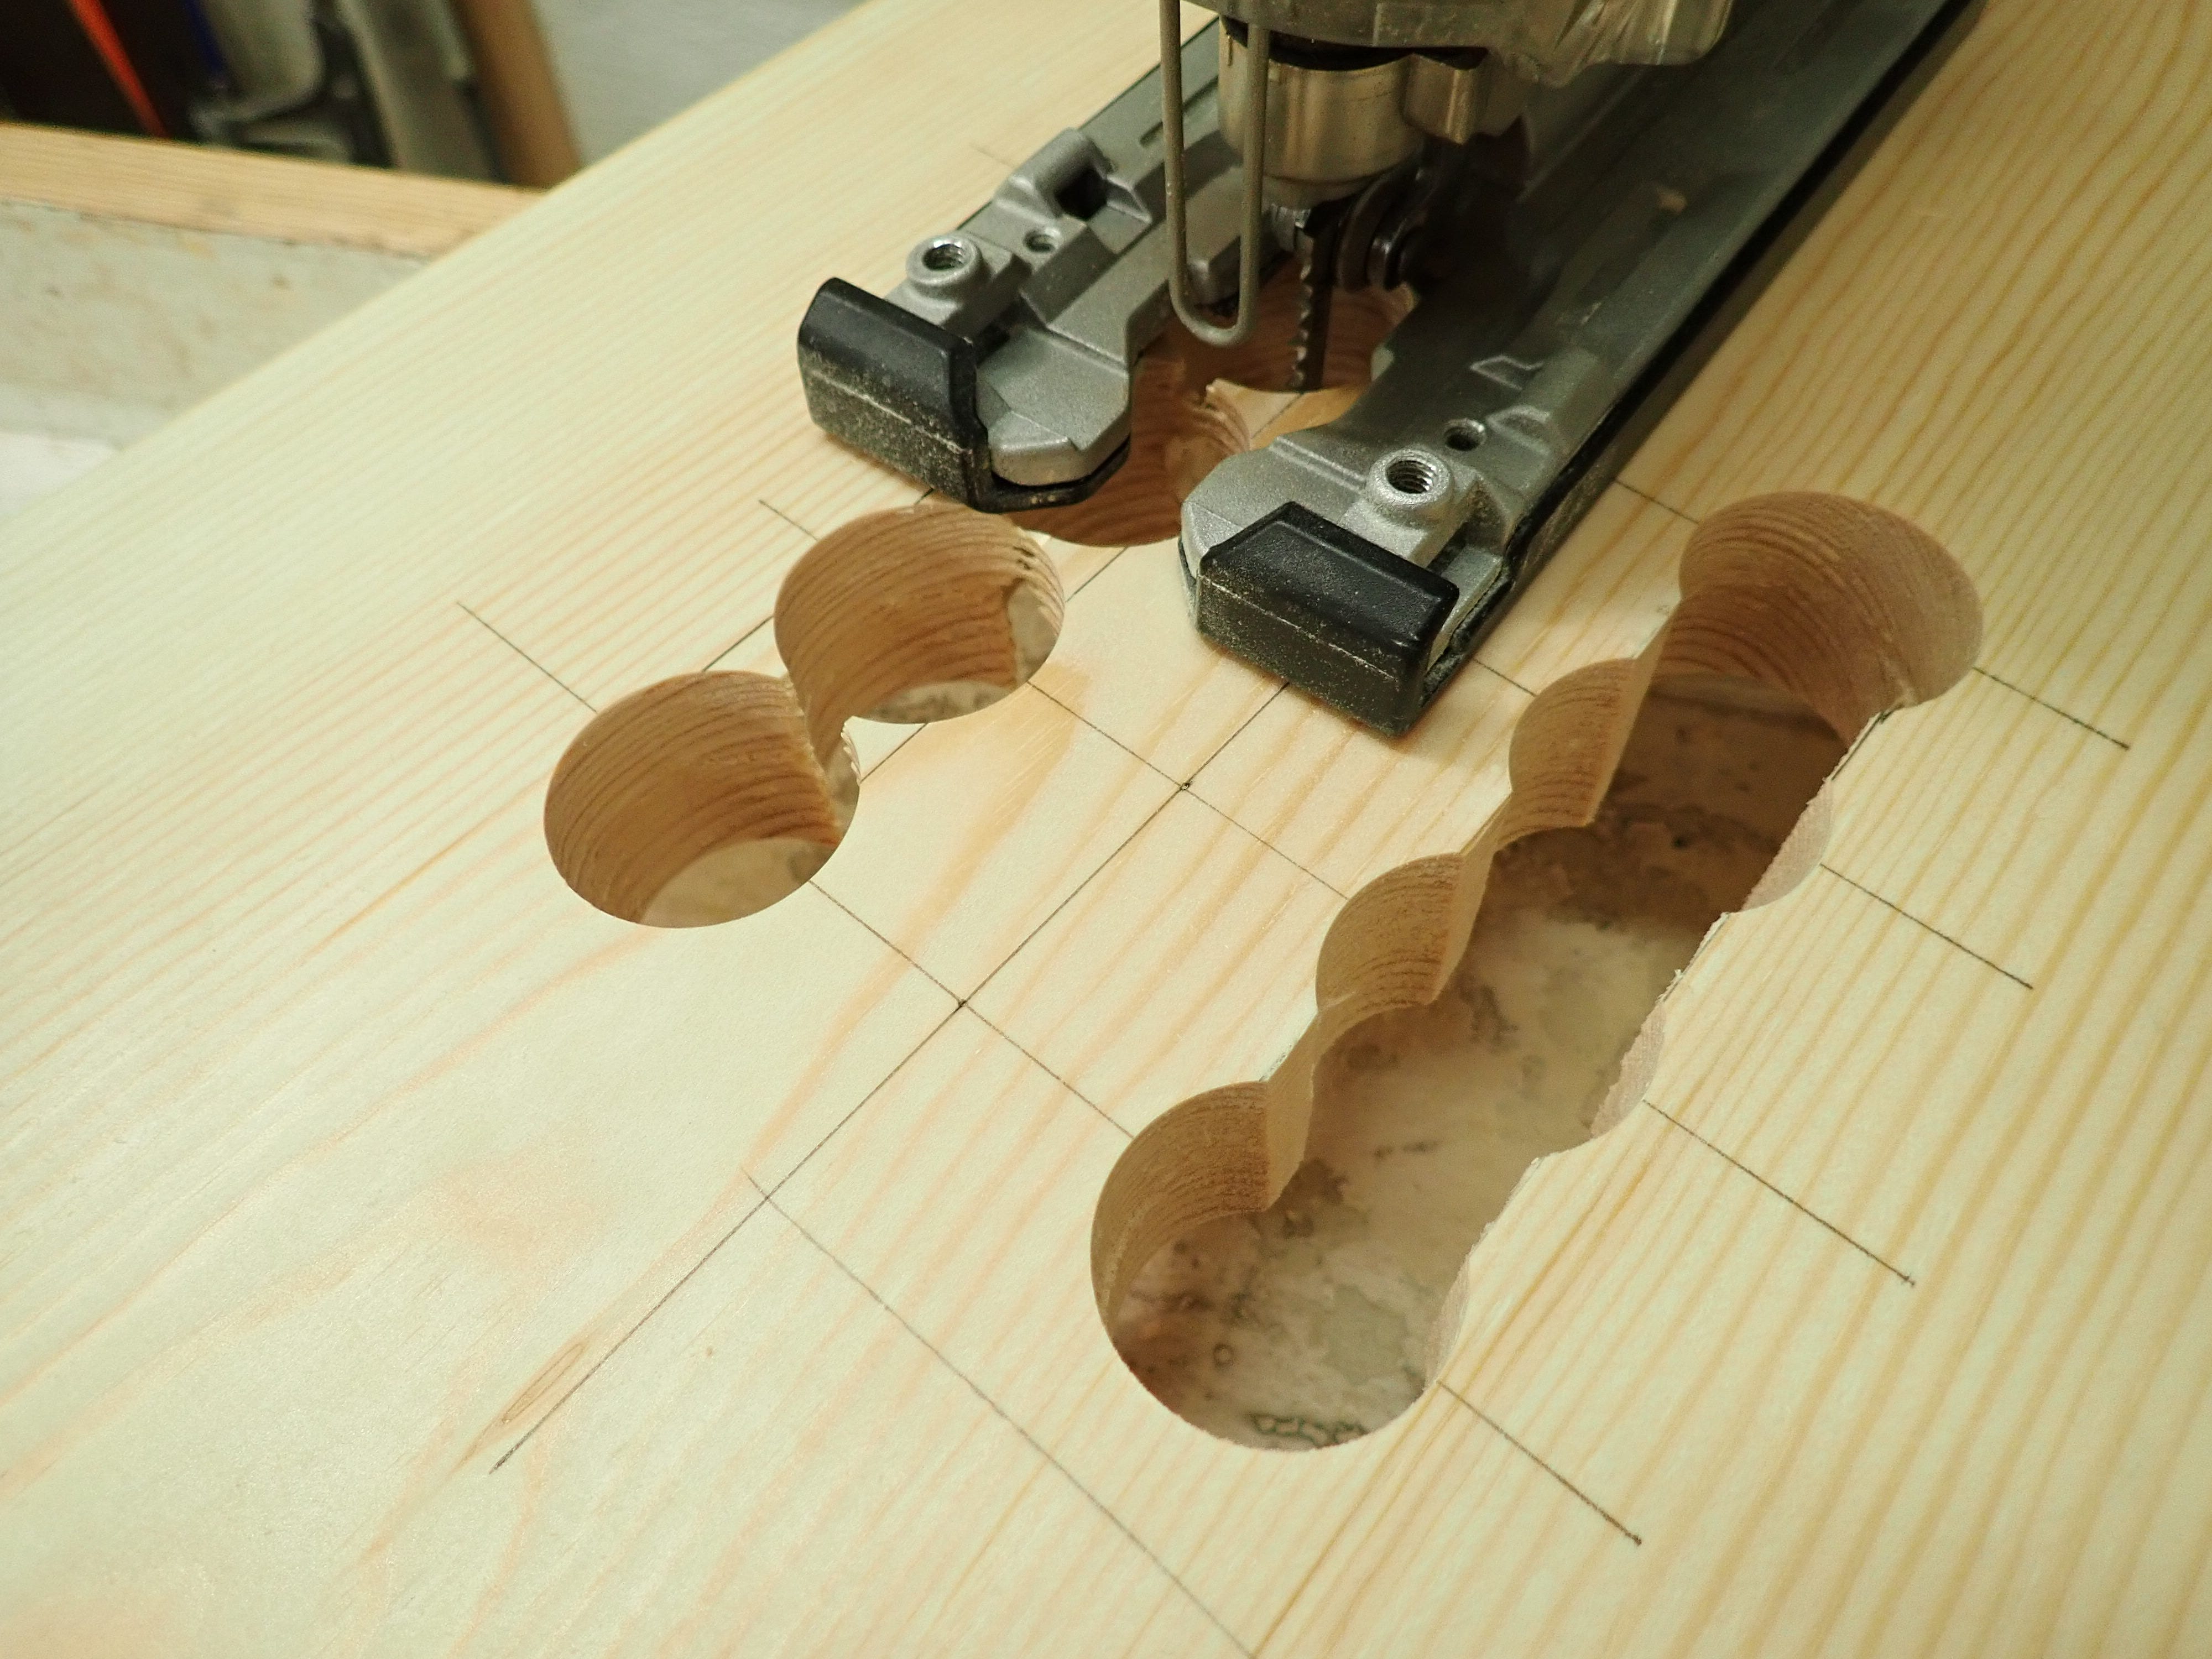
Next I cut back the sharp ‘knuckles’ — a jigsaw will do.
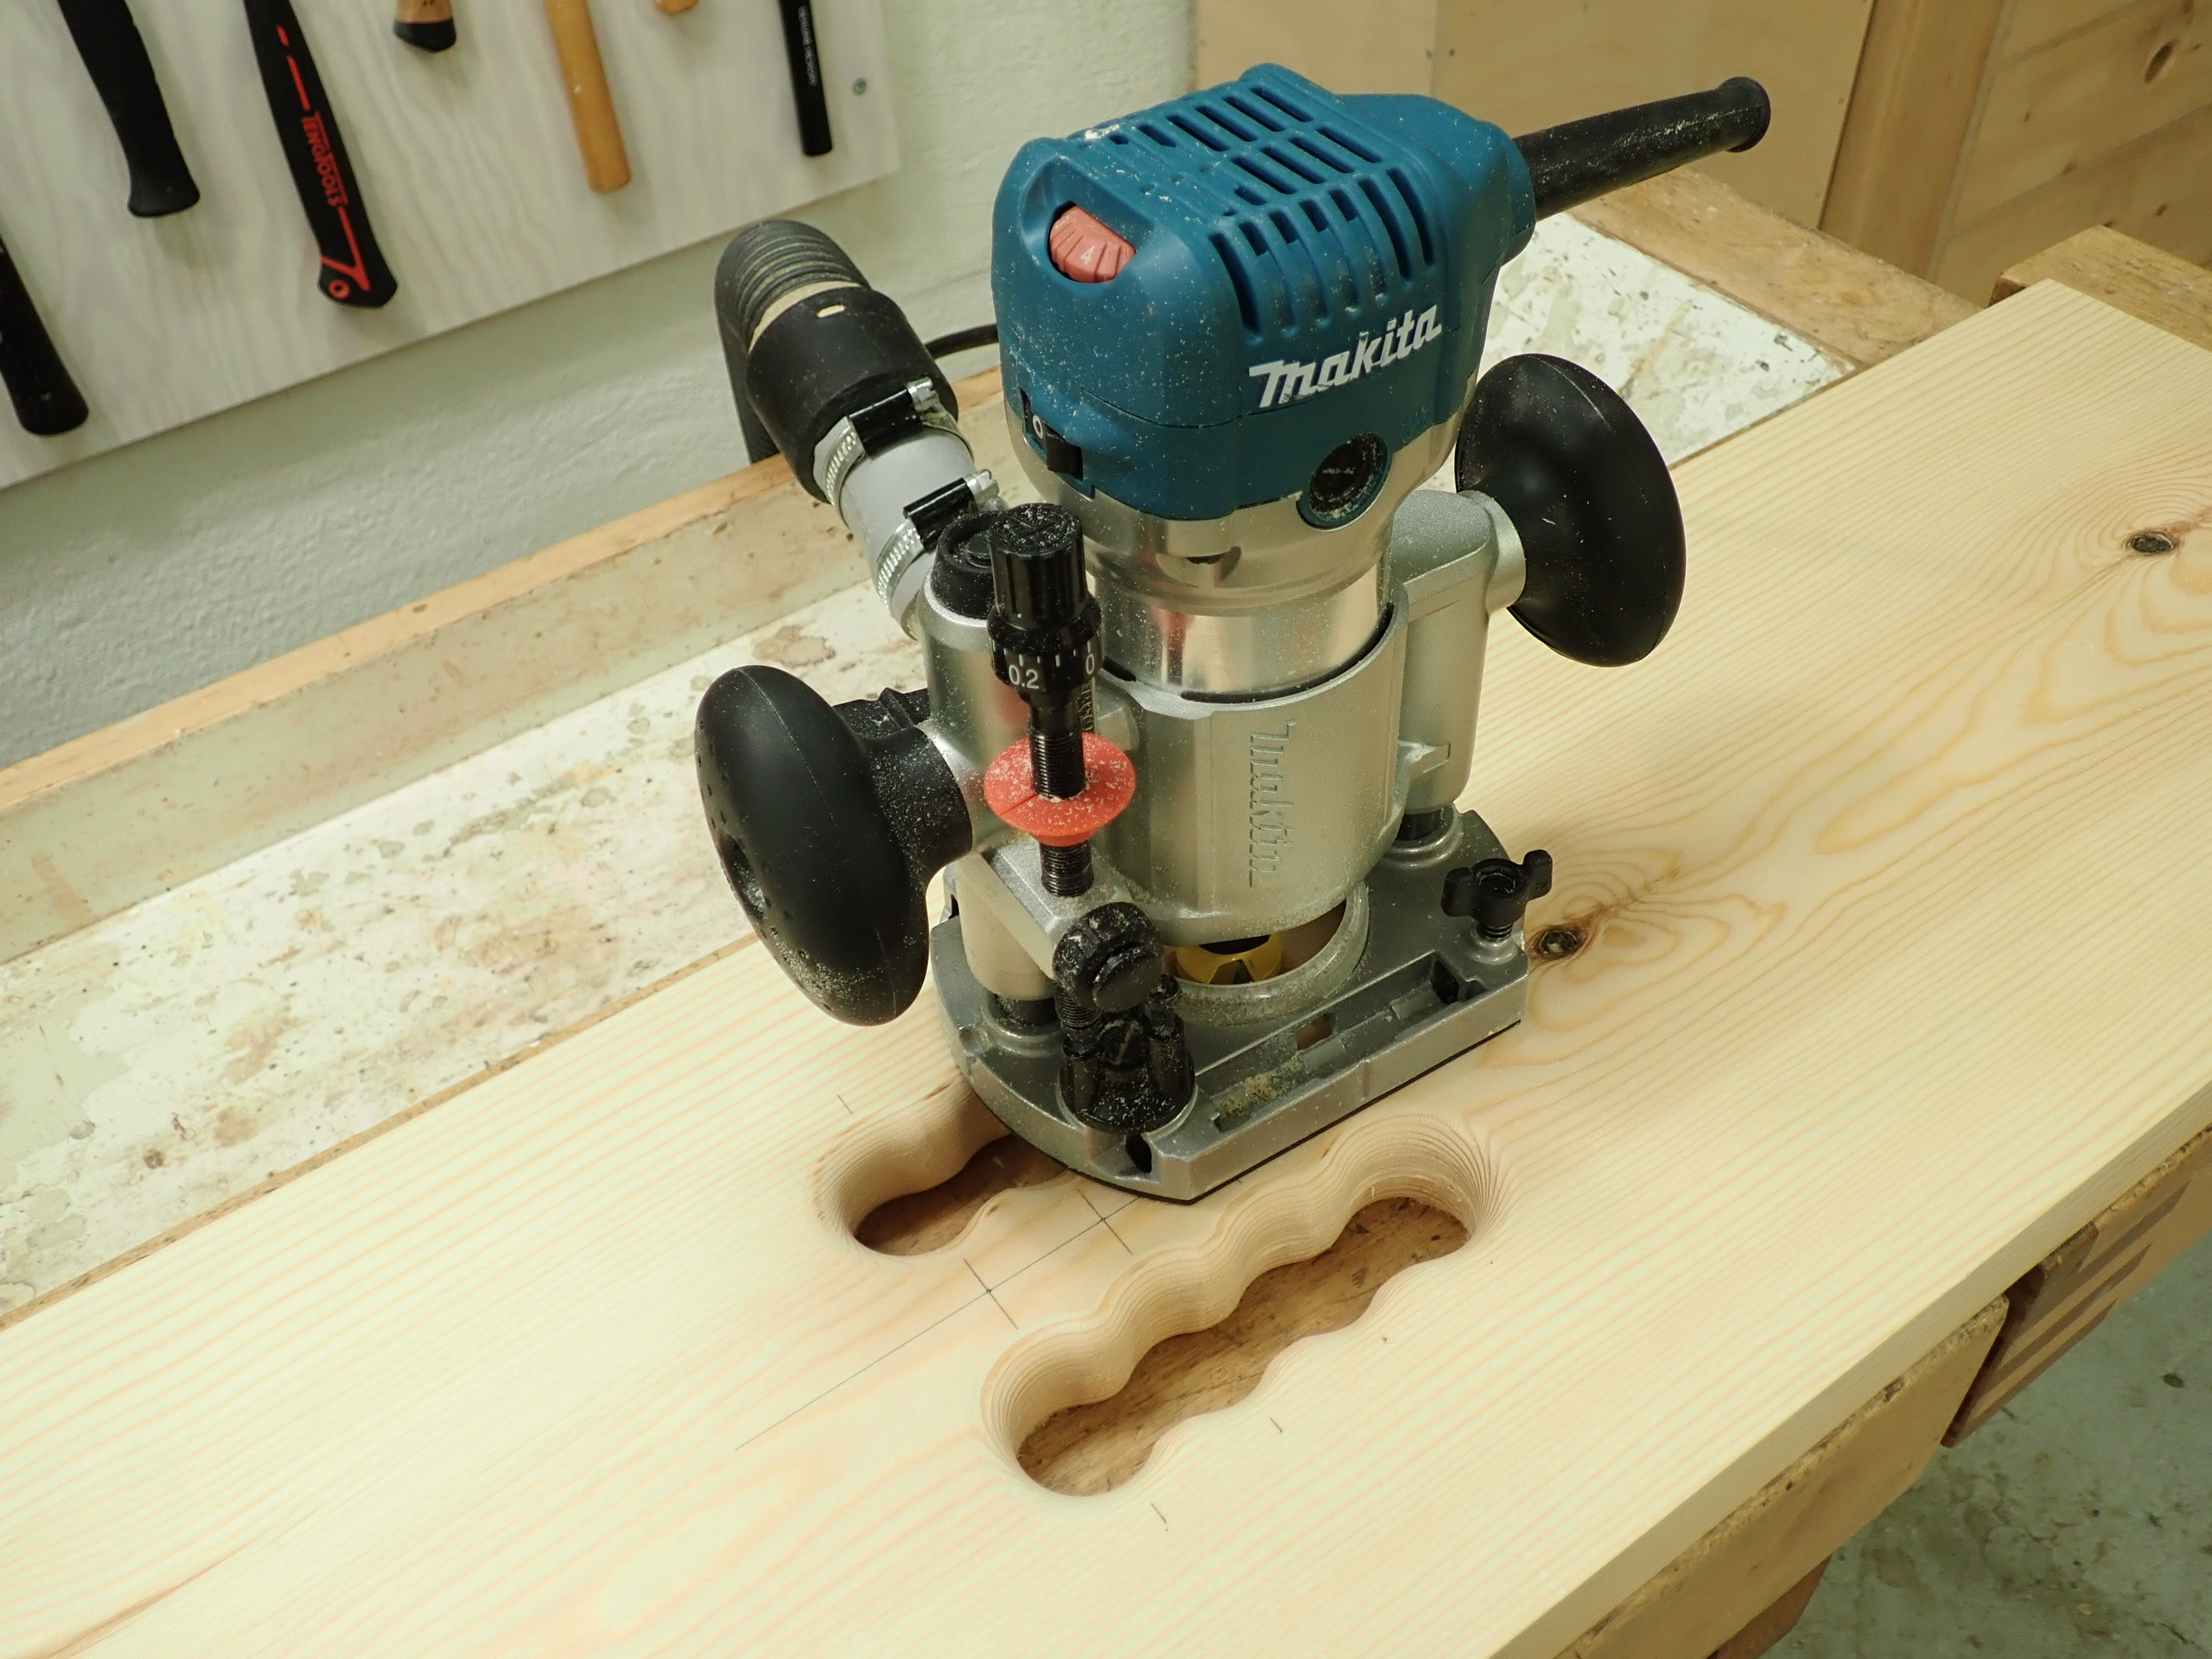
Then, some prettying up …
… before rounding over the edges:
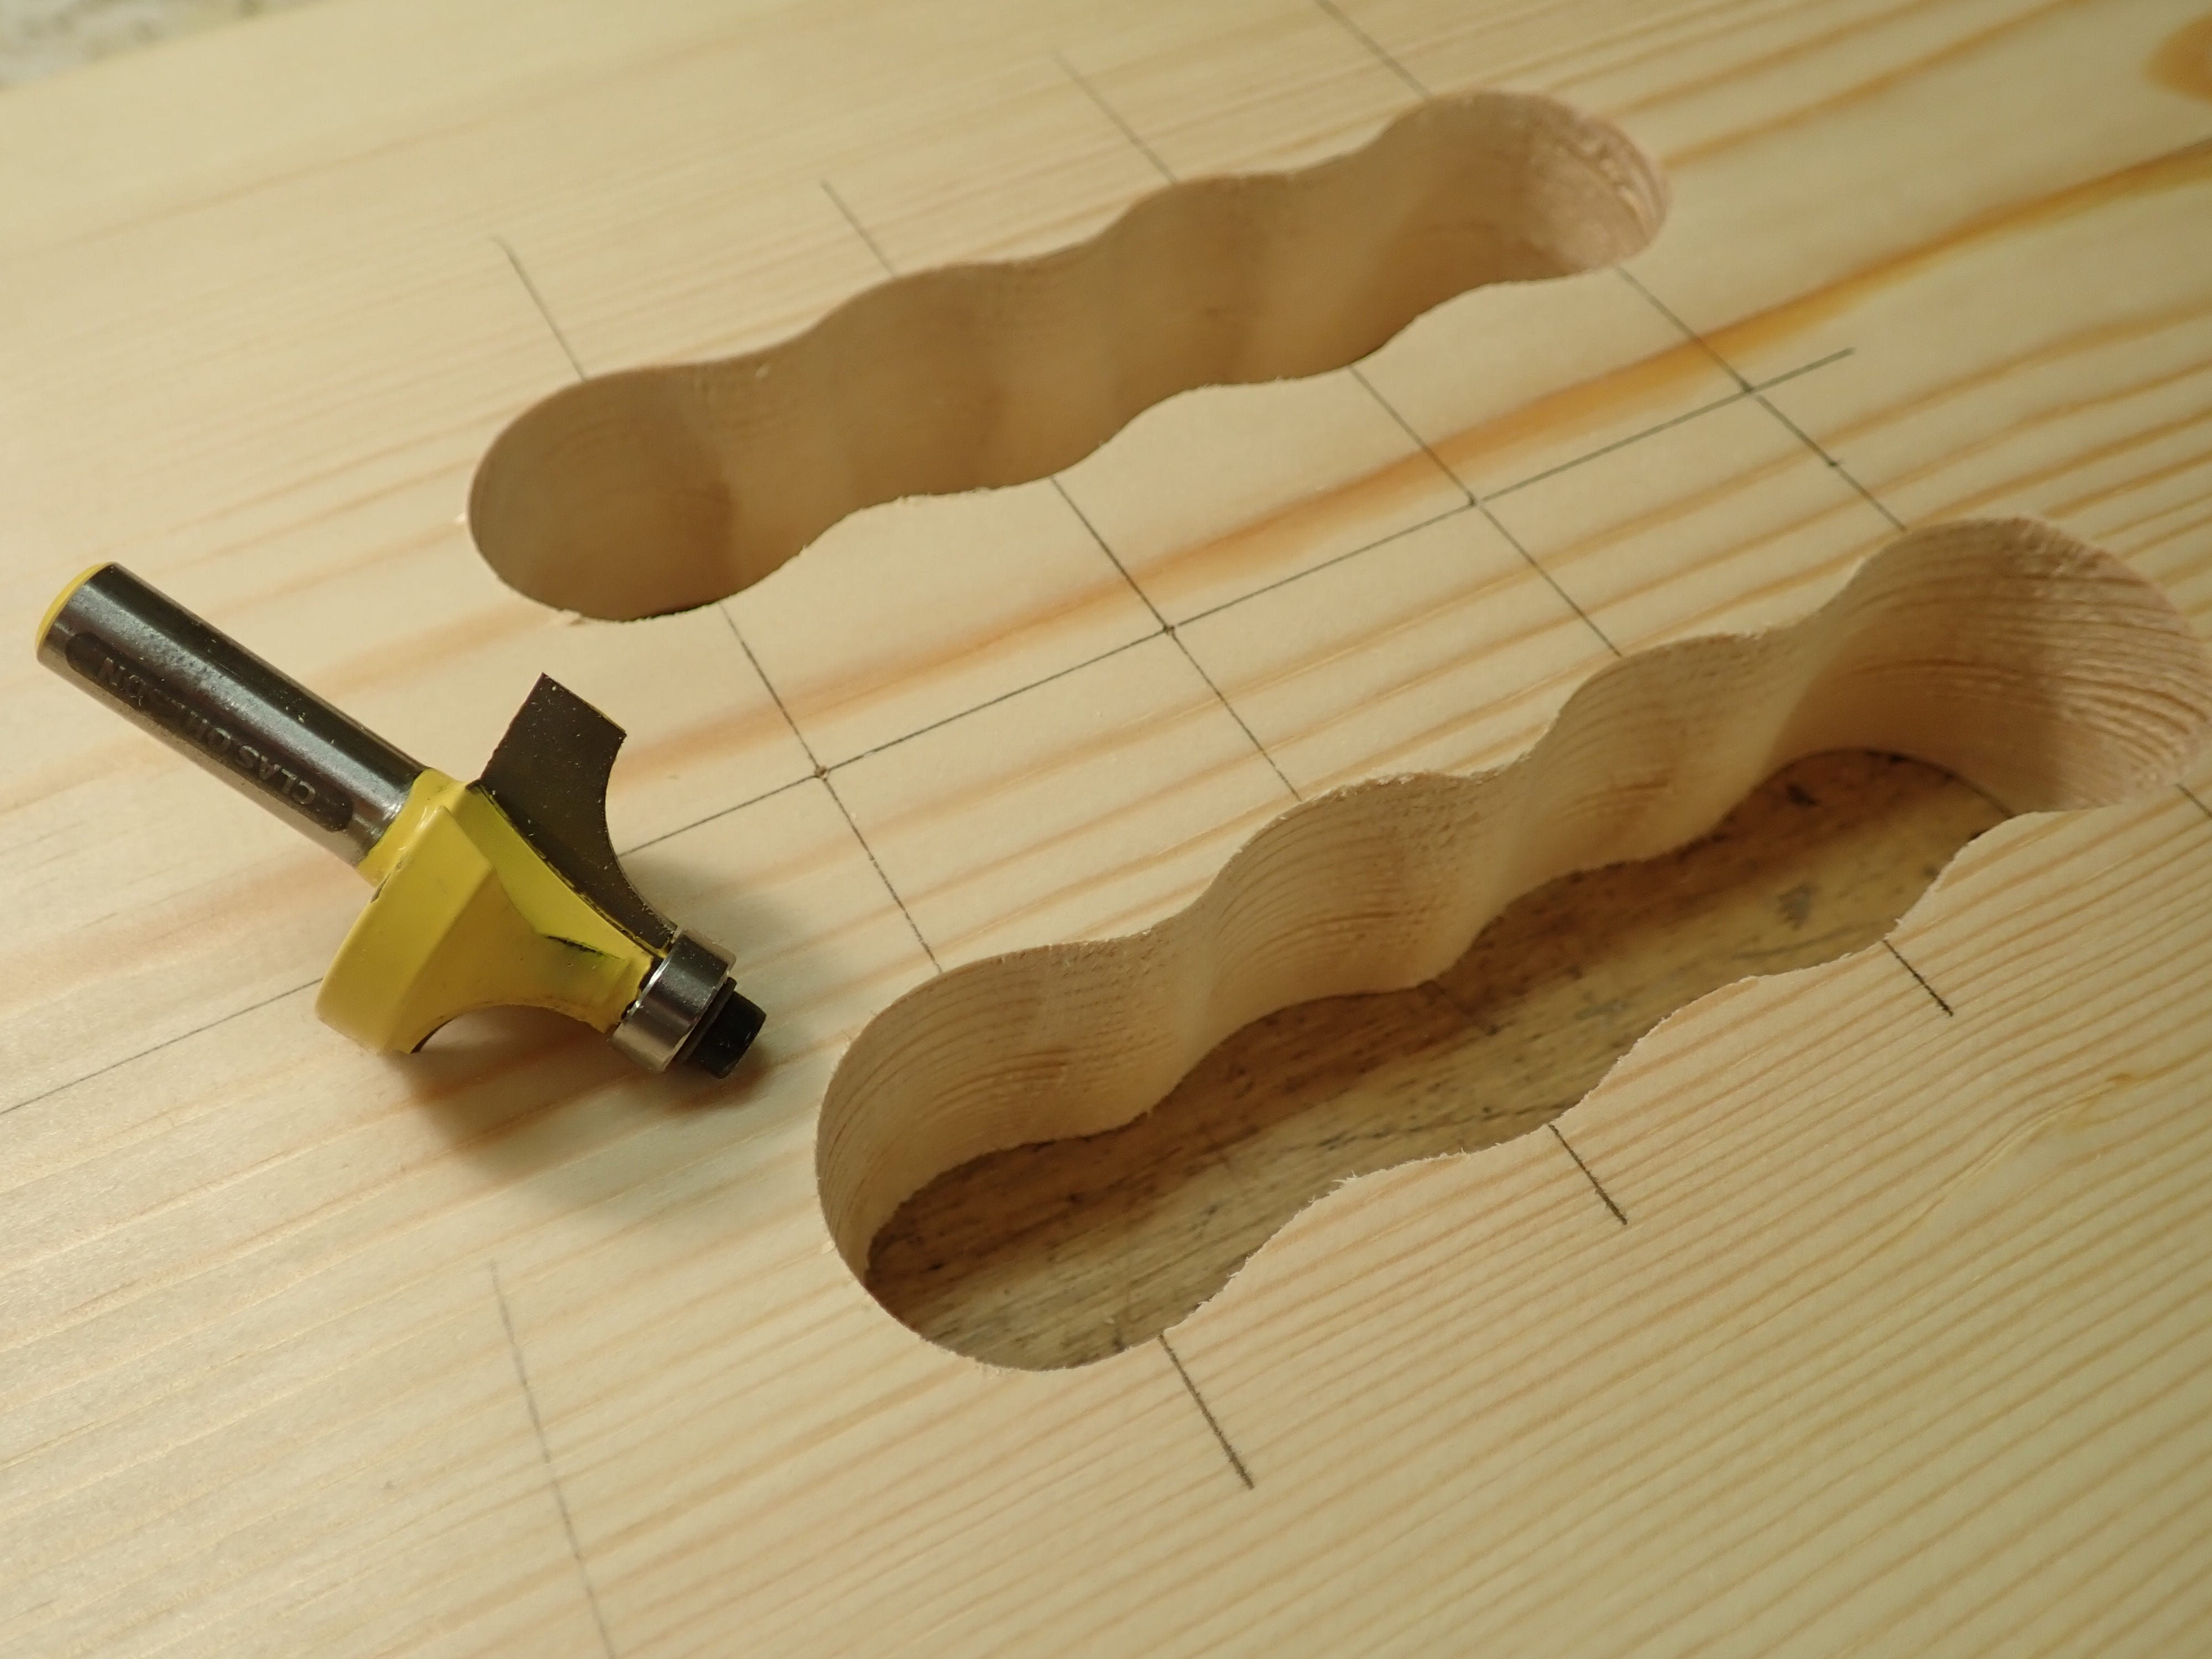
If your router leaves a burned surface, turn down the speed or hone your router bit — it’s easier than sanding afterwards.
After routing you can sand and smooth to your heart’s content.
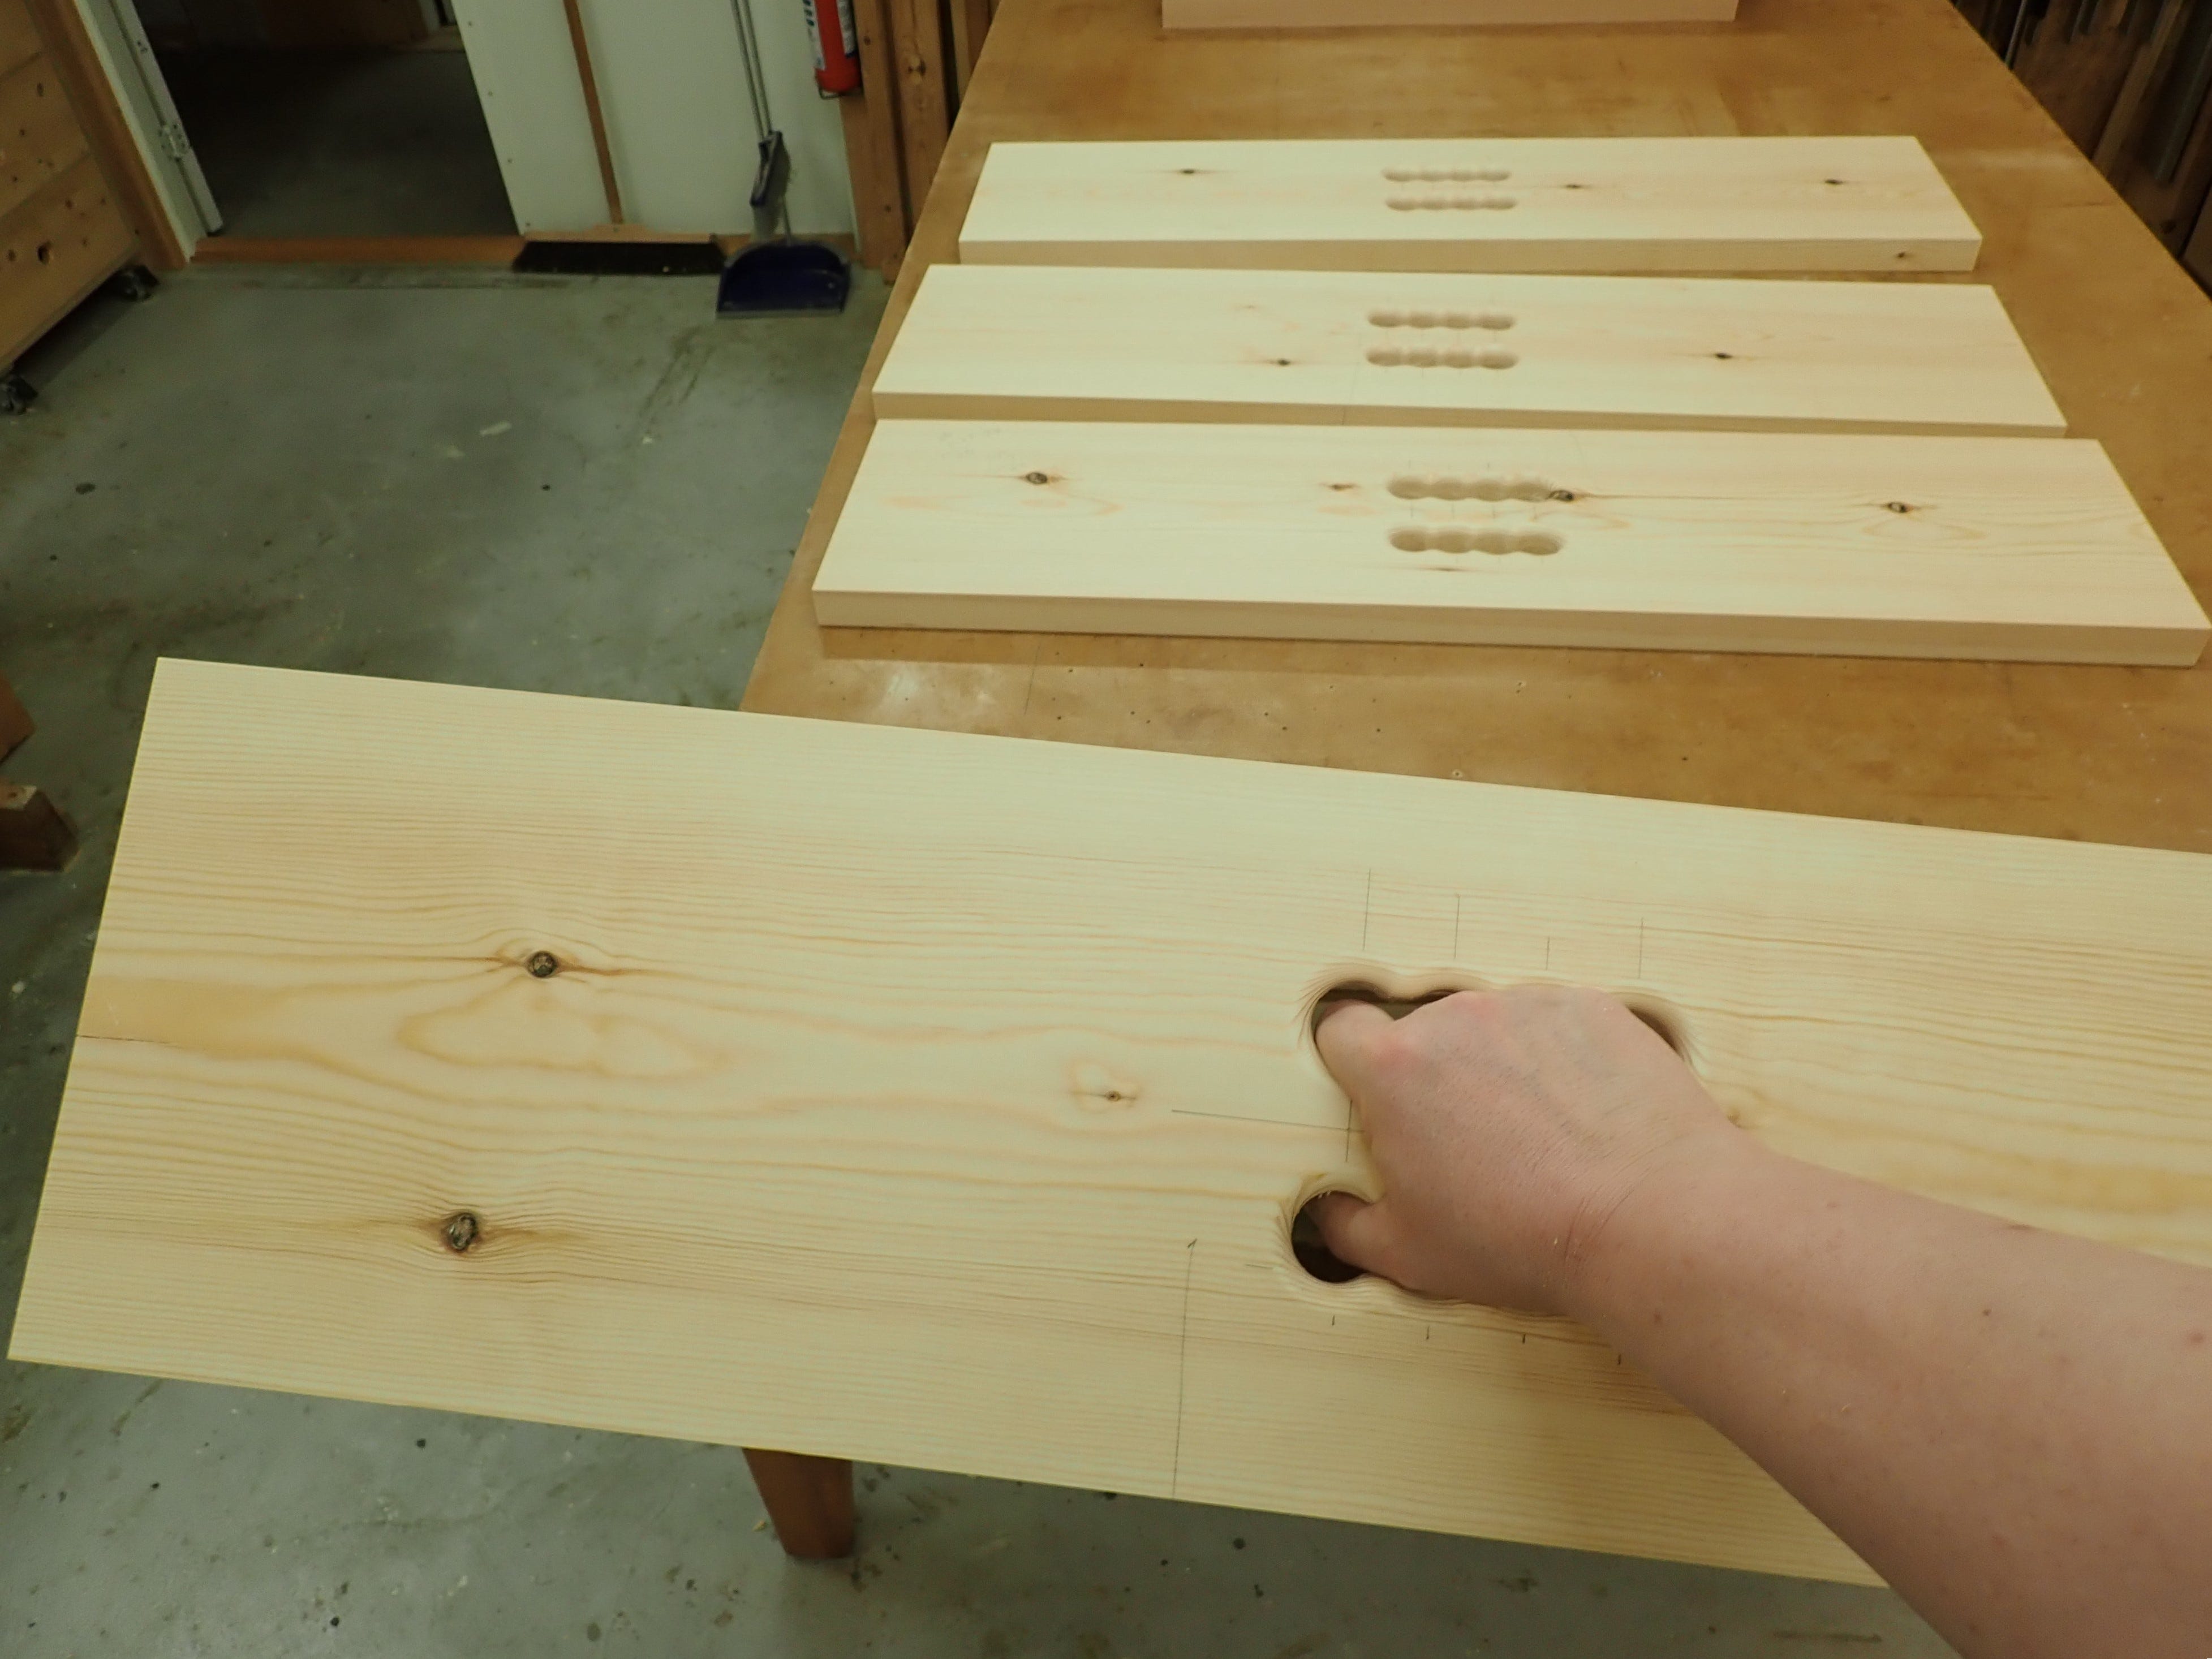
This handhold provides a good grip, but I honestly don’t like the way it looks. I find it too fussy, overly articulated … ‘blobby’ and visually unappealing. That’s what you get for neglecting the design process. Good thing it’s not an aesthetic object for sale, but just a functional set of trestles for the shop.
Oh, well … live and learn, eh?
***
'too fussy', yes, better if only the inner part of each slot had the finger grips. It looks to me as if knuckles would scrape on the outer indents.
That phrase from Archimedes might be my new favorite thing. Great write up! I’m excited to see how these saw benches turn out